Exporting Gif Animation
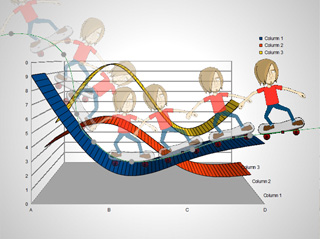
Not only can you quick capture still PNG files and paste them into external application software, but you can also directly import gif animations to give your documents a more attractive and unique look. You may also include multiple objects in a gif animation. Take Saul and his skateboard for example.
-
Create a simple document, in this case, the Microsoft PowerPoint
file.
-
Open Cartoon Animator and create your own unique animation.
-
Select every object that you want to quickly capture.
-
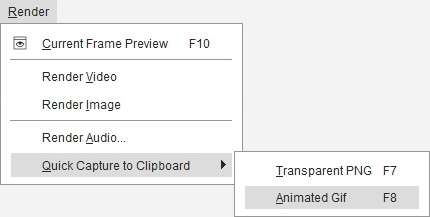
Execute Render >> Quick Capture to Clipboard
>> Animated Gif.
(Shortcut: Windows - F8; Mac - fn + F8)
-
Set the parameters in the panel and click the Export
 button at the bottom of this panel.
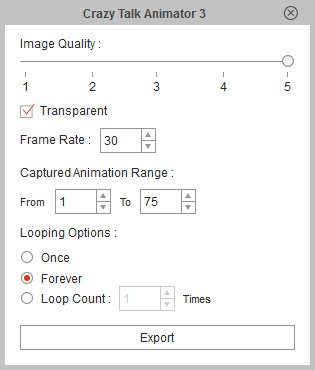
- Transparent: If you want to export a GIF Animation with alpha channel information, then activate this box.
- Looping Options: These three radio buttons determine the looping times of the GIF Animation.
- Switch to the target document of the external software.
- Paste the data (Ctrl + V) in the system clipboard to the document.
-
Transform the pasted object to fit suitably into your document.
 Note:
Note:-
Once you click the Export button,
the captured GIF Animation will be stored in the clipboard on a Windows computer,
and you can directly paste it to a target application, such as Microsoft PowerPoint.
- For a Mac user, after you click the Export, the captured GIF Animation will get saved on the Desktop. Instead of using copy-and-paste, you will need to drag the captured animation into a target application, such as Apple Keynote (version 6.2 or later for this feature), for correct animation results.
-
Once you click the Export
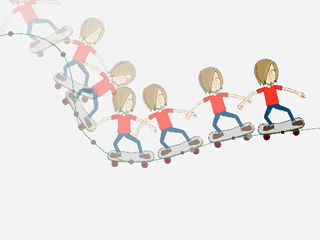
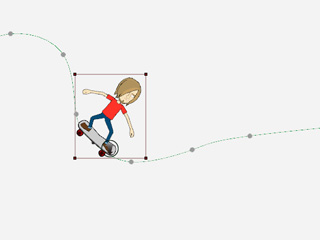
When you want to quick-export GIF animations, you are allowed to select single or multiple objects. Check out the following illustrations:
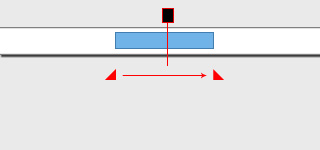
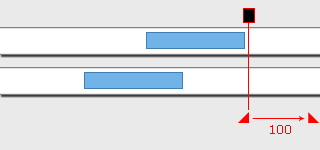
*Please note that the length is determined by the mark-in/mark-out flags that are auto-placed according to the Objects being Selected, the Motion or Animation Clips of them and the Play Head Position.
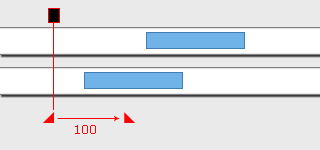
- Single object (with motion or animation) selected:

If no clip spans the play head, then 100 frames starting from the play head will be exported.
If a clip spans the play head, then the export range automatically changes to the same length as the clip.

If no clip spans the play head, then 100 frames starting from the current frame will be exported.
- Multiple objects (with motion or animation) selected:
If no clips span the play head, then 100 frames starting from the current frame will be exported.
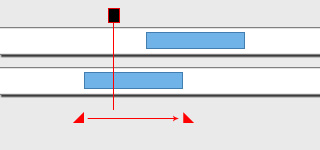
If only one clip spans the play head, then the export range automatically changes to the same length as the clip.
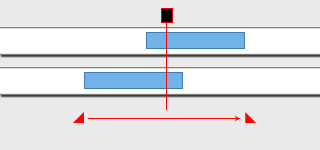
If multiple clips span the play head, then the export range automatically changes to accommodate the length of both clips combined.
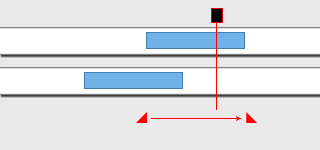
If only one clip spans the play head, then the export range automatically changes to the same length as that clip.
If no clips span the play head, then 100 frames starting from the current frame will be exported.
- Please note that the quick-export range is automatically determined, however you are able to drag the mark-in/mark-out flags to manually change the length.
The smoothness of the captured animation is defined by Frame Rate, and the default setting is 15fps. As an example, a 4 second 15fps 500x700 Animated GIF with higher render quality might produce a file around 1MB in size, so be aware of your frame-rate and resolution settings in order to maintain a balance of optimized performance, visual quality, and data size for your application.
The captured GIF Animation result is exactly the same as the current object display size (pixel) in Cartoon Animator in order to speed up the capture process. This being the case, you can scale up/down the desired objects on the screen in order to get a higher or lower resolution for your animated GIF. For example, if you are working with a high-resolution display mode (something like a MacBook Pro 15” model has a 2880x1800 retina display), you will get a very high GIF resolution output when using the capture feature.
If you wish to define an absolute output size, please export to media formats instead.
If you choose to render a transparent animated GIF file with alpha channel information,
when exporting the animation data, Cartoon Animator will use the project background color for calculation of edge anti-aliasing.
Therefore, make sure the project background color matches your target background to get the best edge quality.
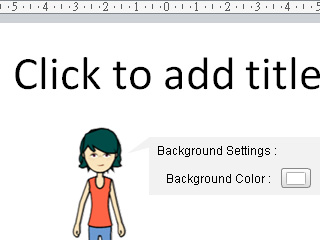
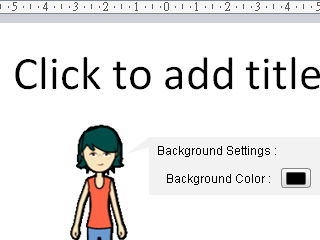
Before capturing your animation clip, click the Project Settings button on the play bar to
select a suitable Background Color in order to export an animated GIF that will best adapt to your background color.
The background color of the project is white by default, and it may not fit in well with various situations. For example, a white background color will produce great results on a document with a white background, but may produce some artifacts along the edge of a black document, and vice versa.
|
|
|
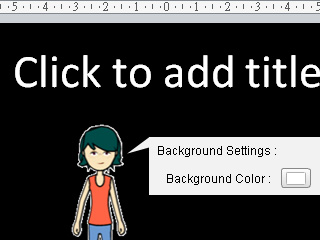
A white Background Color works fine on a white background document, but it may present an unwanted white outline on a black one. |
|
|
|
|
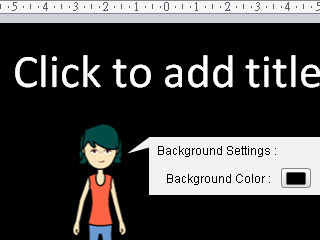
A black Background Color fits well on a document with a black background, but it may produce a thicker edge on a document with white background. |
|