The Key-frame Motion is the traditional method to create motions for a character. You need to set different keys in different time frames. The interpolation between two keys, which is also called "transition", will also be auto-produced. It is time consuming and the animation may need to be fine-tuned, repeatedly.

 button.
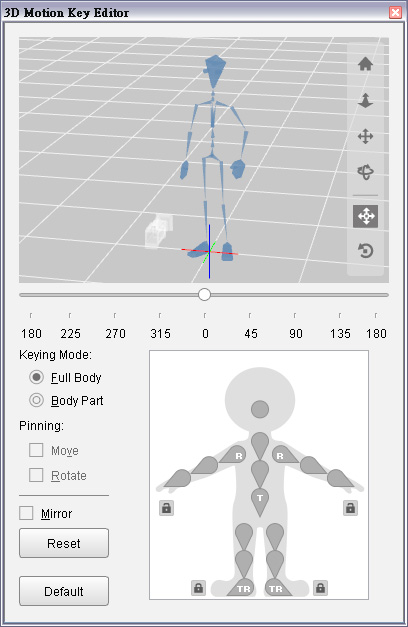

|

|

|

|
|
Set a 3D motion key to the character. |
The 3D motion key in the timeline track. |

When you are familiar with the usage of setting one 3D motion layer key in a certain time frame, you can go to another time frame to set more keys, which can produce so-called key-frame motions. The transition between two keys will be auto-generated.

|
|


|

|
|
Setting another motion layer key. |
The motion layer key generated in the tracks. (Transition is auto-generated as well) |

|
|
|
Key-frame animation is auto-generated. |
|

|
|
|
The Ease In curve is applied. |
|
|
Note: |
|
Please do remember that key-frame motions shall NEVER be created by mix-using the 2D and 3D keys because the results can be unexpected. You must use the 2D-2D or 3D-3D keys to build up key-frame motions. |