Make sure the performer has worn the Perception Neuron correctly.
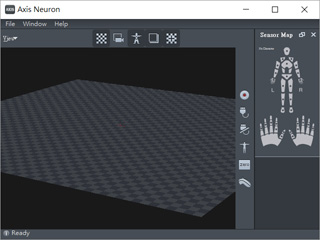
Start the Axis Neuron standalone
application. You can
download and install the application from the Noitom
(the manufacture of Perception Neuron) Official
Web Site.
Click the Connect button.
You will see the panel as shown below, click the Connect button to connect the Perception Neuron (the device)
to Axis Neuron (the application):
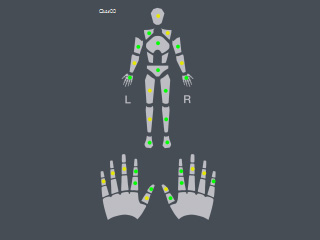
Make sure the lights on the right side of the application are activated in green, yellow
or at least red. If any
of the lights is in grey, then check the device to make sure it is worn
correctly.
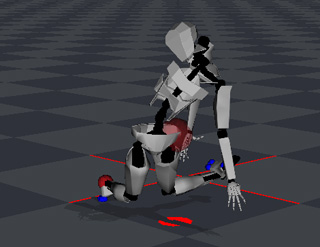
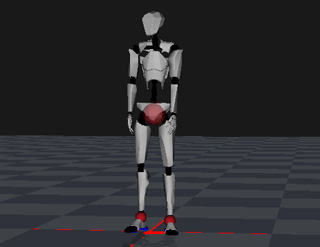
You will see the dummy in the Preview window not
constructed correctly.
Before Axis Neuron receives correct data from the
Perception Neuron, you need to click the Calibration button to start the calibration procedure.
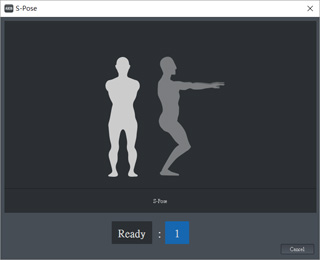
Axis Neuron will direct you to do four poses for calibration.
Click the Next button to start to calibrate.
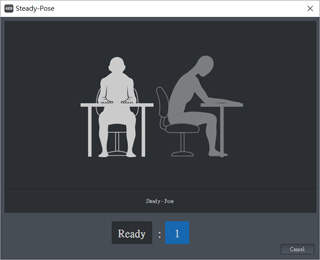
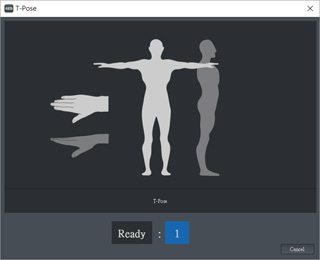
Have the performer hold the poses on the screen for each phase of the
calibration and wait until Axis Neuron finishes the
countdowns.
Now the dummy in the Preview window stands up and your motions can be correctly received from the
Axis Neuron.
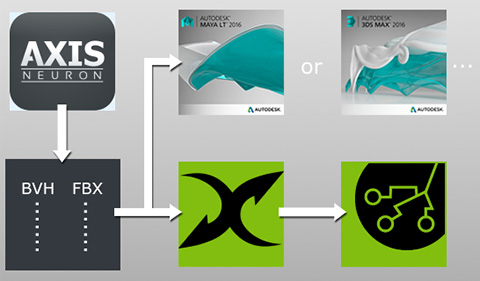
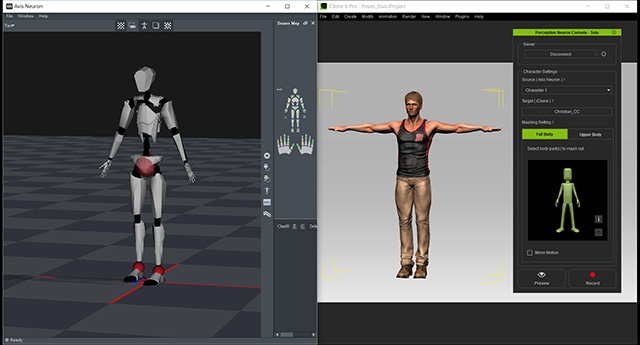
Step 2. Previewing with iClone Virtual Character
By using the Perception Neuron Console plug-in, you can use
iClone as a preview application for rehearsing the motions
shown in Axis Neuron.
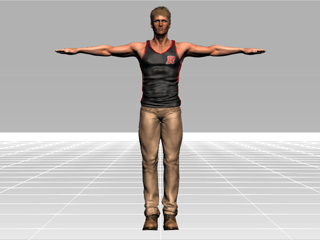
Apply and select a character in iClone.
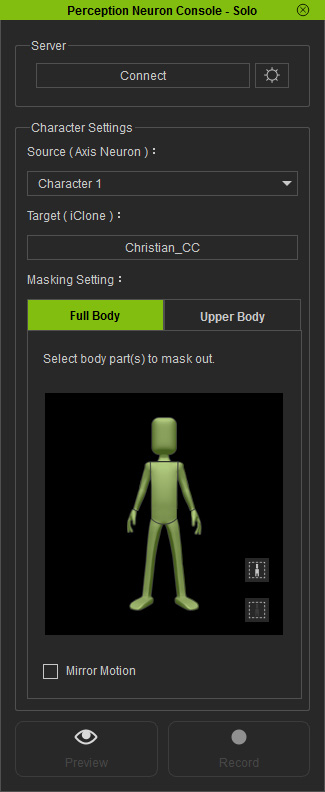
Execute the command Plugins >> Perception Neuron >>
Perception Neuron Solo
to open the Perception Neuron Console panel.
Click the Connect button so that iClone connects
to the plug-in and starts receiving motion data from it.
Make sure Axis Neuron and iClone are
shown side by side.
Click the Preview button
on the Perception Neuron Console panel in
iClone, and press the Space Bar to
start to preview (Shortcut: Space bar).
Step 3. Recording Motion RAW Data and Export
Motion Files in Axis Neuron
After the settings you have made in Step 1 and 2, you are free to record raw motion data in Axis Neuron without time limitation. You can even record several motion data according to the look and style of
your virtual character and then choose the best result for exporting.
You can then use the exported motion files in BVH or FBX format with any campatible 3D tools, or convert them into iMotion for iClone characters through iClone 3DXchange.
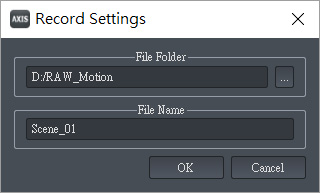
Click the Record button in Axis Neuron.
You will be asked to give a target folder and the name of the raw motion data.
Click the OK button to start recording.
Use iClone as a preview window and perform the desired motions.
Click the Record button again to stop recording.
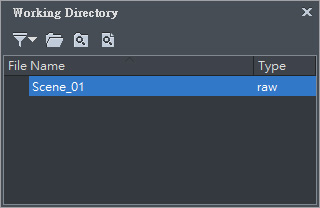
You will get a raw motion data in the Working Directory panel of Axis Neuron.
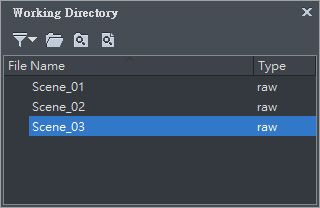
Repeat the steps several times to acquire more motion data if you want to.
Double-click on one of the files and then playback to view the results.
Select the best one in the list (in this case, Scene_03).
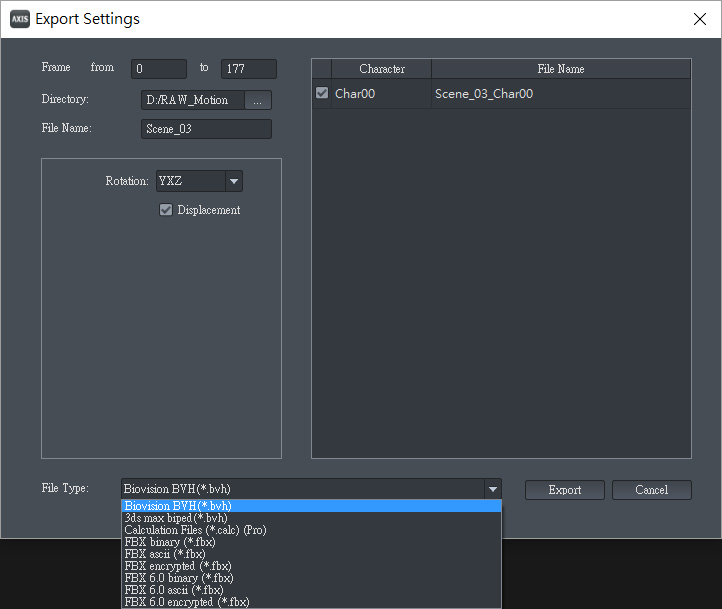
Execute the File >> Export command and select the
motion file type
(BVH or FBX) you want.
Click the Export button to export the raw motion data as a motion file for
further use in other 3D tools, or convert with 3DXchange
into a iMotion file for the characters in iClone.
 button.
You will see the panel as shown below, click the Connect button to connect the Perception Neuron (the device)
to Axis Neuron (the application):
button.
You will see the panel as shown below, click the Connect button to connect the Perception Neuron (the device)
to Axis Neuron (the application):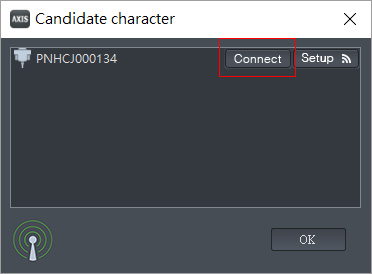
 button to start the calibration procedure.
Axis Neuron will direct you to do four poses for calibration.
button to start the calibration procedure.
Axis Neuron will direct you to do four poses for calibration.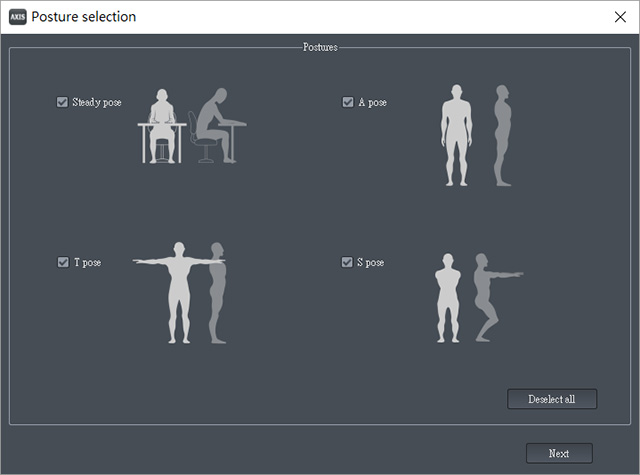

 button so that iClone connects
to the plug-in and starts receiving motion data from it.
button so that iClone connects
to the plug-in and starts receiving motion data from it.
 button
on the Perception Neuron Console panel in
iClone, and press the Space Bar to
start to preview (Shortcut: Space bar).
button
on the Perception Neuron Console panel in
iClone, and press the Space Bar to
start to preview (Shortcut: Space bar).
 button in Axis Neuron.