Warping the Background with the Mesh Emitter
In addition to using the embedded billboard-based Distortion Emitter to create a warping effect, you can also use the Mesh Emitter to emit solid meshes with refraction to create a sense of realism.
- Create a scene (in this case, a rain forest).

- Access the Set Template >> Particle >> PopcornFX Super Tools folder in the Content Manager, apply the Mesh Emitter template to the scene.

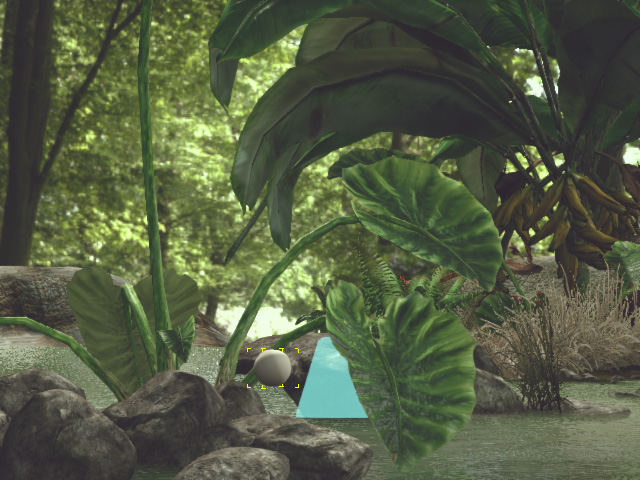
- Playback or simulate (Shift + S) to view the default result of distortion effect. The particles are emitted upwards
and fall according to gravity.

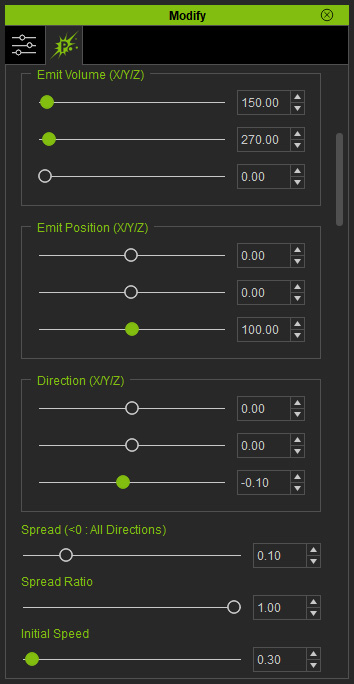
- Select the particle gizmo and switch to the PopcornFX tab in the Modify Panel.
- In the Emitter Settings section, adjust the Volume, Position, Direction and Initial Speed to make the particles slowly fall off beyond the top of the view port.
View the results below:
- Stop the simulate. Create a sphere and adjust its size to a rain drop.
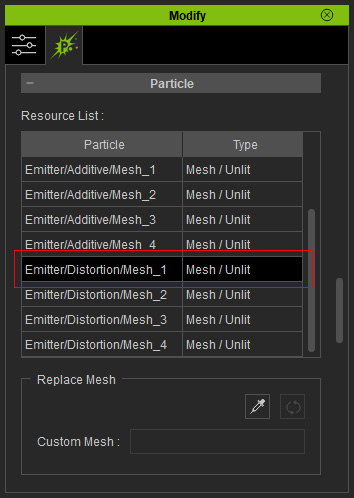
- Select the Mesh Emitter again and scroll to the Particle section in the Modify panel >> PopcornFX tab.
- Pick the Emitter/Distortion/Mesh_1 item in the Resource List.
- Click the Pick Target button and select the sphere as t he shape of the Emitter/Distortion/Mesh_1.
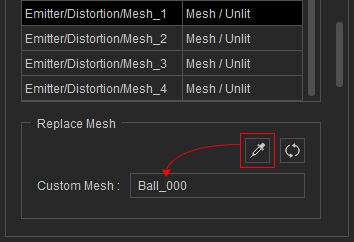
- Repeat the same steps for the Emitter/Distortion/Mesh_2, Emitter/Distortion/Mesh_3, and Emitter/Distortion/Mesh_4.
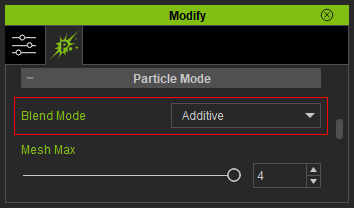
* You may also delete the sphere after this step. - Scroll to the Particle Mode section and change the Blend Mode to Additive because the mesh particle entities are not to be used and will be set to completely opaque later on.
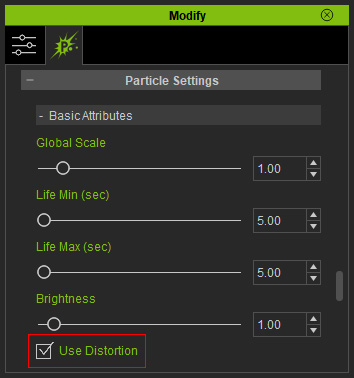
- Scroll to the Particle Settings section >> Basic Attributes sub-section and activate the Use Distortion to use the spheres picked in the previous steps to warp the background.
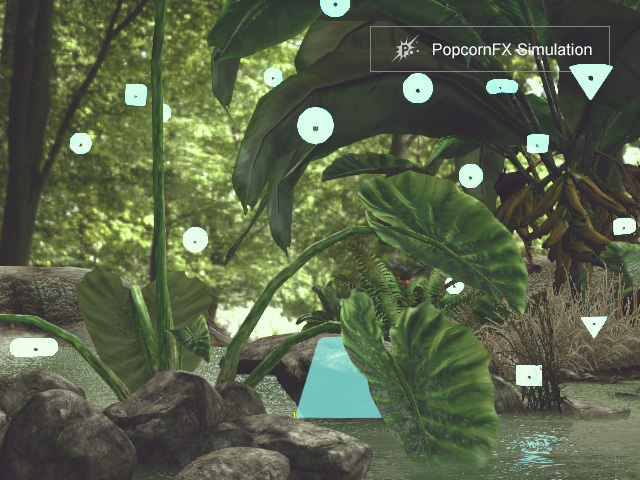
- Simulate (Shift + S). You will see a little transparent balls in (Use Distortion) the center of all the mesh particles (in Additive mode). These balls are spheres that will be used to warp the background.
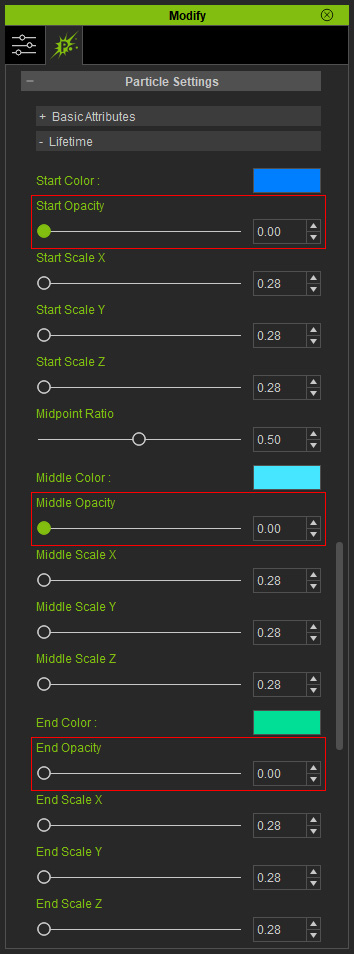
- In the Lifetime sub-section, set the Start Opacity, Middle Opacity and End Opacity to zero to hide the mesh particles.
Simulate to view the result. You may notice that the spheres are too small to be seen.
- Adjust the Start Scal X, Y, Z, Middle Scale X, Y, Z and End Scale X, Y, Z to increase the size of each particle, including the hidden entities.
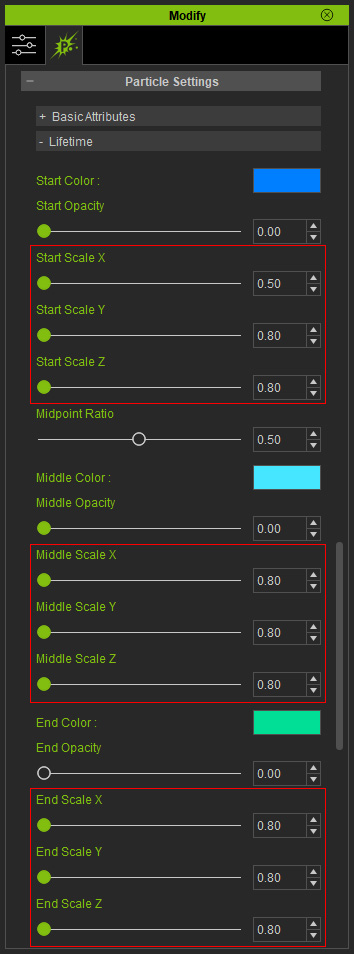
Simulate or playback to view the distortion effect.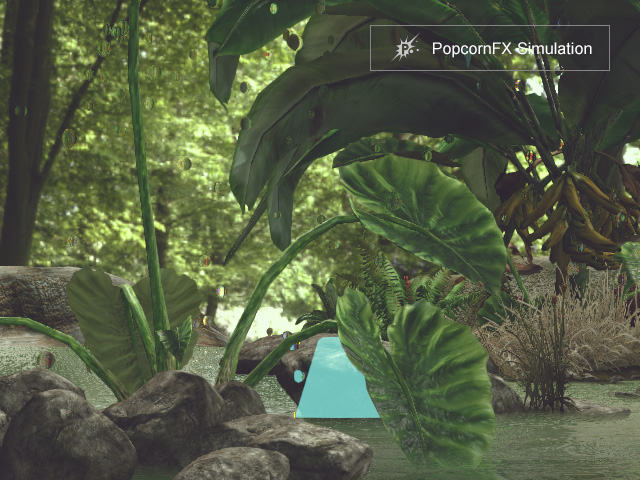
- Finally, adjust the Force to make
the particles move in a desired speed.