Although there are plenty of human motions embedded in iClone, you may sometimes need to apply
motions from other 3D motion generators. To do this, you first need to convert the motions via 3DXchange
before using them in iClone. After the conversion, the motions can be applied to every
standard or non-standard human character in iClone.
Supported File Format
.BVH
.FBX (with human motions)
Step 1: Preparing Motions and Entering Characterization Mode
Press Ctrl + N to open a new project.
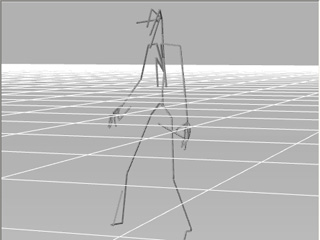
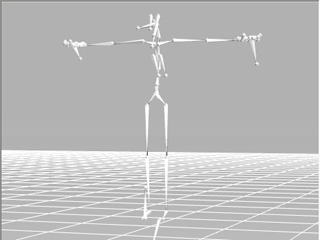
Load a character motion file in the formats described above by drag-and-dropping the file directly into the 3D viewer. If the file contains no character mesh, then
3DXchange will apply a stick character for observation.
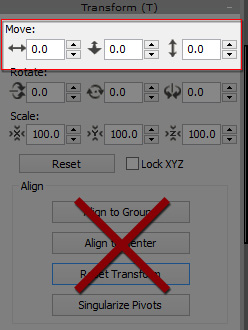
Adjust the X, Y, Z values in the Transform section so that the
motion will be relocated to the center of the world. Please not that you Must Not use the Align to Ground,
Align to Center or Reset Transform button to change the position of the motion.
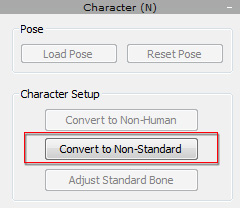
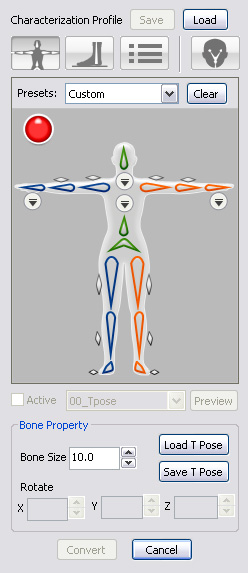
Go to the Character section of the Modify panel.
Click the Convert to Non-Standard button to enter the
Characterization mode.
The Modify page will instantly change to characterization mode.
Step 2: Setting a T-Pose
Because all iClone motions (*.iMotion) are based on a T-Pose, then you must
adjust the motion's pose to a T-Pose so that you will not encounter any offset issues in
the body parts once you apply these motions.
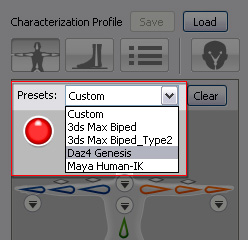
Motions from Standard Bone-rigging 3D Tools
If you know the 3D source tools from where you get your motions, then you
only need to select a prepared profile with a completed T-pose for the motion.
Please refer to the
Auto Setting T-Pose section for more information.
Motions from Custom Bone-rigging 3D Tools
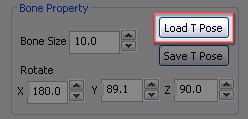
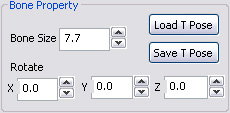
If the motion does not start with a T Pose, then you need to
manually adjust the angle of
each bone by using the controls in the Bone Property section. For more information about
setting a T-pose, please refer to the
Manually Setting T-Pose section.
Step 3: Mapping Motion Bones to Reallusion Human Bones
Converting a custom motion to an iMotion in 3DXchange is actually
mapping the custom bones to the standard bones so that when the motion is
applied, the character is triggered to act by the standard bones to which
the motion is actually applied.
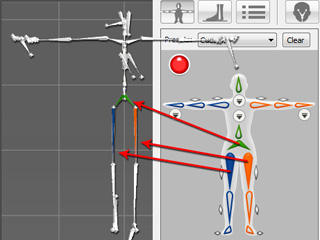
In the Bone Mapping tab, manually map at least 15 basic bones of the Standard Character Bones to the corresponding bones
of the loaded motion.
(The dummy image of the bone structure on the right side of the application is the RL Bone - Reallusion Bone Structure).
Please refer to the
The Concept of Converting to Non-Standard Human Character and the
Custom Bone-Mapping Method sections for more information.
Note:
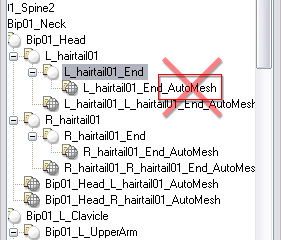
When you load a motion file which only contains bone relation without mesh data;
in order to show the character structure, 3DXchange adds in
mesh nodes with a suffix name _AutoMesh as visual dummies to
represent the character.
Please note that you must always map the bones instead of the mesh nodes with suffix name _AutoMesh
to prevent incorrect mapping results.
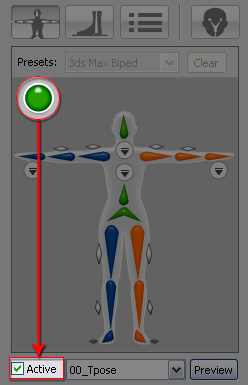
Step 4: Fine-Tuning Motions
After finishing with the mapping, enable the Active checkbox so that the
motion bone structure is governed under the
RL Bone.
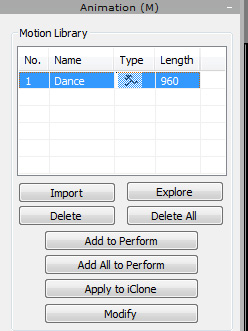
Click the Convert button to exit the Convert to Non-Standard mode.
Go to the Animation section, select the motion in the Motion Library section.
Click the Apply to iClone button to apply the selected motion and preview the
motion results.
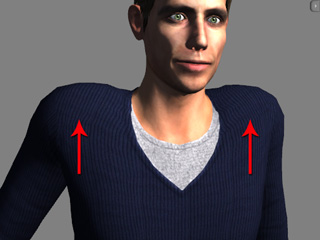
If the character shows some motion flaws, such as shrugged shoulders, then you need to adjust the T-pose in 3DXchange.
The motion shrugs the character's shoulders in iClone.
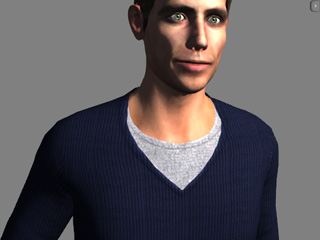
Rotate the collar bones to align to the motion.
The shoulders are rectified.
Repeat the steps until the motion results appear to be correct.
Step 5: Saving Characterization Profile and Export