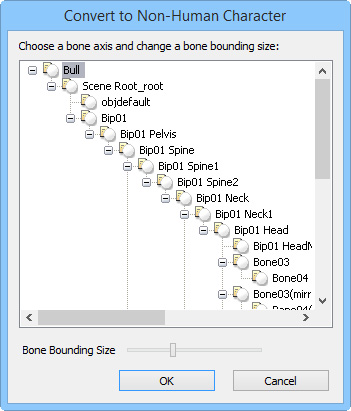
Setting Bones for Converting to Non-Human Character
When you click the Convert to Non-Human Character button in the Character Section, you will see the
dialog box shown below:
Bone Axis
This setting decides the global direction of the bones. Therefore, it is crucial if you want to use IK correctly in iClone.
Click the bones one by one from parent nodes to child nodes.
Check the coordination of each node and find the color line that
goes along with the bone direction. (R = X, G = Y, B = Z)
In this case, the red line is the global direction of the bone structure.
Select the X, Y or Z radio button.
Bone Bounding Size (for iClone 4.2 or above only)
This feature helps you pick specific bones to modify the offset through IK or FK methods in iClone.
Select one of the bones in the tree view that has a very small bounding.
Drag the Bone Bounding Size to decide the size of the reaction range (yellow box) for picking the bone.
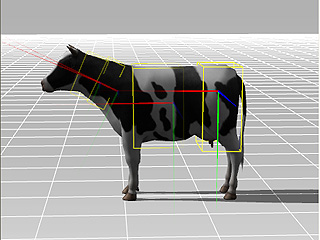
Convert the model to a character and load into iClone.
Go to Modify panel >> Animation tab and click the Edit Motion Layer button.
The bones of the character can now be easily picked in the preview window since the bounding
size has been increased.
Bone Building Rules for Converting to Non-Human Character:
The bone structure must follow the rules below in order to be converted into a non-human character,
and successfully modify its motion with the IK method.
Except the root node, all the translate and scale animations for
character bones will be ignored while the rotate animation is
kept.
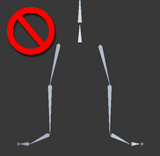
The bone pivots must be at the proper position. The illustration below shows the
improper position of the pivot.
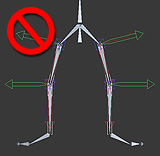
To attain correct results with IK method, the bone structure must be:
Connected and aligned under one same hierarchical structure
The bones must be non-mirrored in order to ensure that the direction