Adding VFX to CTA Animation with AE
You can improve the CTA animation result with tons of professional visual effects in Adobe After Effects.
We will show you how to add some of the most popular effects,
such as Motion Blur, Camera Animation, DOF, Lighting and Shadow, to CTA objects.
( Watch Tutorial - Enhance Your CTA Project in After Effects )
| Original animation in CTA project. | Additional visual effects in AE project. |
Please download the Cartoon Animator AE Script Learning Resource and open the AE project - AE Sample Project.aep inside the 2. AE Sample Project folder to start your experience in the following sections.

| Original animation. | With Motion Blur effect. |
After a CTA project is imported to After Effects,
the object Transform keys in Cartoon Animator can be found in the Position, Scale and Z Rotation properties of the object Transform track under the Scene composition.

Click the box under the Motion Blur column to activate the effect to the character motions,
and then play back to the view the Motion Blur effect.

After a CTA project is imported to After Effects,
the Camera keys in Cartoon Animator can be found in the Transform layer properties of the CTACamera track under the Scene composition.

You can press the hotkey C to invoke the Unified Camera Tool to animate the camera.
- Drag with the left mouse button to rotate the camera.
- Drag with the right mouse button to zoom in or zoom off.
- Roll the mouse wheel to pan the camera.
After a CTA project is imported to After Effects, the layer relationships between objects can be brought in. Therefore, you can add DOF effect to the object layers.
| Cartoon Animator | After Effects |
-
Go to the CTACamera track and click to turn on the Depth of Field property under the Camera Options.

-
Put the cursor upon the Aperture option and move left or right to reduce or increase its values.
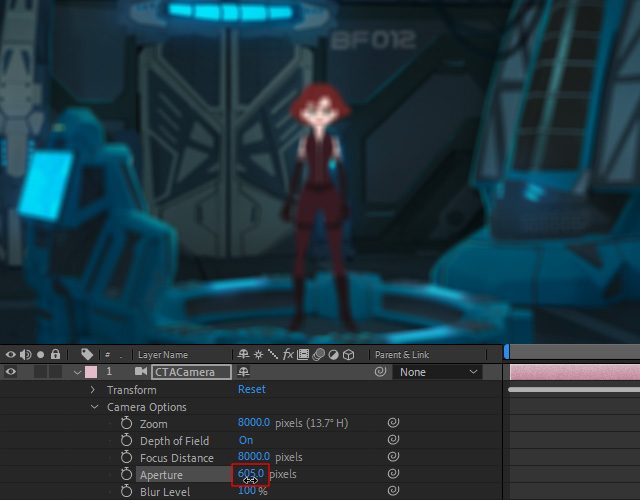
- Press the Ctrl key to select your target object and the CTACamera track in the meantime.
Then right-click on the CTACamera track and select the Camera >> Set Focus Distance to layer command to focus on your target object.
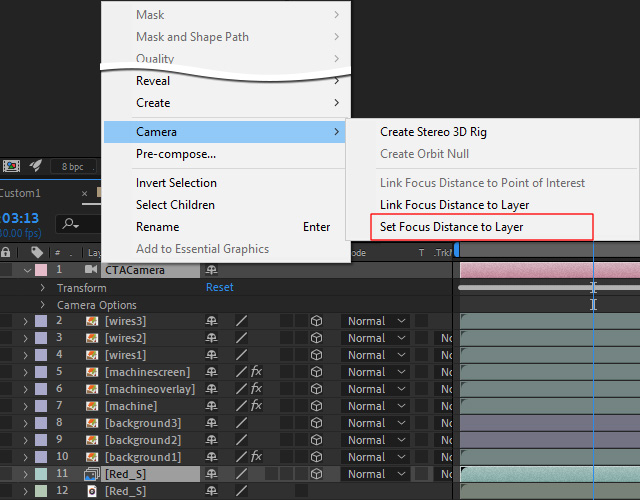
The DOF effect will make the camera focus on objects at different depth.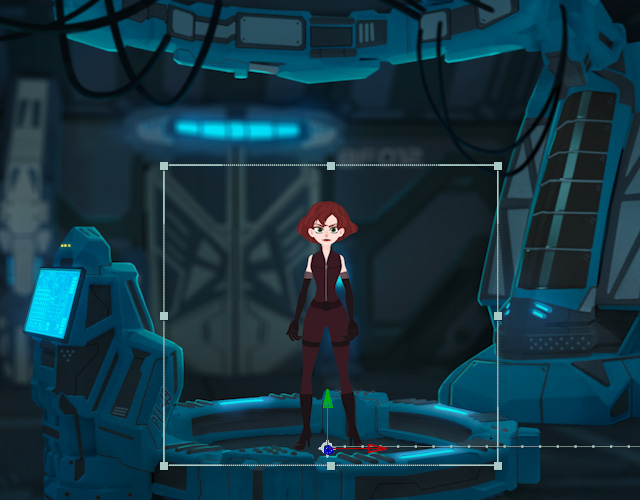
Sometimes, you may find that while the camera zooms in and out,
the target object becomes so blurry because the camera is out of focus.
In this situation, you can set the camera to re-caculate Focus Distance to the distance of the object automatically.
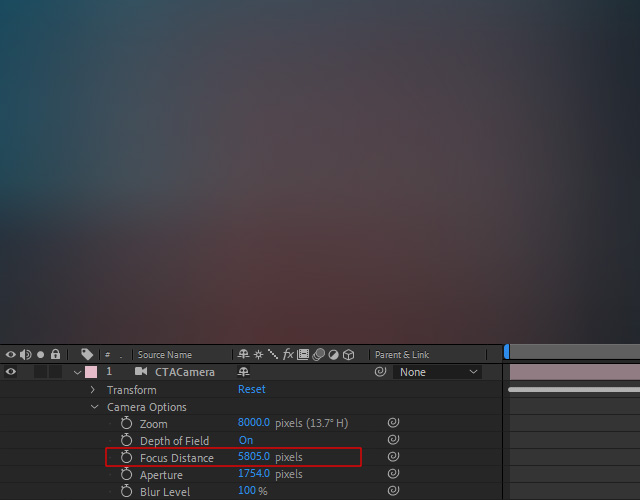
Press the Ctrl key to select your target object and the CTACamera track in the meantime.
Then right-click on the CTACamera track and select the Camera >> Link Focus Distance to layer command to link the camera's Focus Distance to the distance to the object layer's position.

The Focus Distance will then be adjusted automatically according to the linked target.

You can add lighting effects to the objects and create parallel, spot, point, or ambient lights on the scene.
-
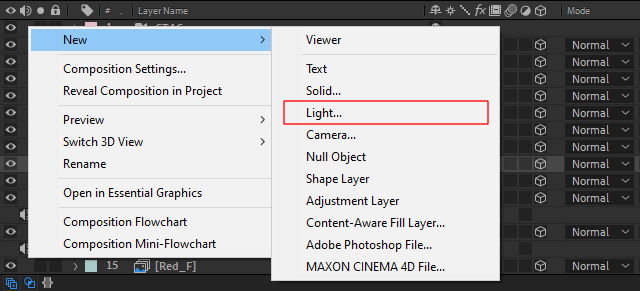
Right click on the empty space of the object tracks to add a light on the scene.
Select New and the Light... option on the context menu.
-
Choose the Point light from the Light Type drop-down list in the Light Settings panel.
Click OK.

-
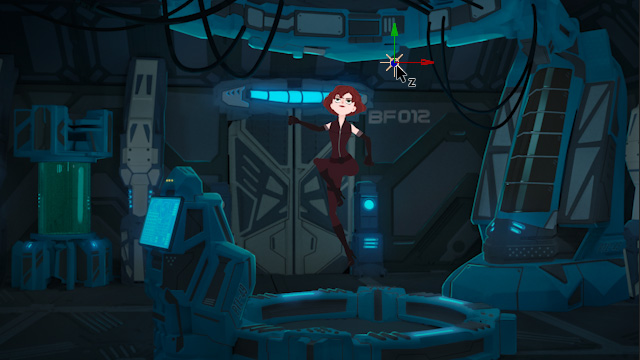
You will see the Gizmo of the created Point Light on the scene.
Move it closer to the object layers.
-
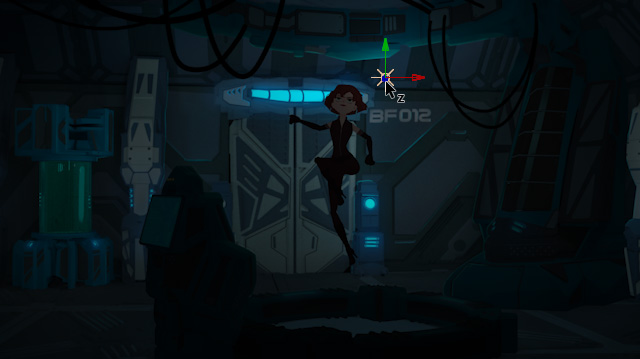
Drag the Z axis of the Gizmo handle to change the Z-depth of the light.
-
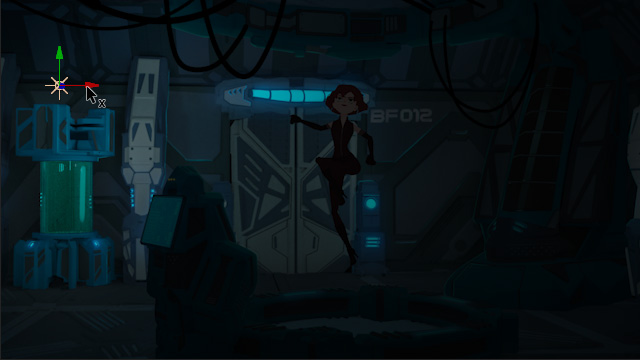
Drag the X axis of the Gizmo handle to change the horizontal position of the light.
-
Drag the Y axis of the Gizmo handle to change the vertical position of the light.
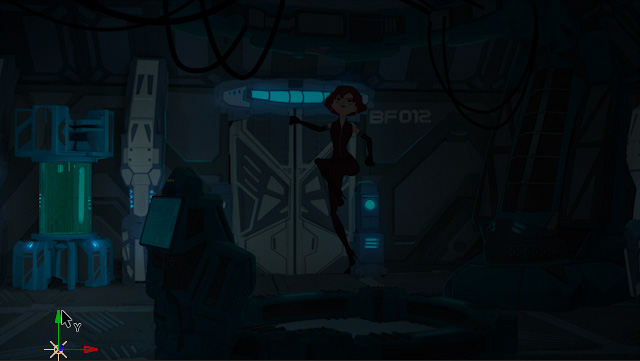
-
Drag the Z axis of the Gizmo handle to change the Z-depth of the light.
-
Select a target object which you want to add the Glow effect.
Double-click the Glow effect in the Effects & Presets panel.

-
Open the Effect Controls panel to show the applied effects of the selected object.
Adjust the glow radius, intensity, or threshold as you see fit.

-
If you are satisfied with the current settings,
you can copy this customized Glow effect.
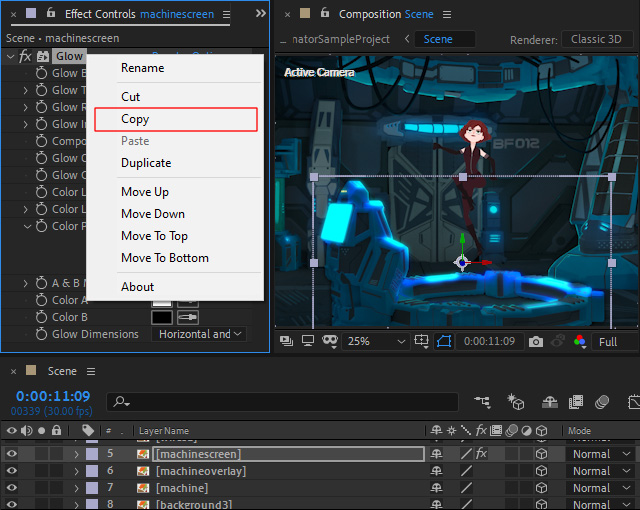
Then press Ctrl + V to paste the Glow effect settings to the Effect Controls panel of the other objects.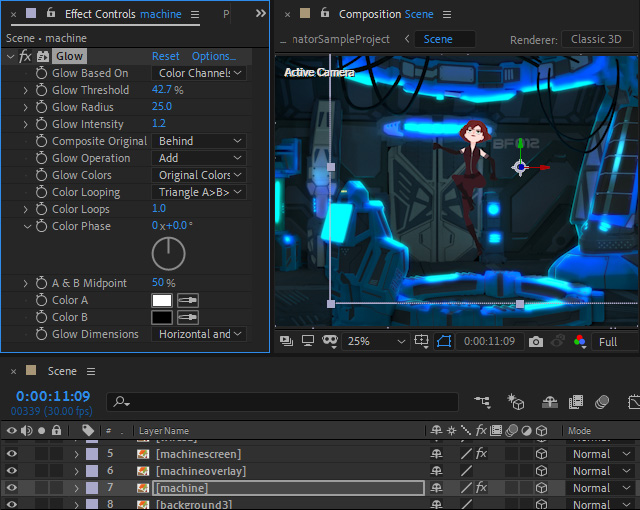
-
Go to the Effects & Presets panel,
and drag the CC Light Sweep effect to an object.
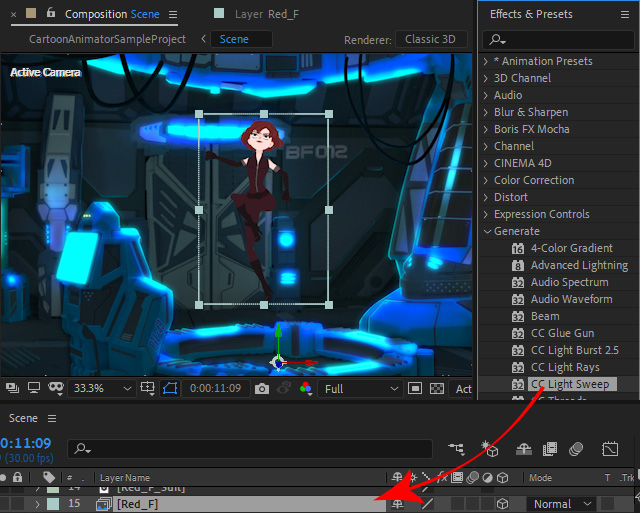
-
Drag the effect center to an ideal position on the object,
and adjust the light width.
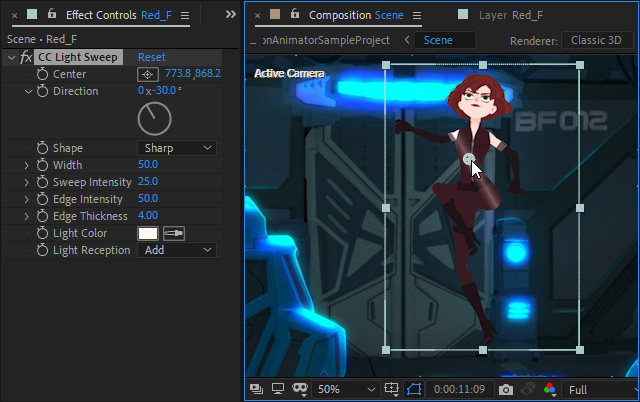
-
Click the dropper button to pick a desired light color,
and optionally adjust the edge intensity and edge thickness.
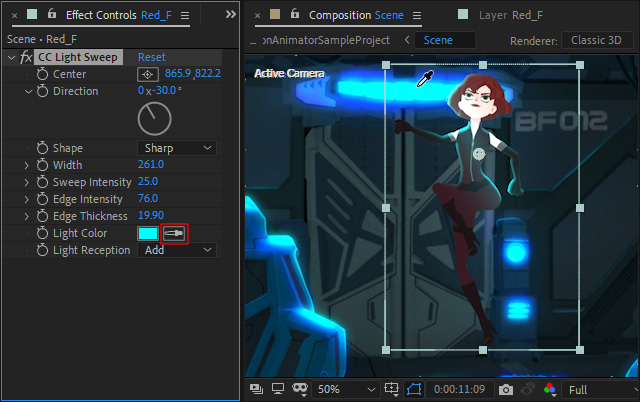
-
You can see the attached Light Sweep effect as the object moves.
You can add a Shadow effect in addition to the Lighting effects.
-
Select a target object which you want to a add the Shadow effect.
From the Effects & Presets panel,
drag the Radial Shadow effect to the Effect Controls panel of the selected object.

-
The Radial Shadow effect is then added to the object.
You may find the shadow effect is cut by the object bounding when the Projection Distance is increased.

-
Activate the Resize Layer option to extend the shadow beyond the layer's bounding.
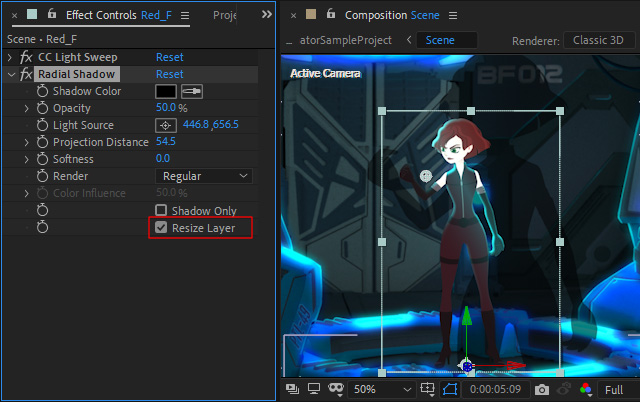
-
You can also adjust the shadow opacity and softness and observe the attached Shadow effect as the object moves.