Creating Different Fashion Styles with Grouping Rules
When you are aware of grouping rules and know how to add clothes to G3 characters, you are ready to build different fashion styles in one PSD files. You can follow the concept mentioned below to add more image layers for different body parts to fill out a character's wardrobe.
-
Apply a G3 character.

- Launch Bitmap Editor to open the image with the preset bitmap editor.
 Note:
Note:
- You will encounter the PSD Options panel. Please refer to the Exporting Ratio section for more information. In order to have a better resolution for the head and body, you can choose to export the head and body in different PSD files with larger scale values.
-
You will encounter a message informing you that the sprites will be converted to bitmap, even if they started out as vector.

- In the image editor, open the Hip group layer
containing only one image layer.
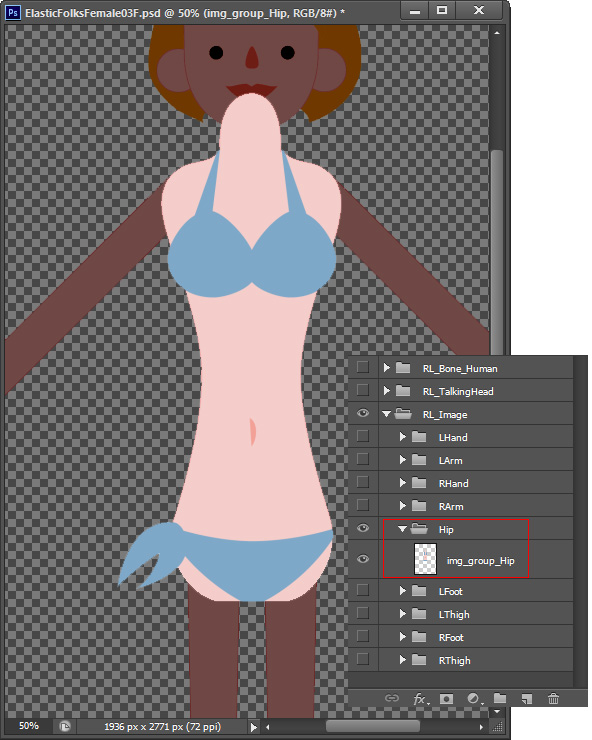
- Create a sub-group and put the original image layer
under it.

- Create another group layer and add one or more image layers under it to create a new
outfit.

- Create as many outfits as you like,
using the aforementioned steps.


- According to the
Grouping Rules,
change the group names as shown below. The character with the first cloth will be transferred back to Cartoon Animator while the other two will not.
- Save the file in the image editor.
- Switch back to Cartoon Animator, and you will see that the character is automatically updated with clothes grouped
under a folder with the "+" prefix.

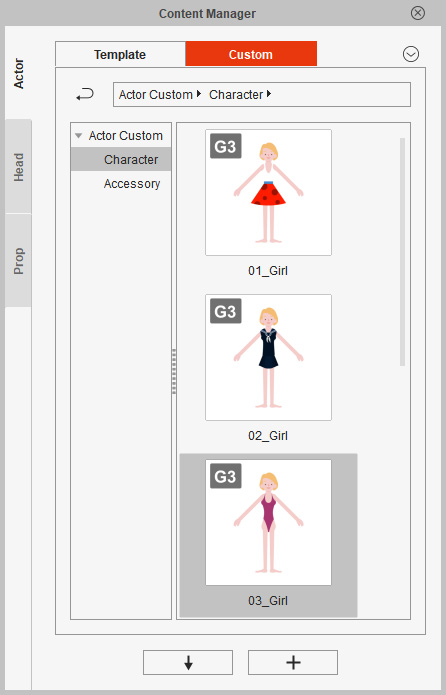
- Save this character to your custom library and name it.

- Change the prefixes of the names for the group layers again in the image editor and save the file.

In this case, the character's body layers are not ideal.
- You can directly change the layer style by dragging the group layers in the image editor to the correct order.

Save the file again, the layer order of the character in Cartoon Animator will be adjusted.
- Store the character into the Content Manager.

- Repeat the same steps (group name changing, layer re-ordering) for the final cloth. Go back to Cartoon Animator to
apply the character.

- Save this character into the Content Manager.
You can then generate an unlimited number of characters by the same process described above.