Arms Layer for Transferring Skin Weight
When you want to create custom clothing, the shape of the clothes will not always fit the T-pose which will be problematic for transferring skin weights.
Character Creator provides an arm layer to separate the arm weights from the rest of the body.
-
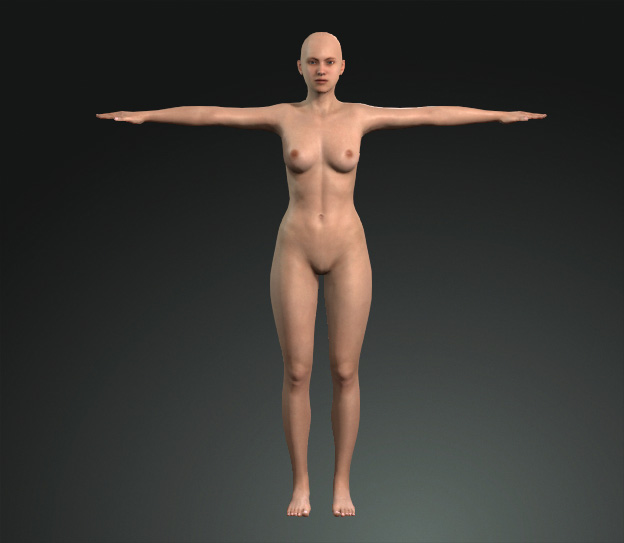
Create a new project.
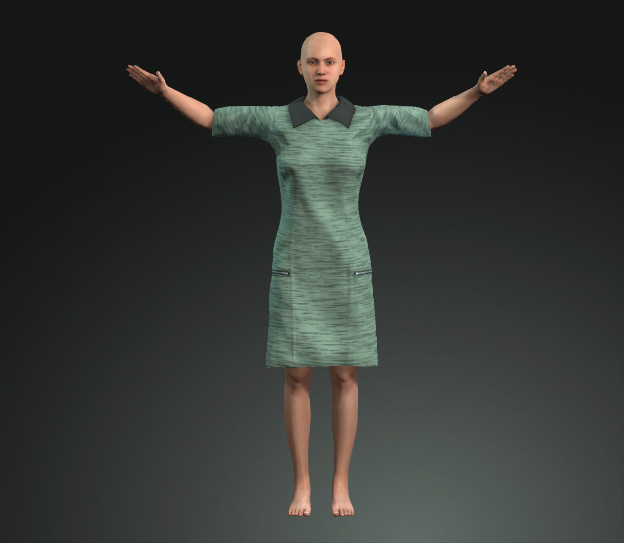
- Create an accessory with a custom model of a cloth.
- Adjust the character's pose to fit into the cloth as possible.
-
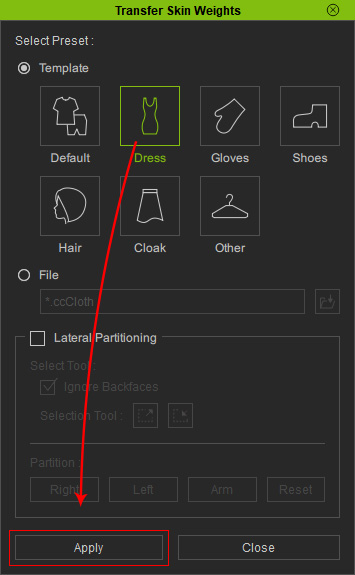
Proceeding with the Transfer Skin Weights
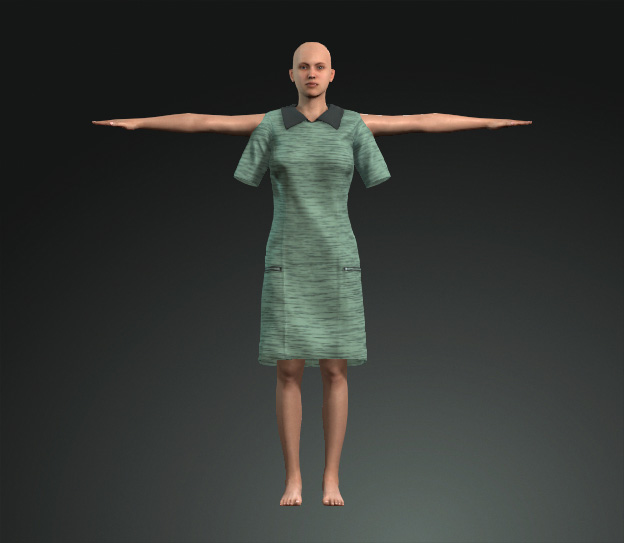
tool, use the Dress preset to apply the skin weights onto the dress.
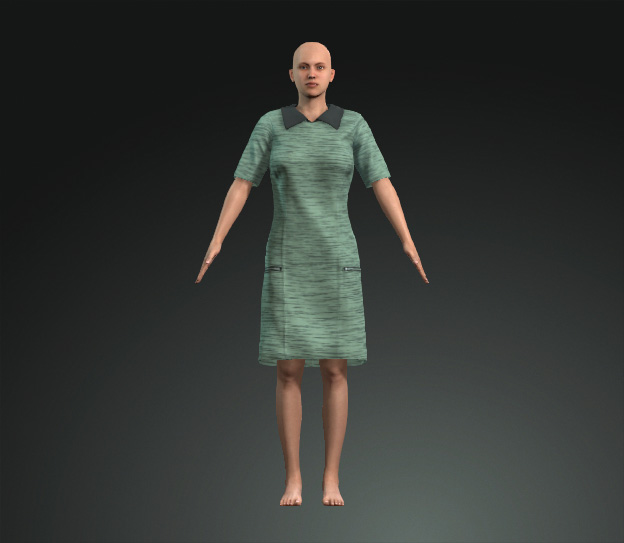
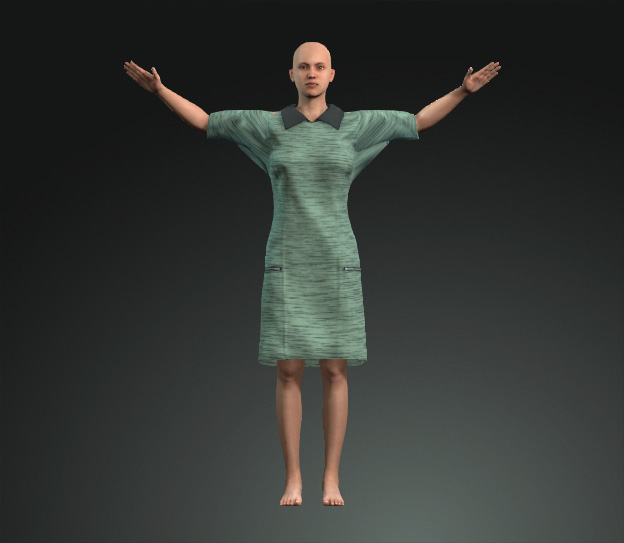
- Pose the character, you will instantly see the mesh stretching.
- Reset the character to the bind pose, select the dress and open the Transfer Skin Weights panel again.
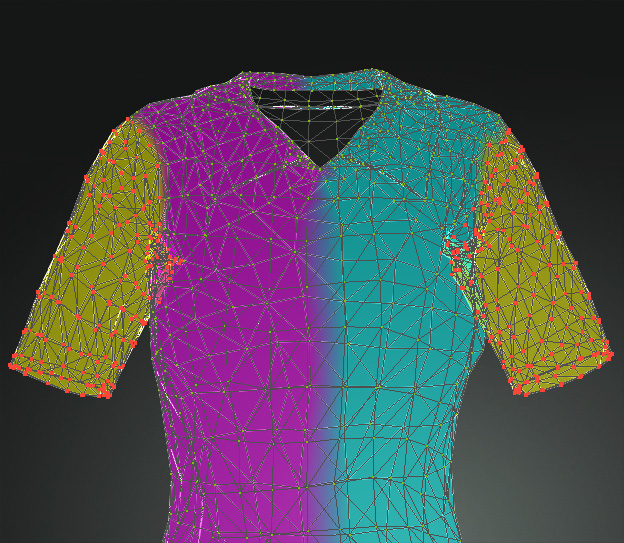
- Choose the Dress preset and activate the Lateral Partitioning checkbox.
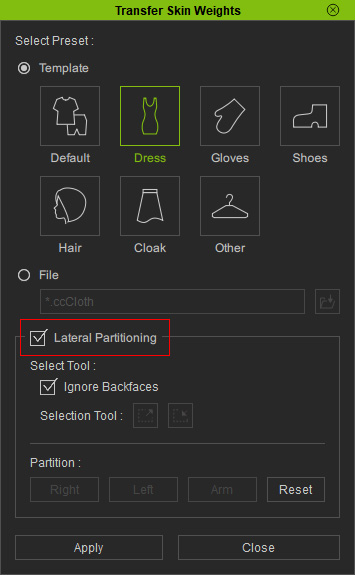
- Select the vertices of the both sleeves.
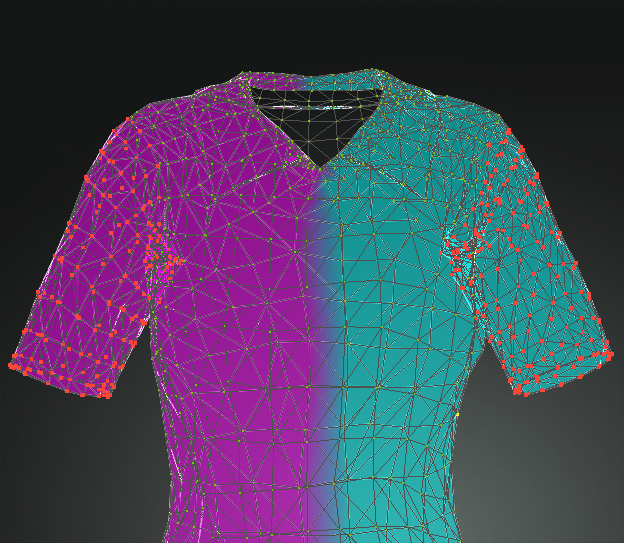
- Click the Arm button in the Lateral partitioning
group to isolate the selected vertices in to the Arm Layer.
- Click the Apply button in the panel.
- Pose the character again, and you will see the stretching has
been resolved.