Using Decals
PBR Substance provides 3 entirely customizable decals that covers all of the materials. Although decals are meant to be layered on top of the materials, it can also be used to completely cover them thus changing the entire look of the apparel or accessories to your liking.
Click on Decals in the tree view and notice the 3 decals layers
underneath: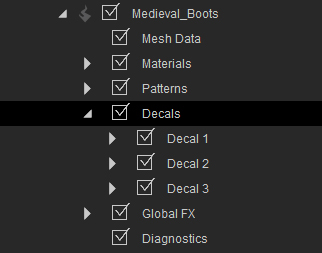
Activating Decals
-
Prepare an object.
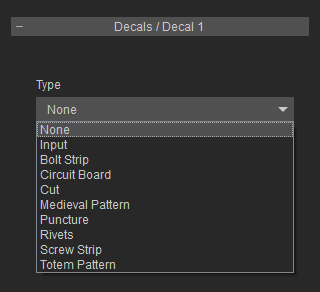
- Select the Decals >> Decal 1 node in the tree view of the Appearance Editor.
-
In the Decal 1 section, choose the desired decal from the drop-down list
(default is None).
-
If you want to create custom decal, then select the Input from the list. You need to fill up the
channels with prepared adequate images to generate custom decal.
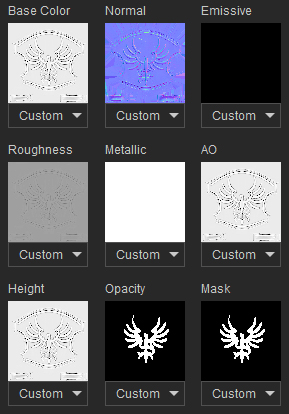
The decal will be generated in accordance with these textures.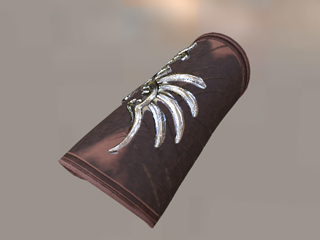
-
You can select any other embedded decals from the list.
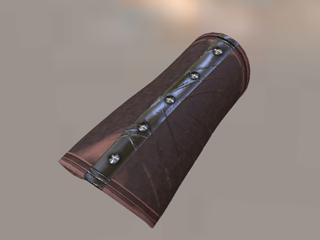

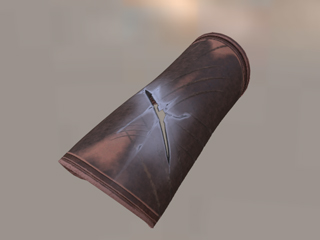
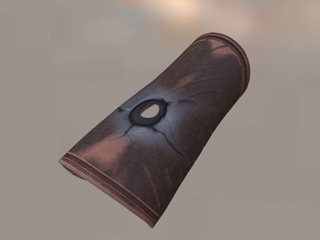
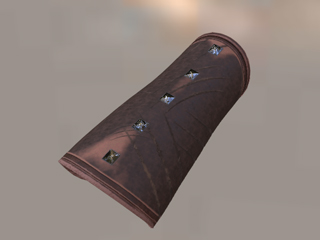
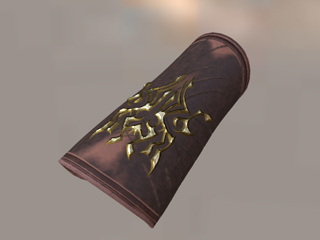
Bolt Strip
Circuit Board
Cut
Medieval Pattern
Puncture
Rivets

Screw Strip
Totem Pattern
-
If you want to create custom decal, then select the Input from the list. You need to fill up the
channels with prepared adequate images to generate custom decal.
Settings for Enhancing Decals
In order to enhance the decal such as the color, reflectivity,
transformation, or especially the flat or embossed effects, you need to use
the nodes under
Decal.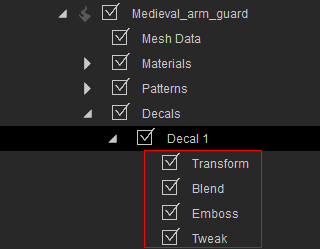
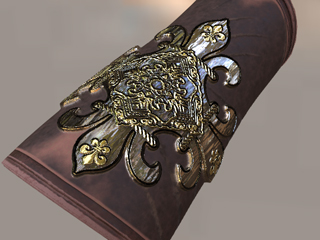
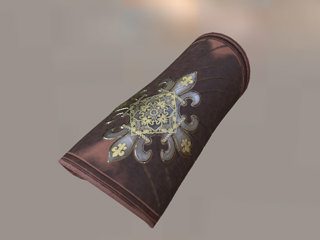
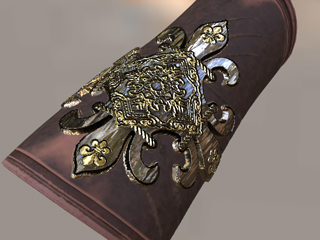
Take the Medieval decal for an example:
-
Transform the decal with the settings in the Transform node.

-
Define the blending Intensity in the Blend node.

-
Adjust the Height settings (Contrast and Luminosity) in the Tweak to define the
extrusion level of the decal on the object.
 Note:
Note:If you choose the Input method to create decals, then you must have a Height map in order see an effect.
-
In the Emboss section, adjust the settings to fine-tune the edges
of the extruded decal.