Exporting Characters to Unreal Engine
Refer to the Skeleton Structures Relations between CC and UE Characters section for more information before starting exporting CC characters to UE.
- Select the character in the project.
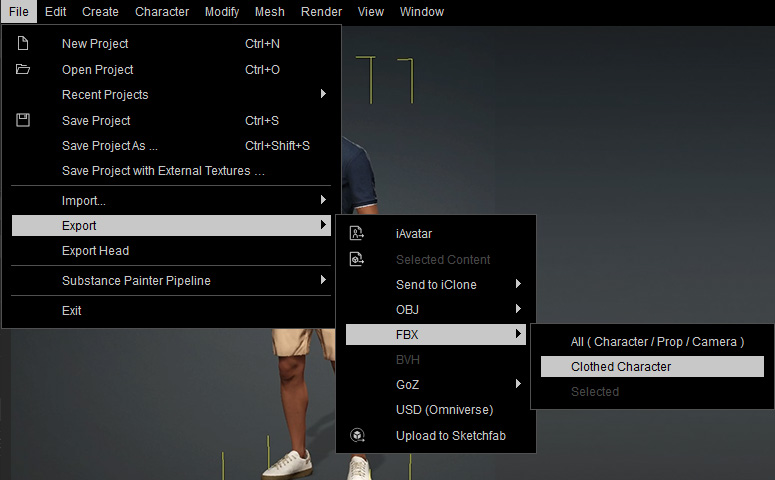
- Access Export > FBX > Clothed Character.
- In the Export FBX panel, adjust the settings accordingly. Then Click the Export button to export the character along with the motions as an FBX file.
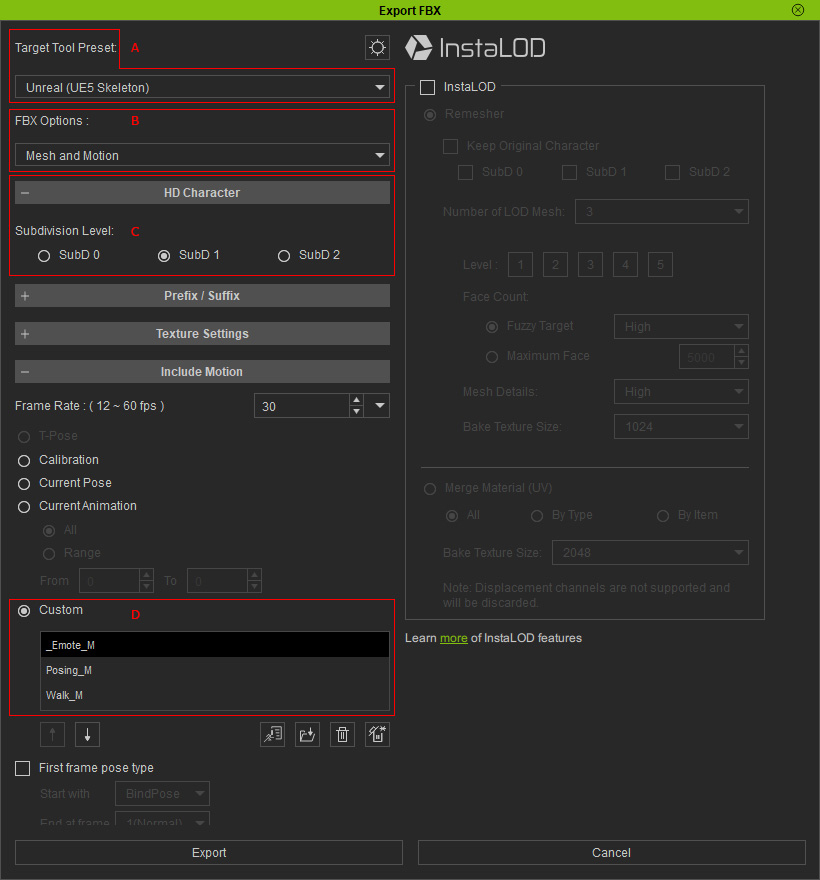
- Target Tool Preset: Choose the UE 5 (Skeleton) item from the preset drop-down list to auto-set the necessary settings in the panel.
- FBX Options: Includes model and motions into an FBX file or export them separately into different files.
- Subdivision Level: Exports the character in specific subdivision level. SubD 1 is recommended for the best balance or performance and visual quality.
- Include Motion: Attach some test or desired motions into the Custom pool to verify animation playback in Unreal Engine 5.
- Advanced Settings: Click the gear icon on the tho of the panel to view the skeleton. The right drawer of advanced settings appears. Set the target bone structure and the bind pose accordingly.
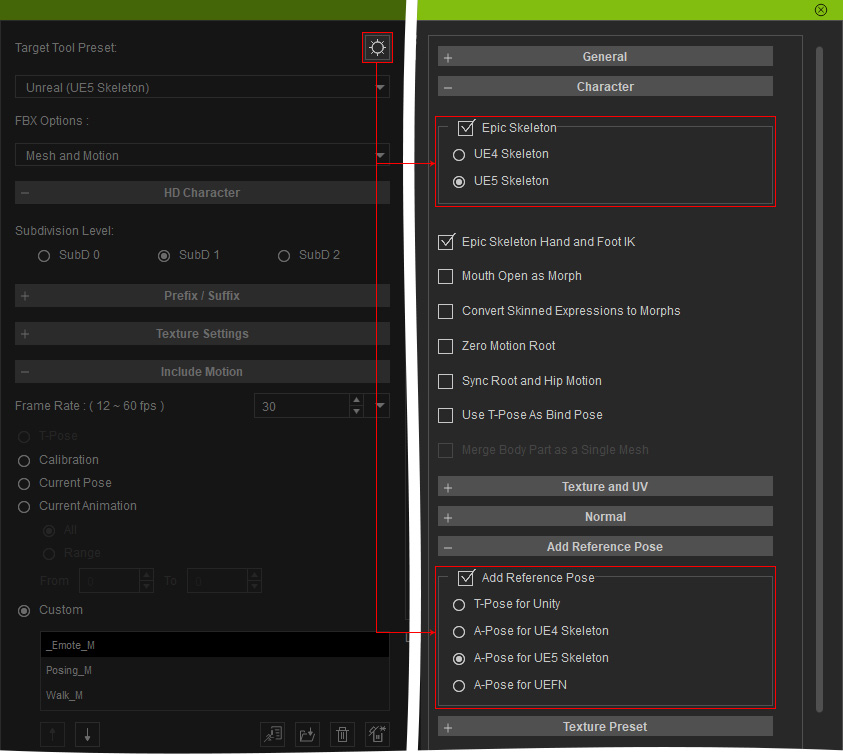
- Since the UE5 (Seleton) is chose, the Epic Skeleton will be automatically set to UE5 Skeleton.
- Also, in the Add Reference Pose group, the A-Pose for UE5 Skeleton radio button is automatically chose.
- You can determine the pose for UE5 or UEFN skeleton structures manually.
- Click the OK button to save the FBX file.

- Launch Unreal Engine 5.6.0.

- Choose GAMES > Blank, type in the project name and click the Create button to start a blank project.

- Install Auto Setup for Unreal Engine plugin to the project.
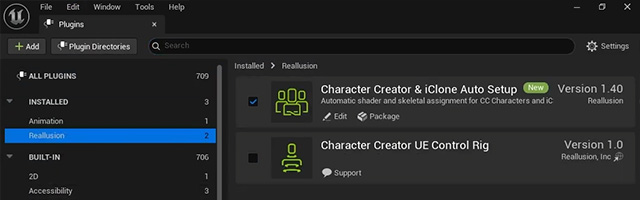
- Go to the plugin panel of Unreal Engine and check out if the Character Creator and iClone Auto Setup plugin (Version 1.40) is installed. Make sure it is activated.
- Import the character's FBX file into Unreal Engine's Content Drawer with HQ Shader and other FBX Import Options.
- HQ Shader:

- FBX Import Options (Mesh, Mesh Advanced and Material sections):

- Animation:

- HQ Shader:
- All imported data will be appear in the Content Drawer with materials and textures neatly organized into dedicated folders for better file management.

- Open the skeletal mesh for the Aaron character and verify the facial morphs. The expressions should be completely transferred from Character Creator.

- Test the animation by selecting any previously saved body or facial animations.
Test the body motion
Test the facial animation
