Setting T-Pose for CC3 Base and CC3 Base+ Characters (New for v3.3)
When GoZ and Import FBX are used for modifying CC3 Base or CC3 Base+ character's shape, the standard T-pose can
sometimes be offsetted due to miscalculation. The Set T-Pose feature
can be used to adjust the result.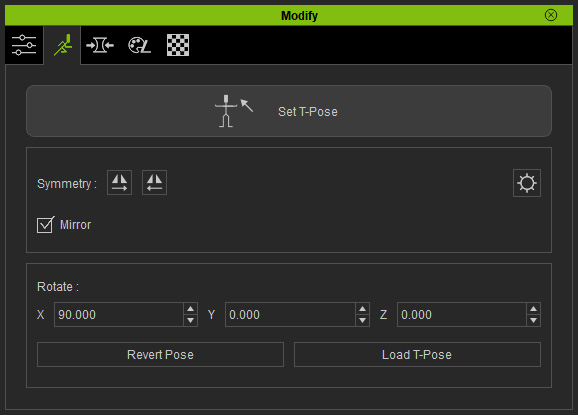
- Create a new project.

- Use GoZ feature to send this character (CC3 Base or CC3 Base+) to ZBrush.
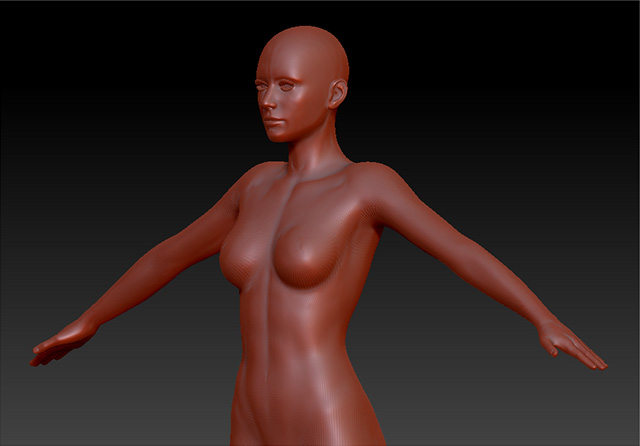
- Modify the model (the original A pose is slightly changed)
- Send the character back to Character Creator. Make sure the Adjust Bone to Fit Morph is activated,
so that the bones can be automatically adjusted to fit the modified model.
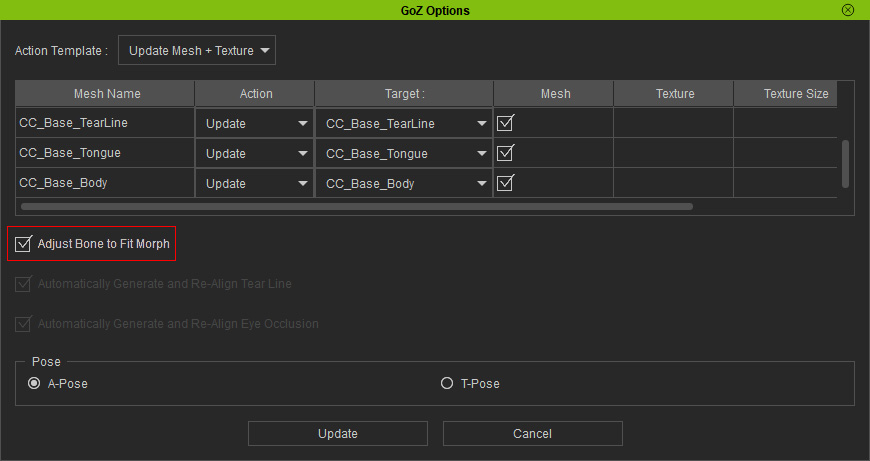
- Click the Update button to import the model back to Character Creator.
- Set the camera to the front view.
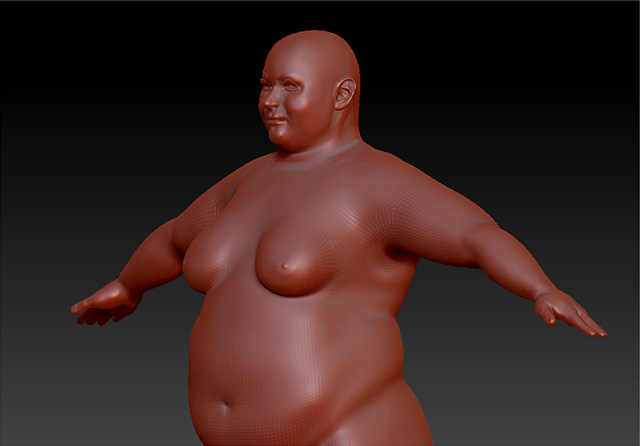
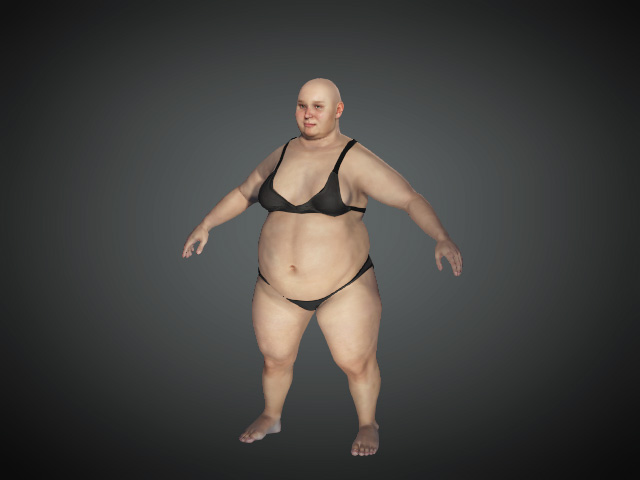
- Apply a T-pose from the Content Manager. As you can see the arms, in this case, raise up due to the modification in ZBrush and the Adjust Bone to Fit Morph feature.
- Click the Set T-Pose button in the Motion Pose tab of the Modify panel.
- The Set T-Pose panel will show up.
- Symmetry: Click one of these buttons to copy the bone rotations from one side to the other.
- Mirror: Symmetrically adjust the bilateral bones together.
- Bone Settings gear icon: Click this icon the show the Bone Settings in the Project Settings panel to adjust the Color, Size and the Opacity of the bones.

- Revert Pose: If you want to abort all the modification for the bones, then click this button to revert the original orientation of the bones.
- Load T-Pose: Click this button to load a *.ccProject or *.ccAvatar file as the reference of the T-pose for the current character.
- Select one of the bones (in this case, upper arm bone). Use the Rotate tool to make a
proper T-pose for the character.
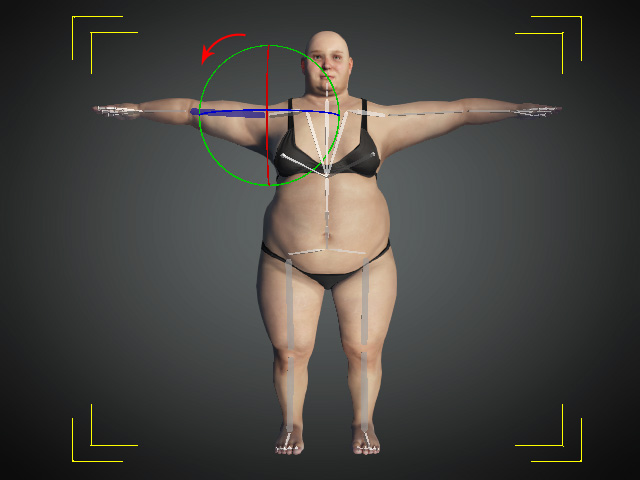
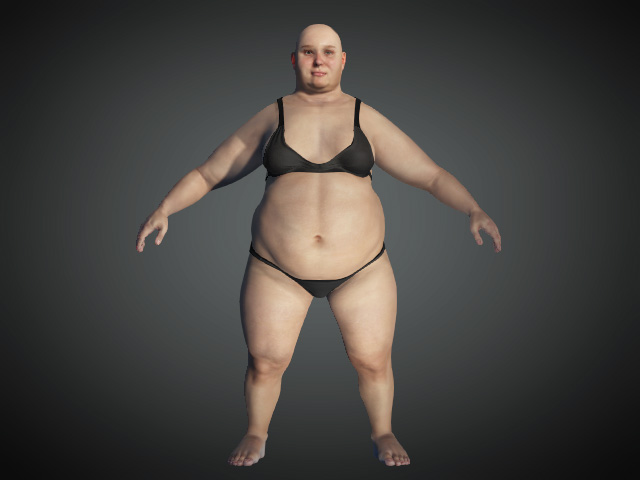
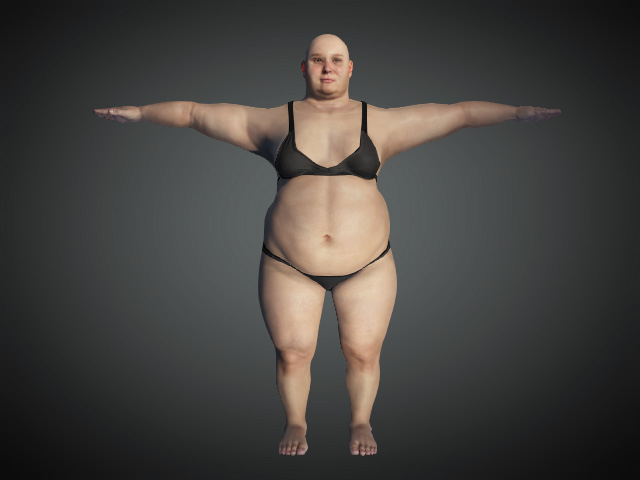
- Leave the Set T-Pose mode. You can see the character's T-pose is rectified.
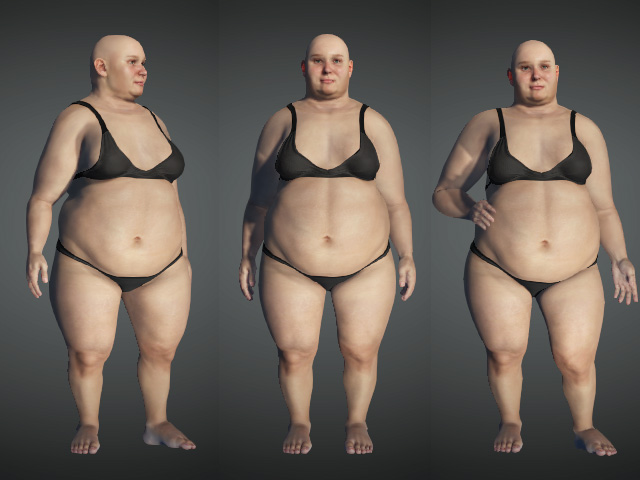
Before
After
- The character can perform correct poses afterward.