Applying RLHead and Appearance Editor to CC3 Characters (New for v3)
Character Creator provides two powerful features for customizing your characters. First is the ability to load an RLHead to replace the original head, the other is Appearance Editor for customizing the skin textures and cosmetics.
However, currently, these two features can not be applied to CC3 characters. If you still want to apply them to CC3 characters, you can follow the steps below:
- Create a new project and replace the default CC3 character with any one of the CC1 characters.
You can find the CC1 base character in the library shown below: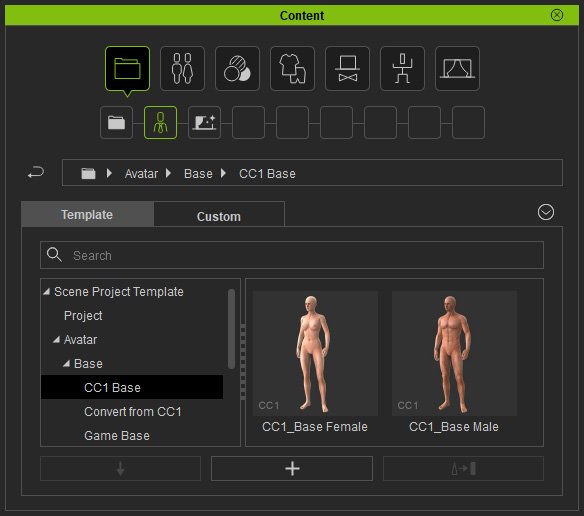
- Apply an embedded or custom RLHead to the character.
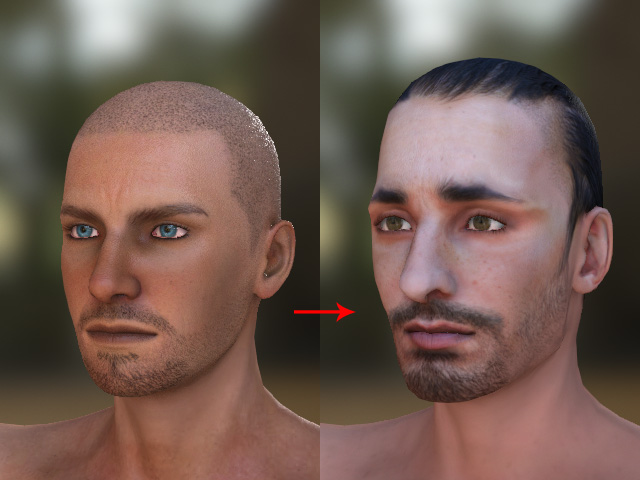
- You can use the Creating 3D Actor feature provided in Reallusion CrazyTalk 8 to create custom RLHead.
- If you have downloaded and installed Realistic Human 100 Content Pack, then you can find 100 head in the path below:
C:\Users\Public\Documents\Reallusion\Shared Templates\RL Head\Realistic Human 100
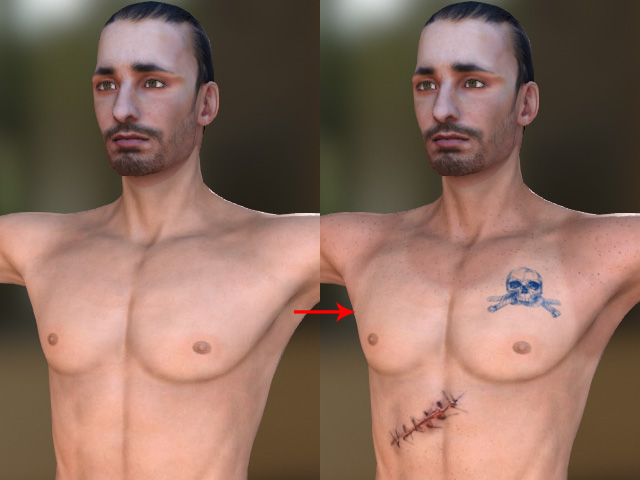
- Use the Appearance Editor to edit the skins of the character.
- Save the project first in case that you want to modify the character's head and skins again.
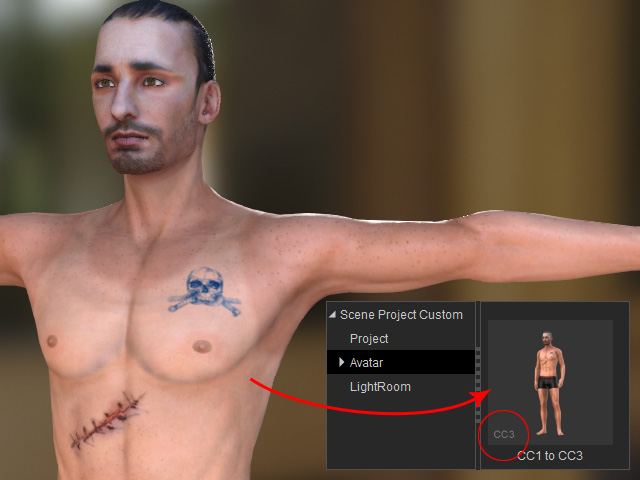
- Convert the character to CC3 character by clicking the Convert CC1 to CC3 button on the Modify panel.
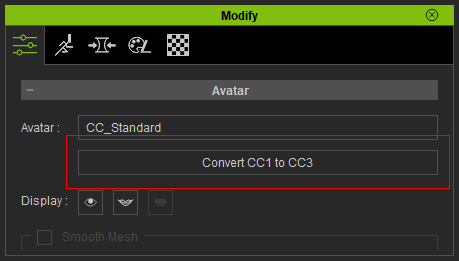
- There are no obvious changes in the preview window, however, if you add the character to Content Manager, you will see
the text: "CC3", at the corner of the thumbnail.