Transferring Animated Crowd from iClone to Unreal in Sequencer (New for v1.3)
With the release of iClone 8.0, came the ability to create crowd animation in iClone with Motion Director. Nevertheless, transferring both the crowd and their motions to Unreal through the Unreal Live Link plugin and rebuilding them posed challenges of a tedious process. The advent of Unreal Live Link version 1.3 has significantly improved this workflow. Now, with the Bake all animations to sequencer feature, you can seamlessly generate a sequencer that integrates items, motions, and animations simultaneously, to streamline the entire process.
Transferring Actors with Motions to Unreal Sequencer
- Create a scene in Unreal.
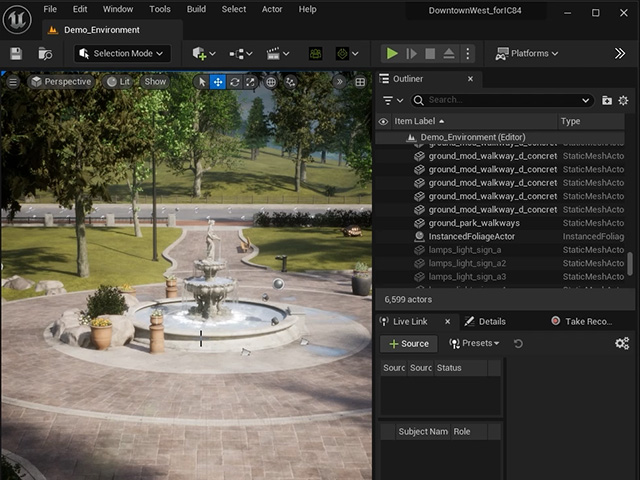
- Right click and access the Transfer to iClone command (in this case,
Merged) to export the ground and necessary props to iClone as reference meshes.

The meshes will be instantly shown in iClone.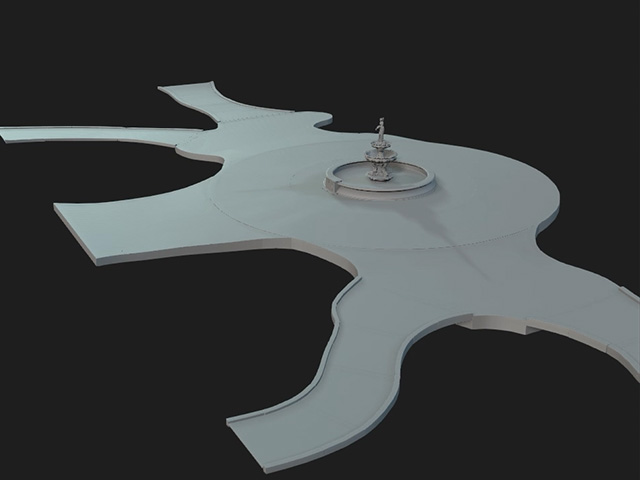
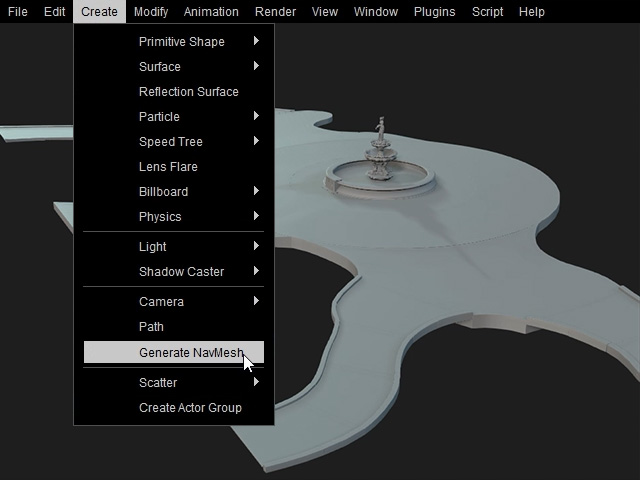
- In iClone, create
a navmesh based on the reference meshes.
The bluish polygon of navmesh will be produced based on the reference meshes.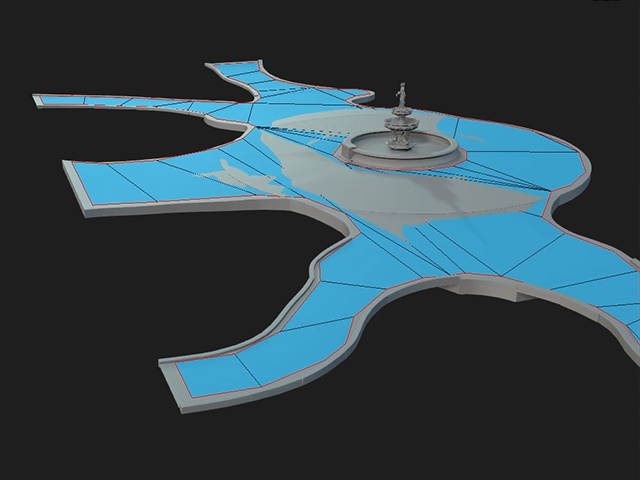
- Scatter
a crowd on the navmesh by using the Create > Scatter > Generate Crowd command.
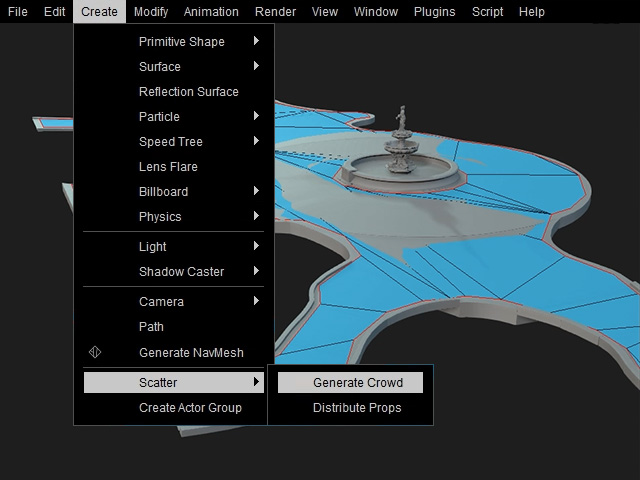
You will see the actors are deployed on the navmesh depending on your settings.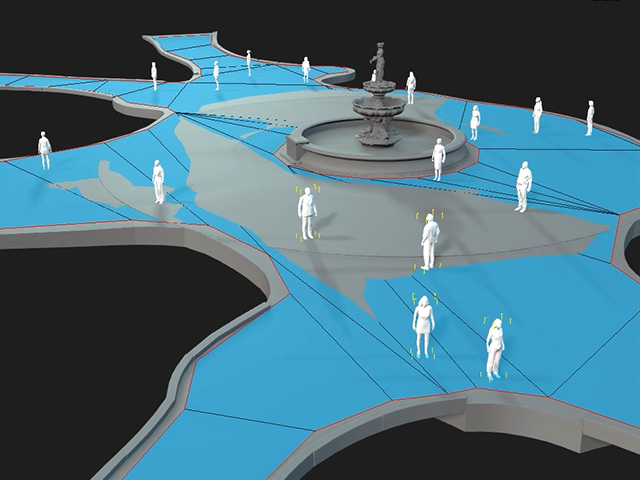
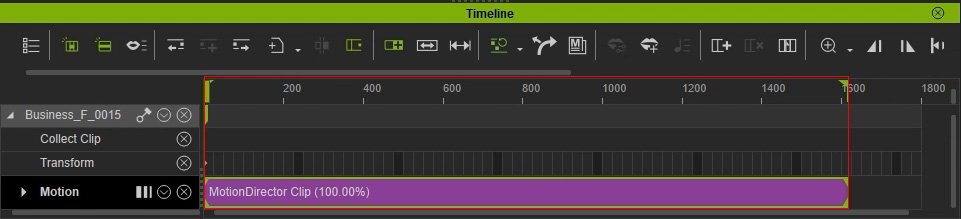
- Set the Start Mode in the Motion Director - Controls panel to
Record Selected for recording the motion simulation results of the pedestrians.

Hit the Start Record by Selected button to start recording the motions. - Set the iClone project length to the same as the simulated motions of ether one of the actors.
- Open the Unreal Live Link panel. Switch to the
Transfer page, adjust the settings to resemble the
following illustration:
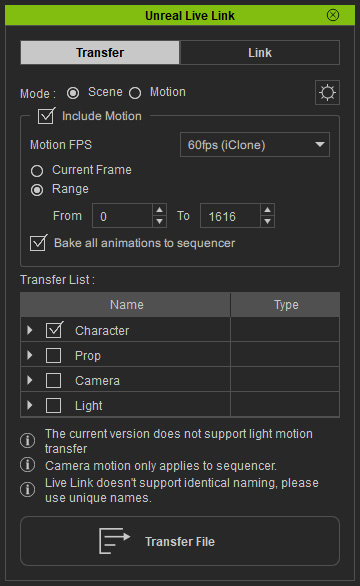
- Make sure the Bake all animations to sequencer checkbox is activated.
- Activate the Character category checkbox to transfer all actors to Unreal stage.
- Deactivate the Prop, Camera and Light category in this case.
- Notice that the light can be transferred to Unreal but its animations can not.
- Click the Transfer File Settings gear button and commence
with the advanced settings:
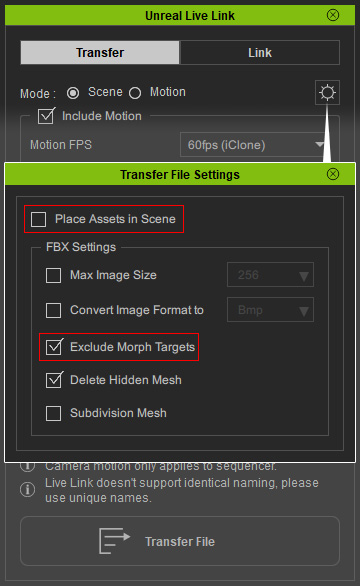
- Place Assets in Scene: Deactivate it and the actors will be integrated into sequencer without adding ones on the Unreal stage.
- Exclude Morph Targets: Activate it to remove the actors morph data if there is no need to take close up shot for the expressions.
- Click the Transfer File button to start transferring the actors.
- In Unreal, open the sequencer and you will see the actor and
motions integrated within.
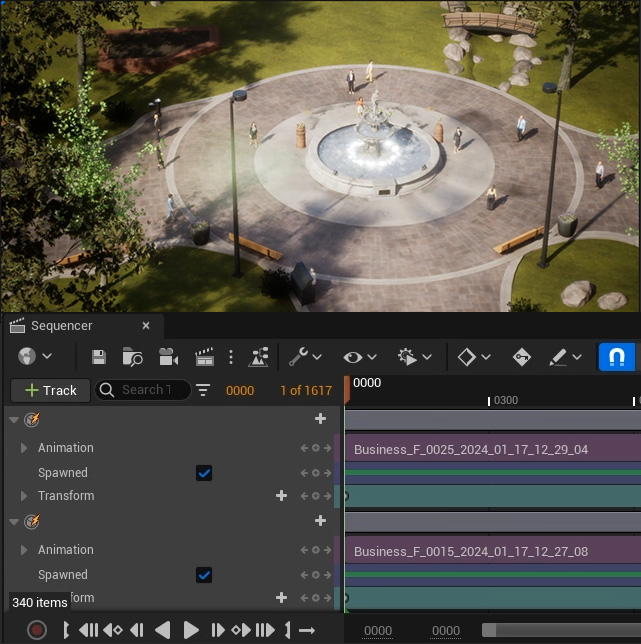
- Playback the sequencer to view the result.
Integrating Multiple Sequencers
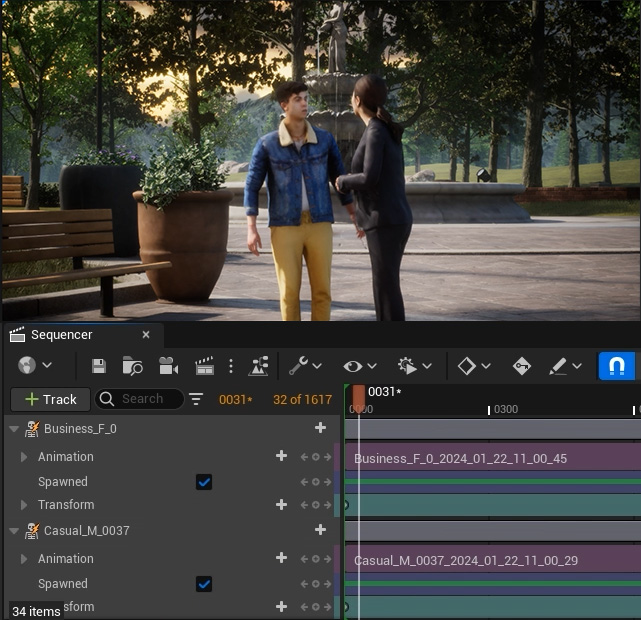
- Repeat the same steps as shown in previous section to generate a new sequence with two characters in conversation.
You can find the sequencers in the "Content > RLLevelSequences" subfolder.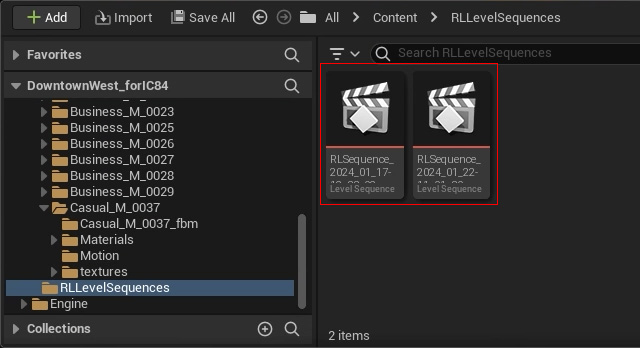
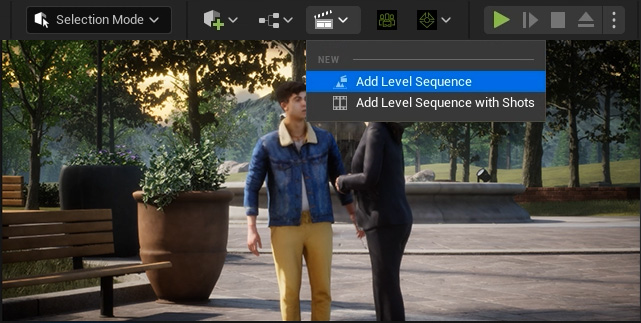
- On the toolbar, click the clapperboard button and execute the
Add Level Sequence command.
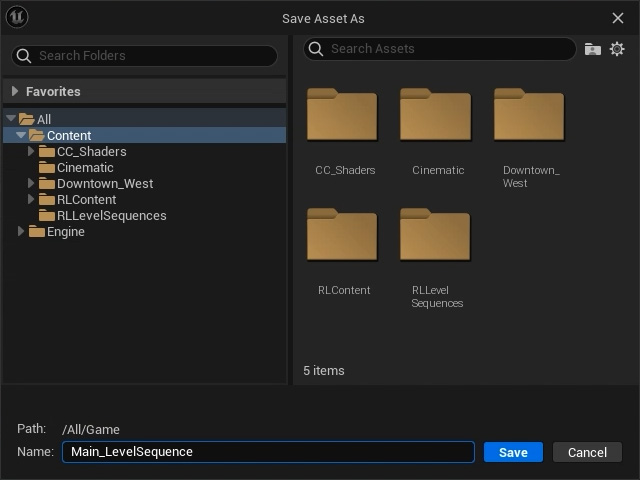
- Save the new sequence.
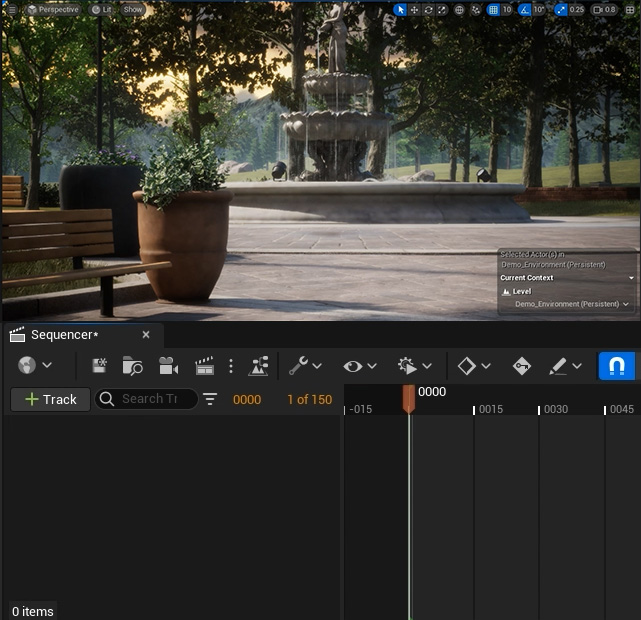
- You will see the Sequencer is open but empty.
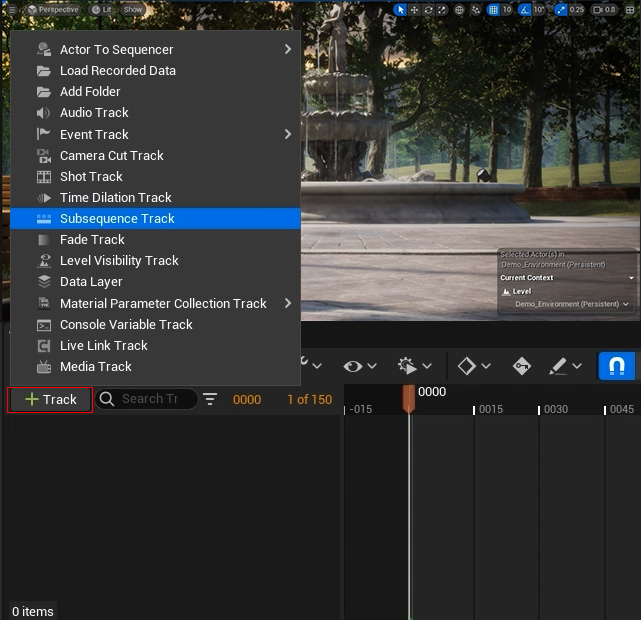
- Click the + Track button and choose the Subsequence Track command.
- Click the Add button of the new Subsequences track and choose the sequencers you have created.
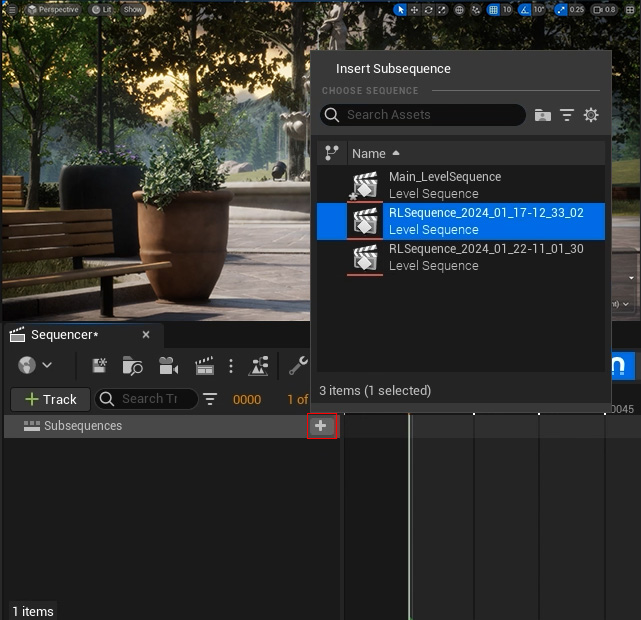
The sequencer will be add into the new sequence.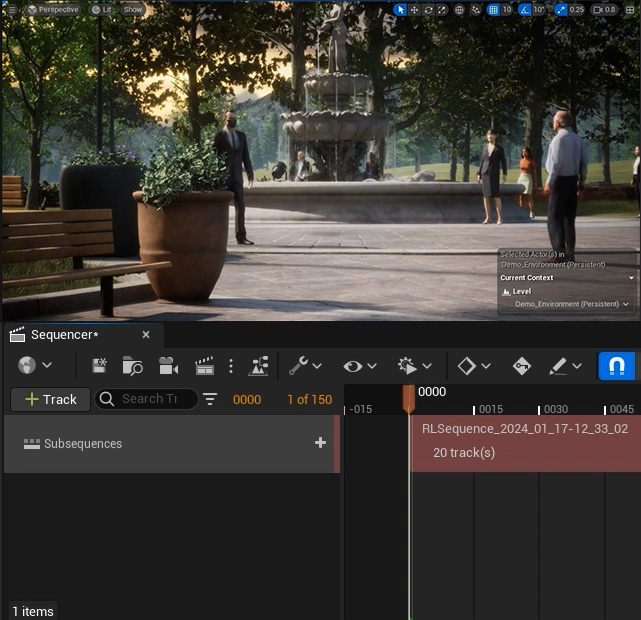
- Repeat the same steps to add more saved sequencers. As you can see the contents in different sequencers are combined together.
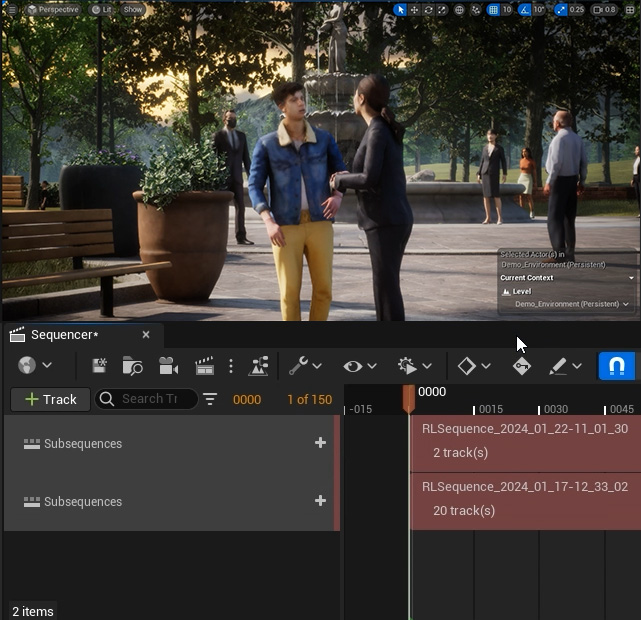
- Playback the new sequence to view the composition.
- You can then easily create crowd animations in Unreal with this technique.
