Device Settings - Perception Neuron
Motion LIVE plug-in supports the Perception Neuron mocap device, which provides a complete mocap solution for production. Not only can you capture performances by one actor, multiple actors are also allowed.
For Single Actor
- Make sure that the performer has worn the Perception Neuron devices correctly.
-
Start the Axis Neuron standalone
application. You can
download and install the application from the Noitom
(the manufacture of Perception Neuron) Official
Web Site.
-
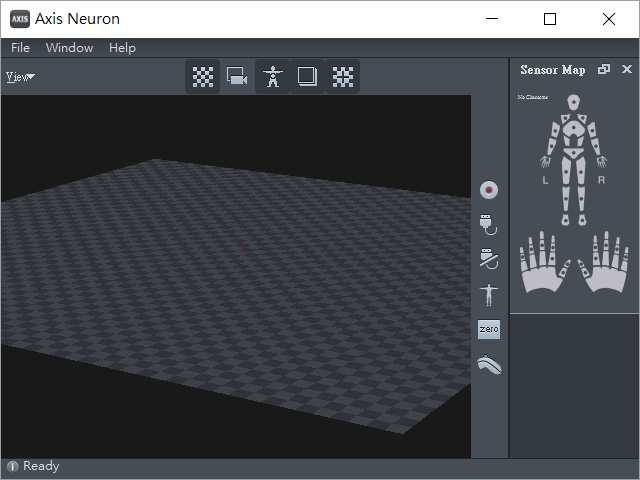
Click the Connect
 button.
You will see the panel as shown below, click the Connect button to connect the Perception Neuron (the device)
to Axis Neuron (the application):
button.
You will see the panel as shown below, click the Connect button to connect the Perception Neuron (the device)
to Axis Neuron (the application):
-
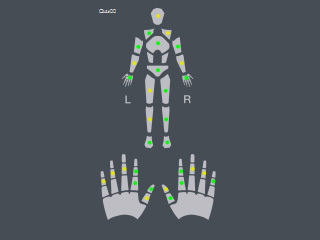
Make sure that the lights on the right side of the application are activated in green, yellow
or at least red. If any
of the lights are greyed out, then check the device to make sure it is worn
correctly.
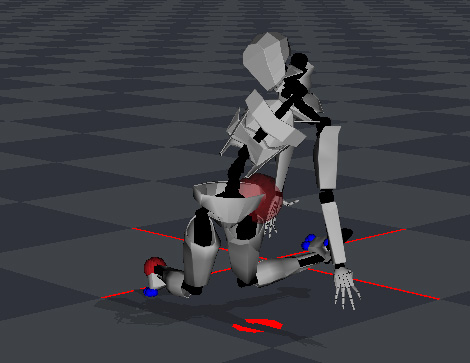
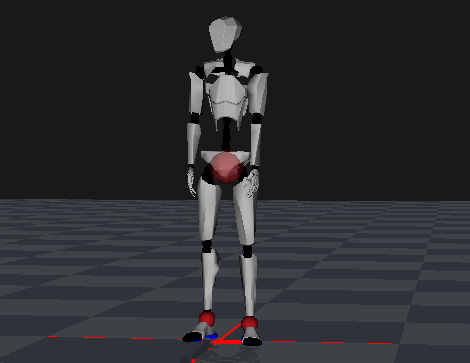
- In the Preview window, you will see that the dummy is all messed
up.
-
Before the Axis Neuron receives correct data from the
Perception Neuron, you will need to click the Calibration
 button to start the calibration procedure.
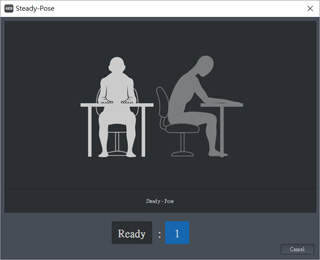
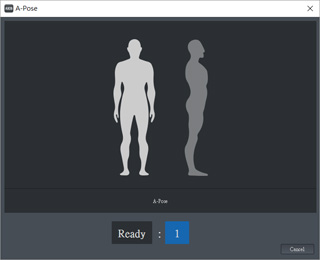
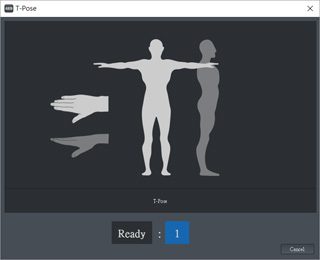
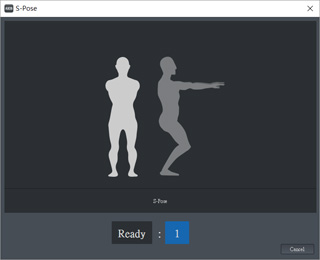
Axis Neuron will direct you to do four poses for calibration.
button to start the calibration procedure.
Axis Neuron will direct you to do four poses for calibration.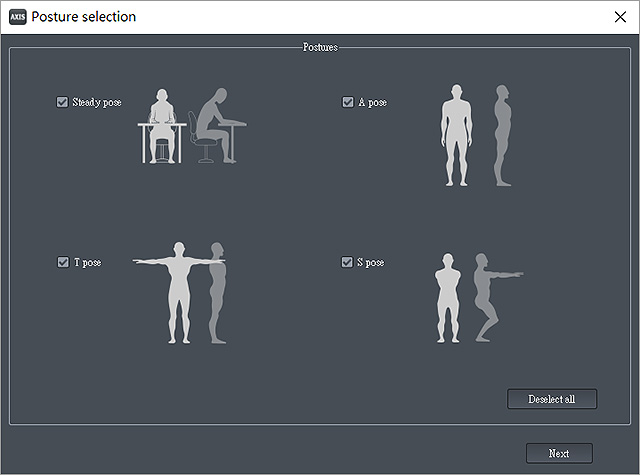
Click the Next button to start to calibrate. -
Have the performer hold the poses on the screen for each phase of the
calibration and wait until Axis Neuron finishes the
countdowns.
-
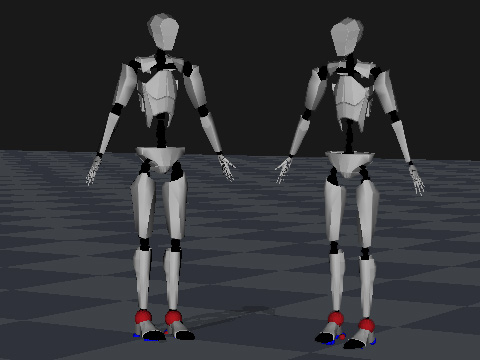
Now the dummy in the Preview window stands up and your motions can be correctly received from the
Axis Neuron.
For Multiple Actors
What there are more than one actor for the motion-capturing, please follow the steps below:
- Make sure the performers have worn the Perception Neuron correctly.
-
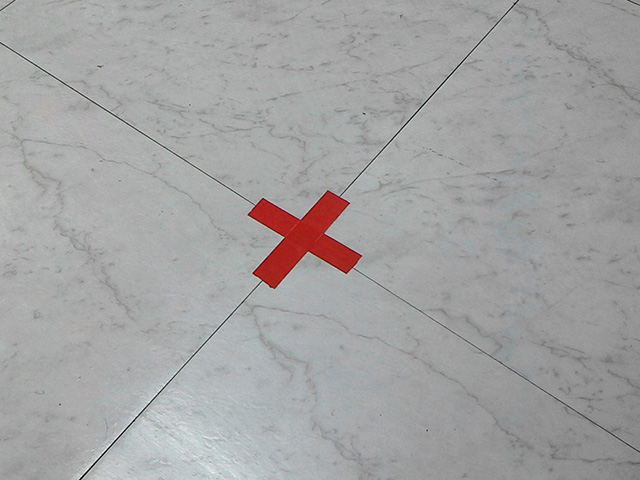
First, Make a mark on the floor.
-
Start the Axis Neuron standalone
application. You can
download and install the application from the Noitom
(the manufacture of Perception Neuron) Official
Web Site.
-
Click the Connect button.
You will see the panel as shown below. Click one of the Connect buttons to connect
the Perception Neuron (the device)
to Axis Neuron (the application):

-
Click the Connect button
again.
You will see the panel as shown below. Click the Connect button to connect
the rest to the Perception Neuron (the device)
to Axis Neuron (the application):
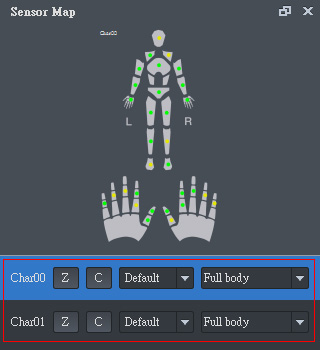
-
Select the character at the right side to make sure the lights on the
Perception Neuron are activated in green, yellow
or at least red. If any
of the light is in grey, then check the device to make sure it is worn
correctly.
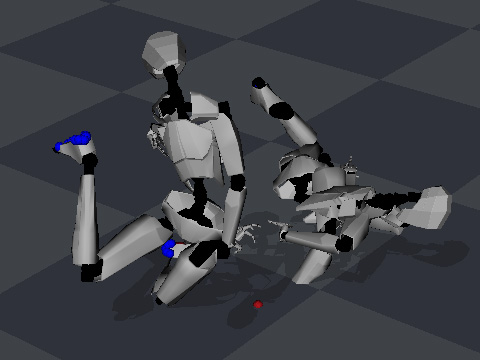
- You will see that the dummies in the Preview window are
all messed up.
-
Before Axis Neuron receives correct data from the
Perception Neuron, you need to do the calibration
first. Please have one of the performers to stand on the mark.

-
Click on the C button of one of the characters to start the calibration procedure.

- Axis Neuron will direct you to do four poses for calibration.
Click the Next button to start to calibrate. - Have the performer hold the poses on the screen for each phase of the
calibration and wait until Axis Neuron finishes the
countdowns.
-
Make sure you have selected the other character on the list at the right
side of the Axis Neuron. Then have the second performer stand on the mark and do the calibration to.

- Now the dummies in the Preview window stand up and your motions can be correctly received from the
Axis Neuron.
More About Perception Neuron
- Suits of Sensors: Neuron Edition V2, Perception Neuron
- Standalone Program: Axis Neuron
- Native Data Format: *.raw
- Export: *.FBX, *.BVH
- Perception Neuron Official Website
