CAMERA Mode Workflow (New for v 1.1)
Use a camera to capture your facial performances in real-time with AccuFACE, then seamlessly transfer the captured calibration data to your chosen character model in iClone.
- Open AccuFACE and iClone.
- Connect the camera device to your computer.
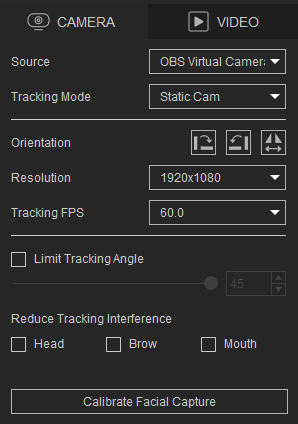
- In AccuFACE, select the CAMERA mode.
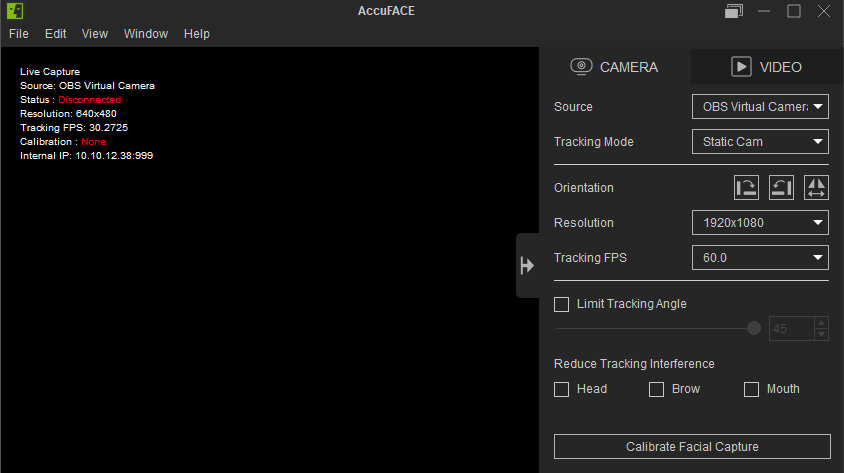
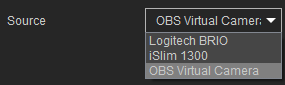
- Select the appropriate Source camera.
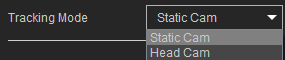
- For Tracking Mode, select the appropriate camera setup for your capture device.
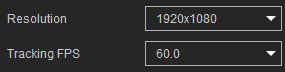
- Adjust the recording Resolution and Tracking FPS according to your preferences for the facial mocap.
Note: For accurate facial performance capture in AccuFACE, it is recommended to use 720p resolution with 60 FPS. - After you have finished configuring your CAMERA settings, click the Calibrate Facial Capture button to improve the accuracy of your facial performances.
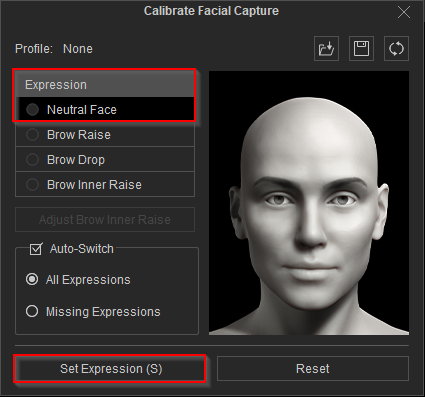
- Choose Calibrate Facial Capture > Expression > Neutral Face, and relax your face to create a blank expression like the diagram in the calibration window. When ready, click on the Set Expression (S) button to capture the calibration data.
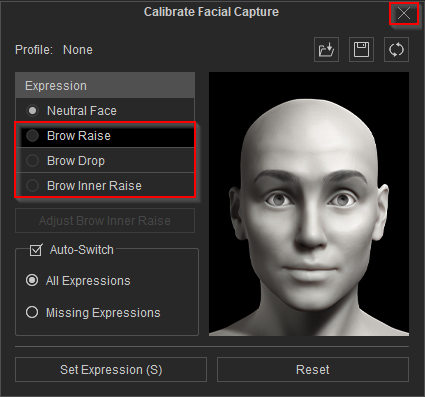
- After setting the Neutral Face expression, perform the rest of the expressions you want to save. Once completed, you can close the Calibrate Facial Capture window.
Before and After Facial Capture Calibration
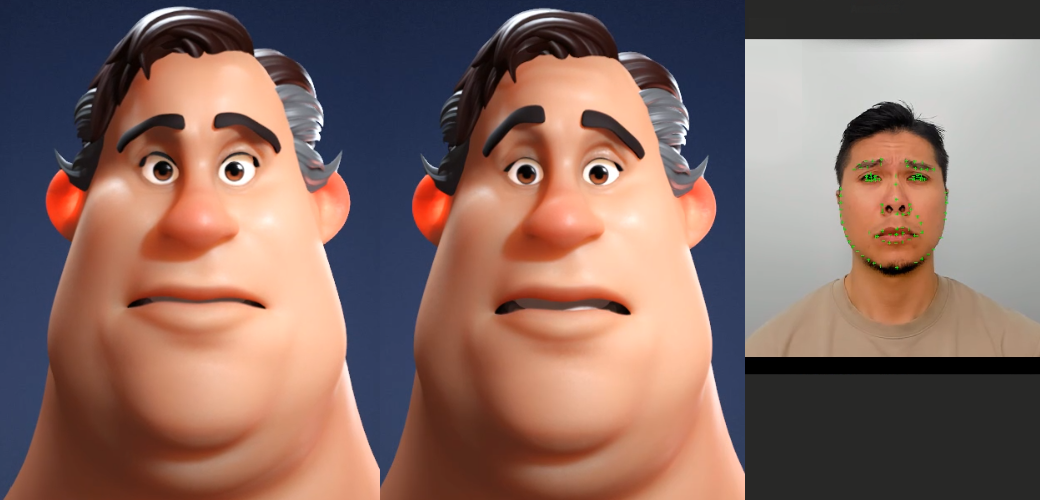
- Brow Raise expression calibration:.

Before calibration.
After calibration.
AccuFACE facial capture.
- Brow Inner Raise expression calibration:
Before calibration.
After calibration.
AccuFACE facial capture.
Connecting AccuFACE to Motion Live
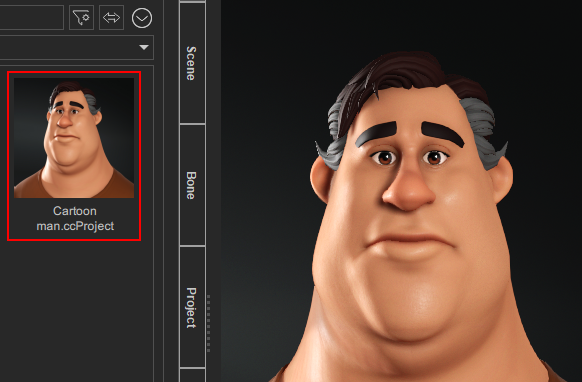
- To initiate the connection between AccuFACE and Motion Live, begin by selecting a character model in iClone.
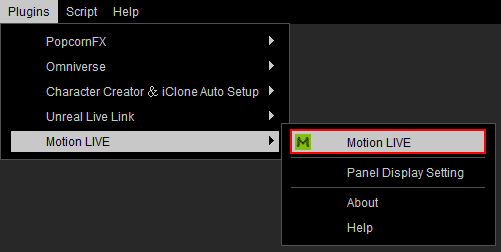
- Perform Plugins > Motion Live > Motion Live.
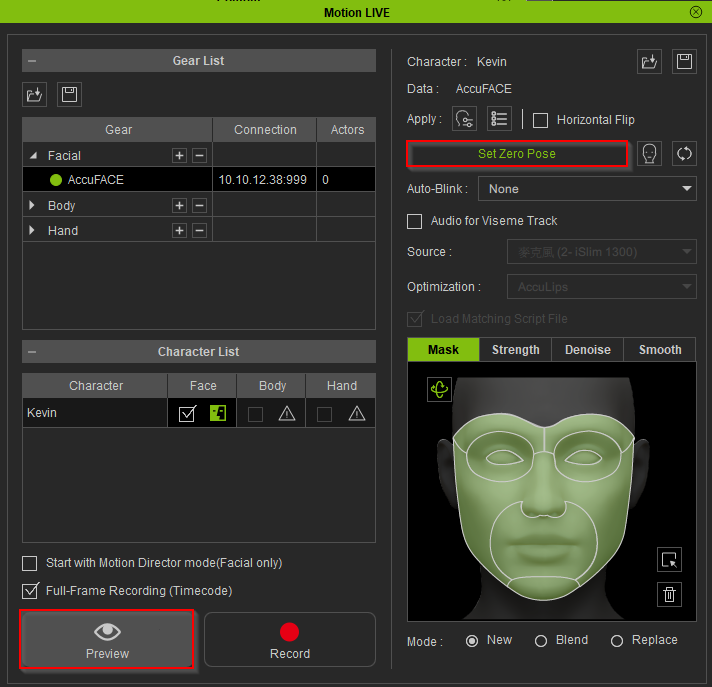
- The Motion LIVE panel will appear. Select the facial row under the Gear List section.
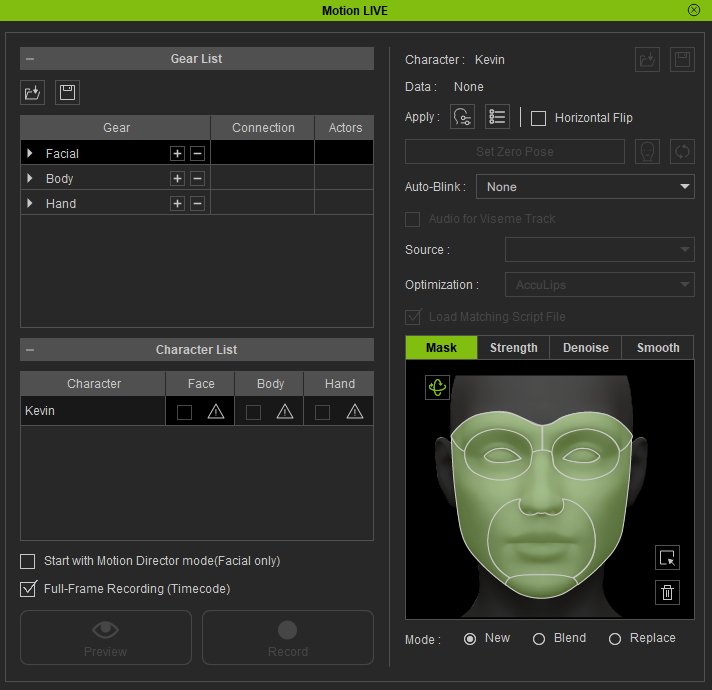
- Under Gear List, click the + button in the ‘Facial’ row to show the supported default devices.
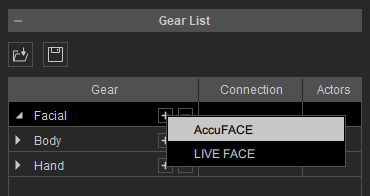
Select ‘AccuFACE’ from the dropdown menu. You will see the device is now under the ‘Facial’ group with a green hollow circle.
- Type the IP address shown in your AccuFACE application into Motion LIVE > Gear List > Connection and activate the hollow circle beside it.
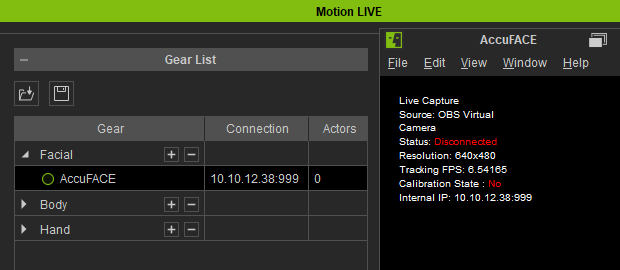
The green circle will become solid, indicating that AccuFACE has successfully connected to the Motion Live plugin.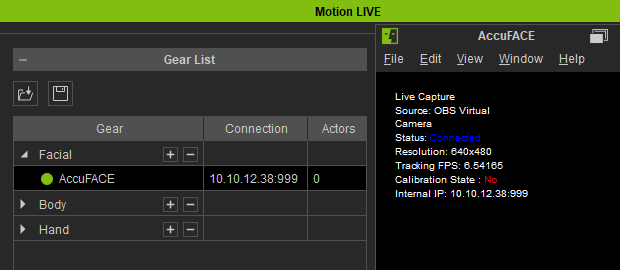
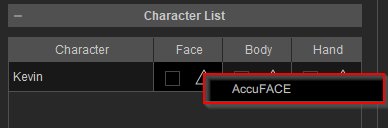
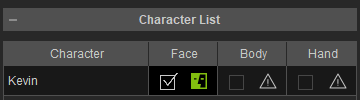
- Click on the hazard sign under Character List > Face for the character you want to puppet and select ‘AccuFace’.
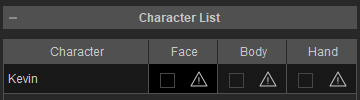
Before establishing the connection.
After establishing the connection.
- Click the Preview button and press the Spacebar to preview your own expressions on the virtual character. For better capture results, click the Set Zero Pose button to initialize the facial expression.
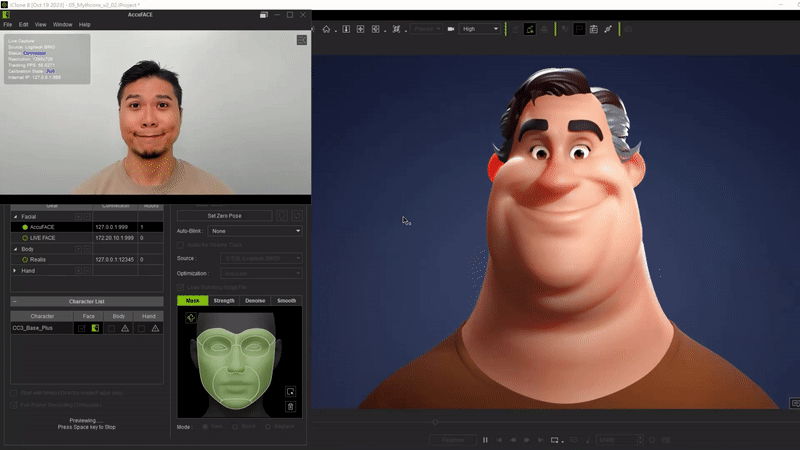
- Click the Record button and press the Spacebar to start recording.

 Note:
Note:- If your facial capturing process involves a wide range of head angle movements, it is recommended to activate the Limit Tracking Angle feature. This feature restricts AccuFACE from receiving tracking data beyond a designated rotation angle (adjustable from 30° to 45°). This helps prevent the transfer of potentially inaccurate tracking data to Motion Live, ensuring a more precise result.

- Prior to recording your facial performance, it is recommended to utilize the ‘Acculips’ option to improve the precision of your character's mouth, lips, and tongue movements.

- If your facial capturing process involves a wide range of head angle movements, it is recommended to activate the Limit Tracking Angle feature. This feature restricts AccuFACE from receiving tracking data beyond a designated rotation angle (adjustable from 30° to 45°). This helps prevent the transfer of potentially inaccurate tracking data to Motion Live, ensuring a more precise result.
