Setting and Mirroring Joints
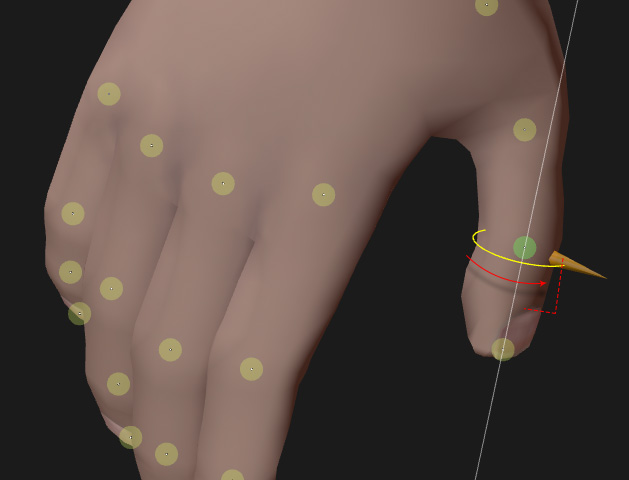
In the Hand Rig step, the most crucial task is to position the knuckle joints of the fingers and correctly set the orientation of the thumb.
- Import a model.
- Set the center line correctly.

- Go to the 3rd step and set the body joints.
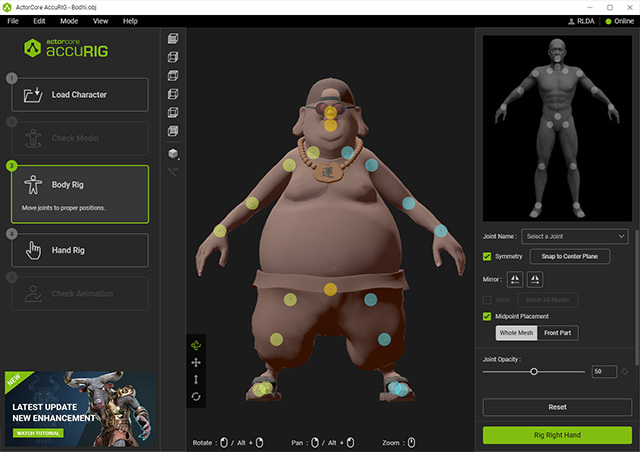
Proceed to the 4th step for Hand Rig, by clicking on the namesake button on the left or the Go to Right Hand button on the right.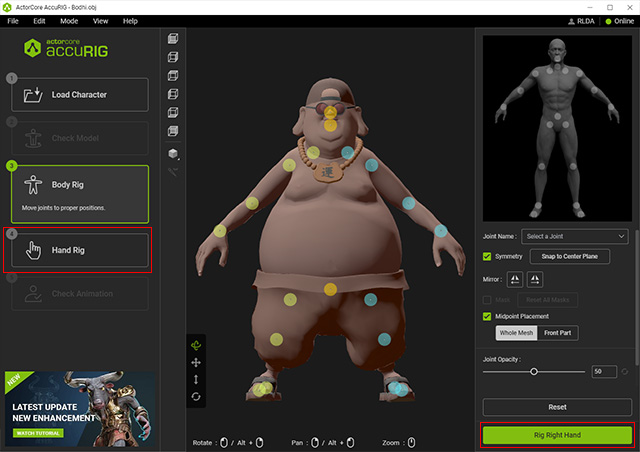
- Before proceeding to the
4th step, you will be asked to input the number of fingers
for the character.
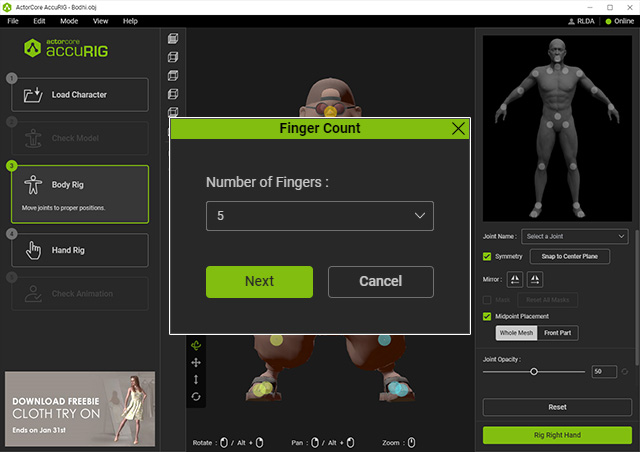
- The system will automatically place the joints into the fingers in
the 4th step. You can also manually
reposition them if needed.

Click the Left Hand tab or Go to Left Hand button for the same adjustments to the other hand. Proceed to the final step by clicking the Check Animation button at the left side panel. - Drag the joints to properly place them on the knuckles of the fingers.
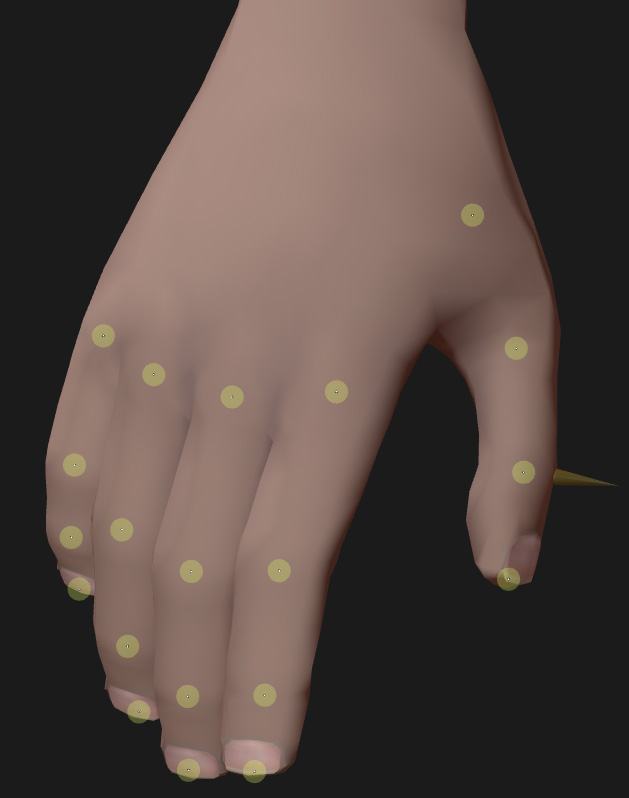
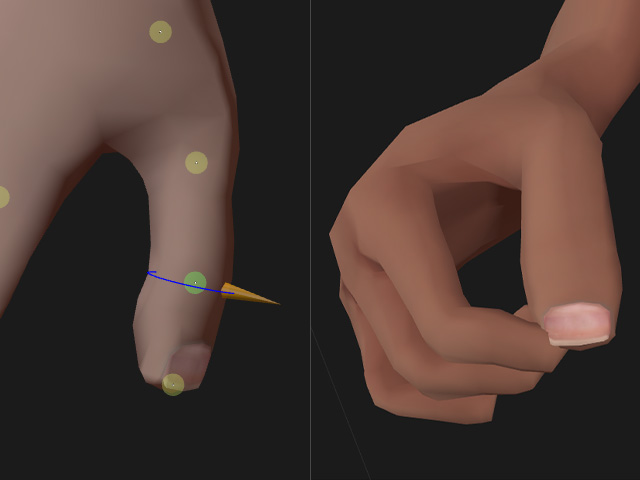
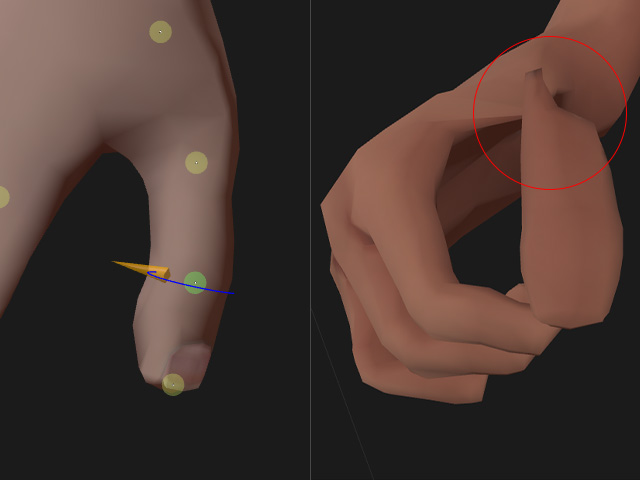
* Always orbit the camera to observe and make sure the joints are inside of the model. - Click on the joint indicator and drag on the circle
gizmo to align it perpendicular to the thumbnail in order to have
the joint bend in the proper direction.
- If the poses for both hands are identical
and joint positioning for one side is already complete, you can save
some time by clicking on the Mirror to Left Hand or
Mirror to Right Hand button to mirror the joint positions
and thumb orientation to the other hand.
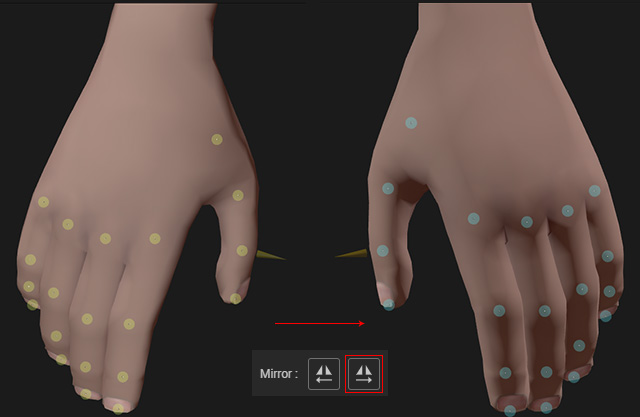
Otherwise, you will need to manually reposition the joints for the other hand. - Go to the final step to characterize the model, then apply
either of the motions for testing.
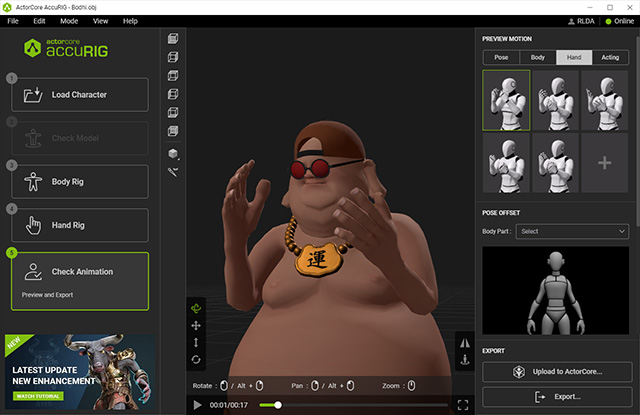
- You can export the character if you are satisfied with the final result.