Managing Layers
Each application of AI-generated imagery creates a new layer in the Layer Manager. You can manage these layers by assigning Color IDs, adjusting blending with the base layer, rearranging their order, grouping multiple layers, and merging layers before sending them back to Character Creator.
Conditions That Create a New Layer
A new layer is generated in the Layer Manager when:
- FashionGen is launched with Auto mask FashionGen layers enabled.
- Content is dragged into the Layer Manager or directly into the viewport.
- An image file is dragged into the viewport.
- AI-based texture generation features are used, including Pattern, Decal, Detailing, or Aging.
Inserting a New Layer
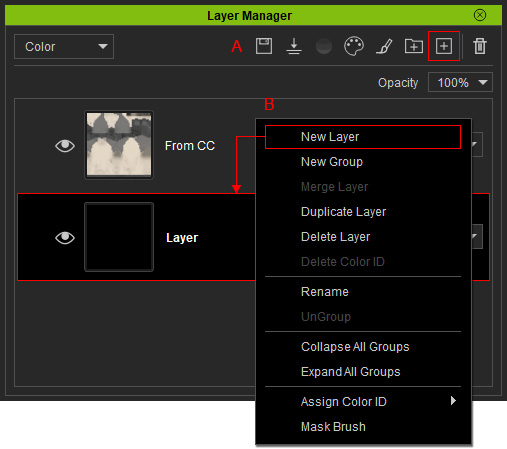
Click New Layer on the Layer Manager toolbar (A), or right-click a layer and choose New Layer (B) to insert an empty layer below the current layer.
Renaming a Layer
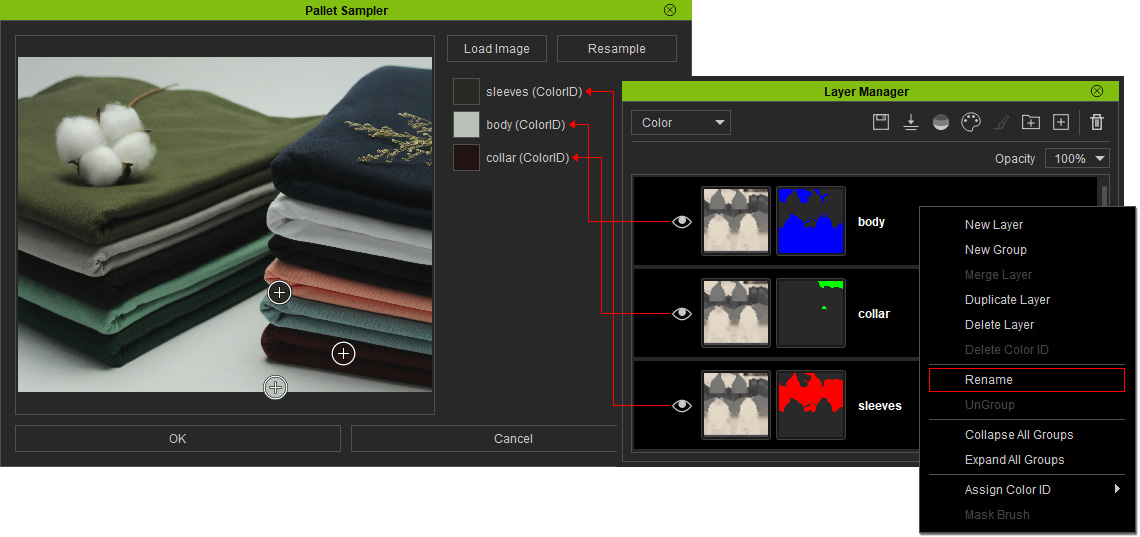
Right-click a layer and select Rename to label it for easier identification.
These names will also appear in the Pallet Sampler.
Deleting Layer
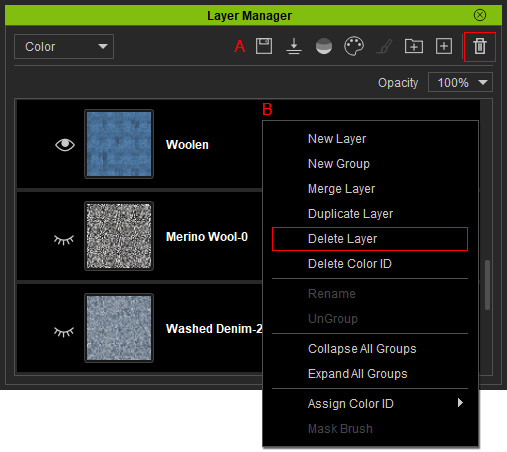
Click Delete Layer on the Layer Manager toolbar (A), or right-click and select Delete Layer (B).
Multiple selected layers can be deleted at once.
Assigning Color ID to a Layer
Manually assign a Color ID to a layer to apply textures or materials to a specific mesh region.
Duplicate the base layer from CC by right-clicking and selecting Duplicate Layer.
Then, select the duplicated layer and assign a Color ID by clicking Color Mask on the Layer Manager toolbar (A) or right-clicking the layer and choosing Assign Color ID (B).
Pick a Color ID from the mesh’s embedded Color ID map.
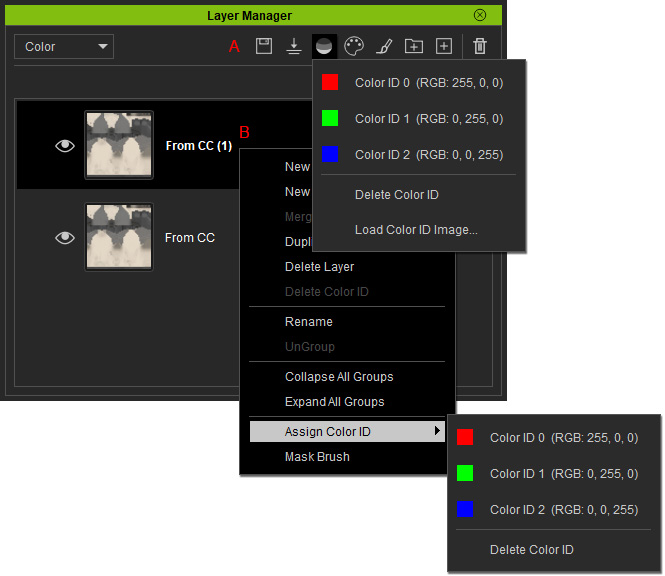
To remove a Color ID, use the Color Mask button or the right-click context menu.
Blending with Underlying Layer
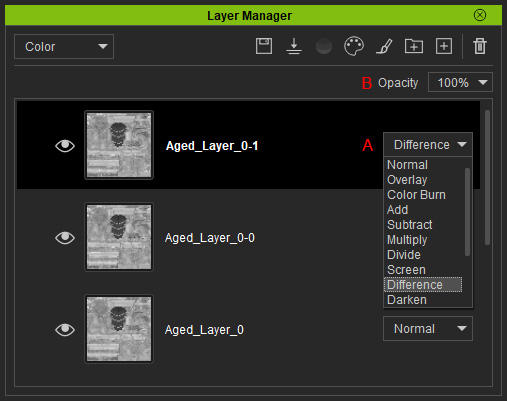
Select a blending mode from the drop-down list (A) to control how the layer interacts with the underlying layer for a more natural look.
Adjusting the layer opacity (B) further refines its appearance with the base layer.
Adjusting Layer Order
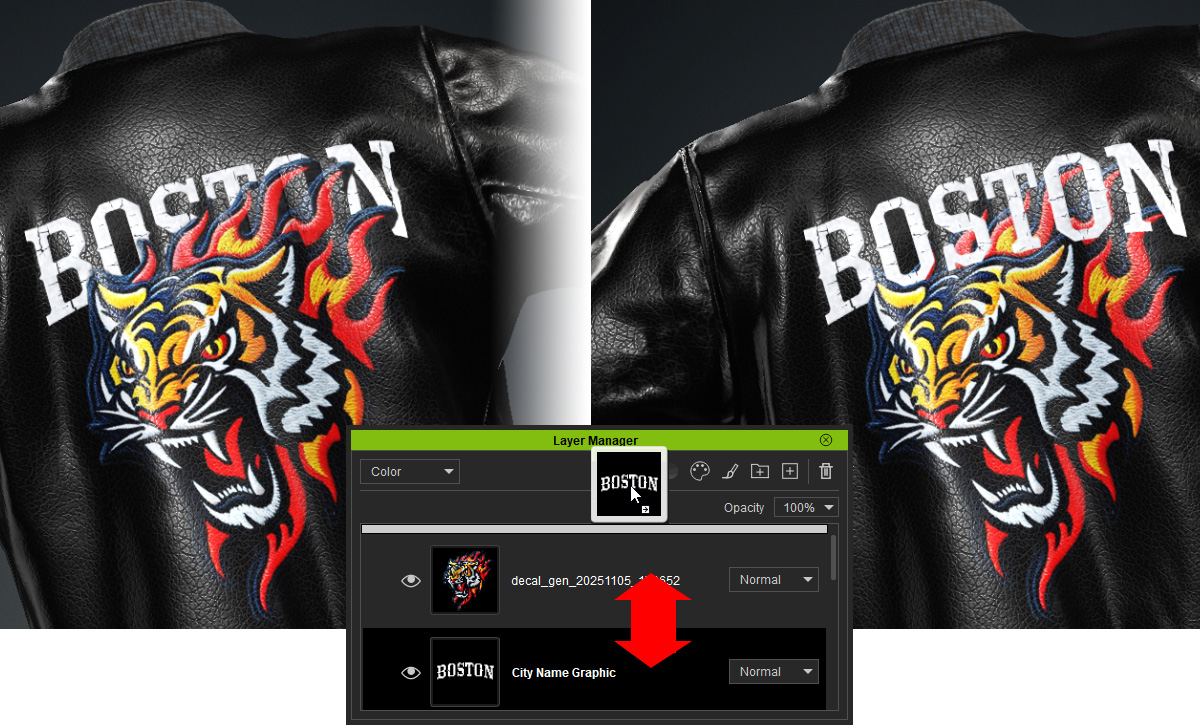
Drag layers up or down in the Layer Manager to rearrange their order.
This is useful for managing overlapping decals, stamps, or other layered textures.
Grouping Layers
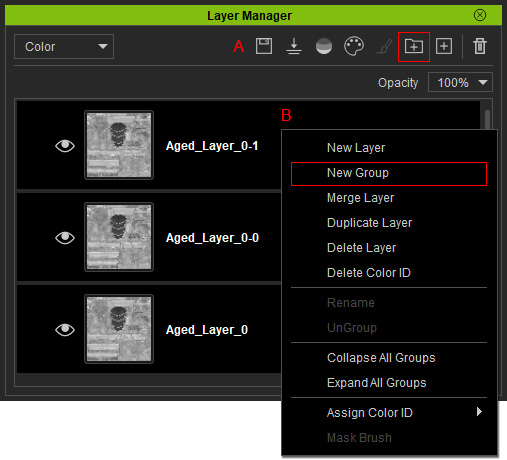
Group layers with similar features (such as patterns, decals, detailing, or aging effects) to organize and manage them effectively. Grouping also makes it easier to move multiple layers up or down, even among overlapping layers.
Select one or more layers, then click Group Layers on the Layer Manager toolbar or right-click and choose New Group to collect them under a single group.
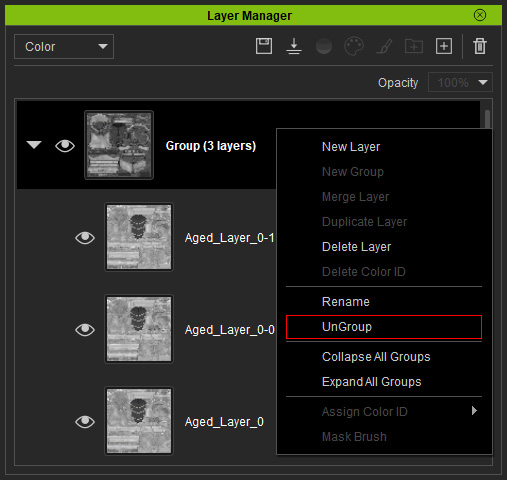
To remove a group, right-click it and select Ungroup; this deletes the group and moves the layers outside.
Merging Layers
Merge layers to reduce layer count and decrease file size.
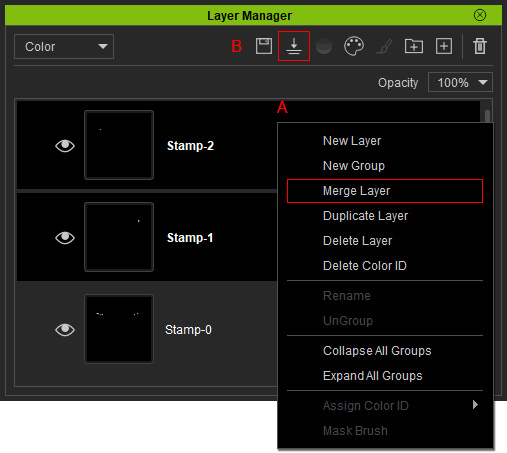
- To merge selected layers: Multi-select the layers, right-click, and choose Merge Layer from the context menu (A).
This is useful for layers with similar features (such as decals, stamps, or repeatedly generated details and aging effects) and also simplifies color distribution among the layers with the Pallet Sampler.
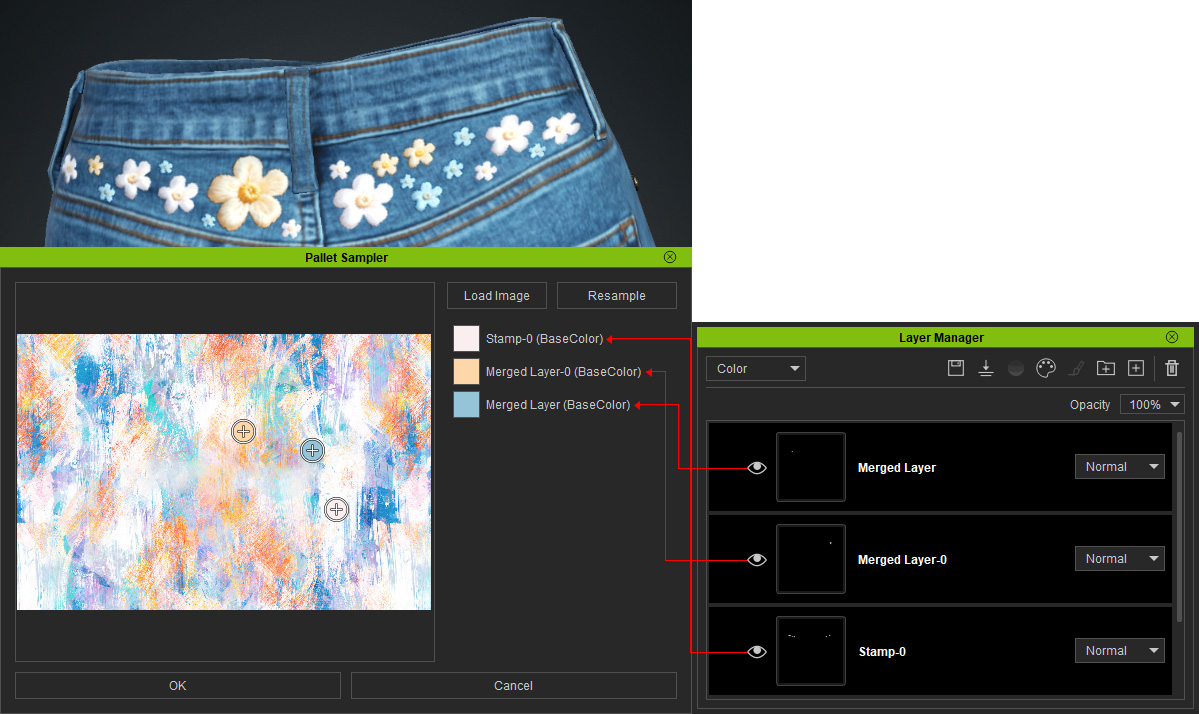
- To merge all layers for a lightweight version of the garment: Click Flatten Layers on the Layer Manager toolbar (B) to merge all layers into a single layer; thus optimizing for character animation.
