Sharing Custom Content
With the Content Manager, you can save custom content in a central directory and access it from both iClone and Character Creator.
This section covers animating a character in iClone, making modifications with Character Creator, and then animating the updated character in iClone.
-
In iClone, click on Content Manager > Menu > Settings.

-
The Settings panel will show with the default folder shared between applications.
Click the OK button.
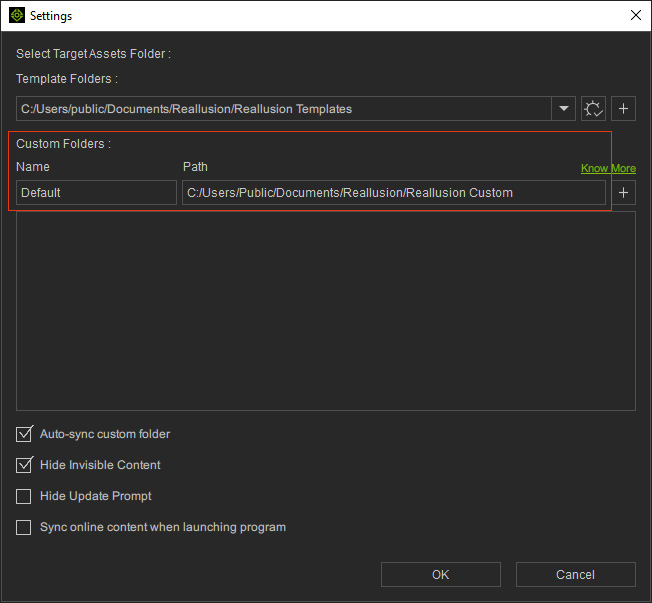
* You can add multiple Custom Folders here to save custom content in a shared directory. -
Apply a character and a motion from the Template tab.

-
Switch to the Custom tab.
Save the character under the Actor > Character category.

-
Right-click on the item to find it with Windows File Explorer.

-
Go to Character Creator.
You will find the character (iAvatar) appears under the same category, when the Auto-sync Custom Folder checkbox is enabled in the Settings panel.

* If the item doesn't appear automatically, click the Refresh button to manually sync with the custom content.
 -
Right-click on the item to confirm it with Windows File Explorer.
iClone and Character Creator can now share the custom content.
-
Apply the character.

-
Change the clothes with template content.

-
Reshape the character with morph sliders.

-
Save the character under the Actor > Character category node.

-
Right-click on the item to confirm it with Windows File Explorer.

 ccAvatar vs. iAvatar:
The content file extension starts with "cc" such as ccAvatar, ccHair or ccCloth indicates the content is editable with dynamic settings (file size is comparatively larger), while the content file extension starts with "i" such as iAvatar, iHair or iCloth indicates the content is flattened, not editable (file size is comparatively smaller).
-
Back in iClone, you will find the character (ccAvatar) appears under the same category node, when the Auto-sync Custom Folder checkbox is enabled in the Settings panel.

* If the item doesn't appear automatically, click the Refresh button to manually sync with the custom content. -
Replace the current character (iAvatar) with the this one (ccAvatar).

- Playback to observe the animation.

