Enhancing Spatial Impression with Blur Effect
(New for v7.1)
In order to increase the spatial impression of your project like the photos taking in the real world, you can use the DOF effects. By adjusting the blurriness of different (far and near) regions, the impression can be enhanced drastically.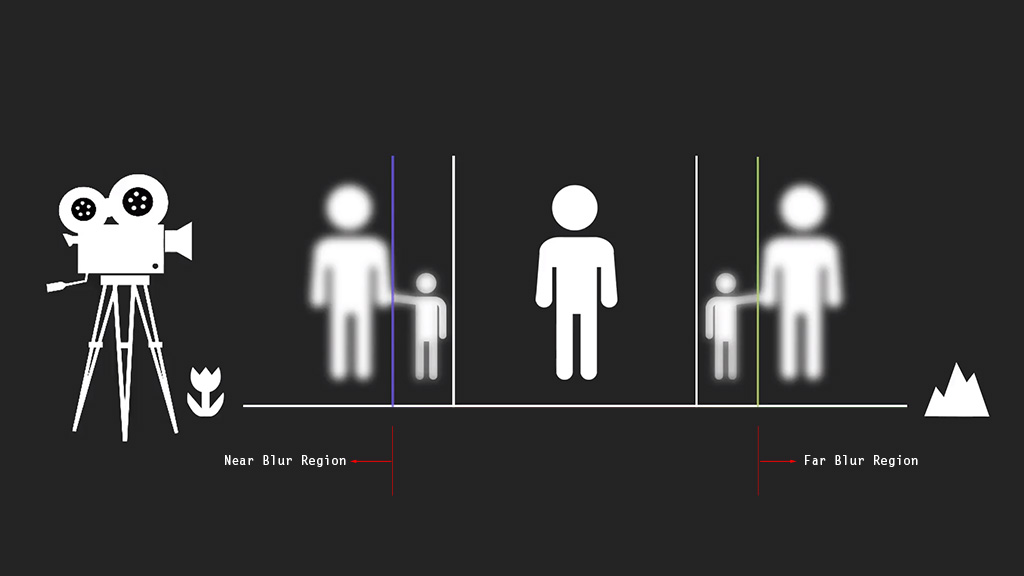
Given a project as shown below: the depth of the scene is not obvious
due to the angle of the camera.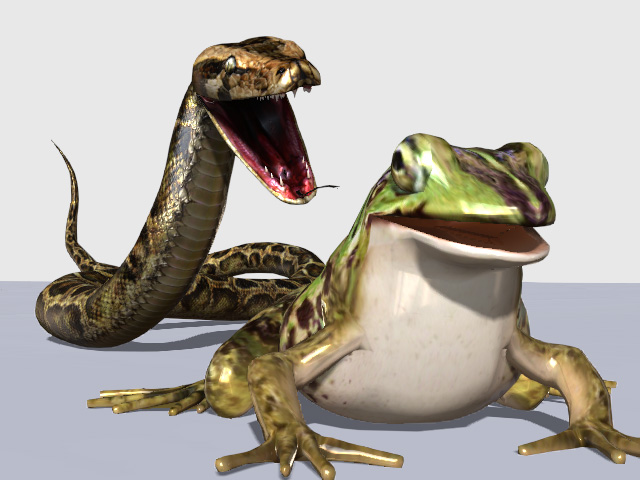
You can activate the DOF effect and set the Focus Distance
with Pick Target or manually enter a value: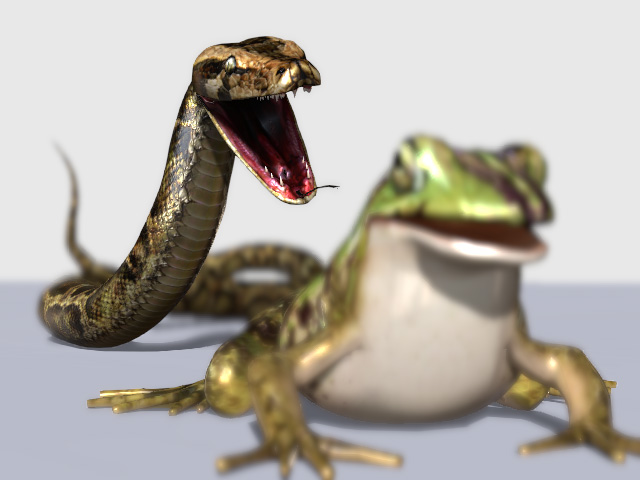
Setting Blur Strength
The Blur Strength can be used to increase or decrease the blurriness for the de-focused region.
- Make sure the DOF effect is turned on as shown in the previous illustration.
- Select the camera whose DOF is turned on. Open the Modify Panel.
- Scroll to the Depth of Field section; in the Blur Settings group, drag the Near Blur Strength slider
around.
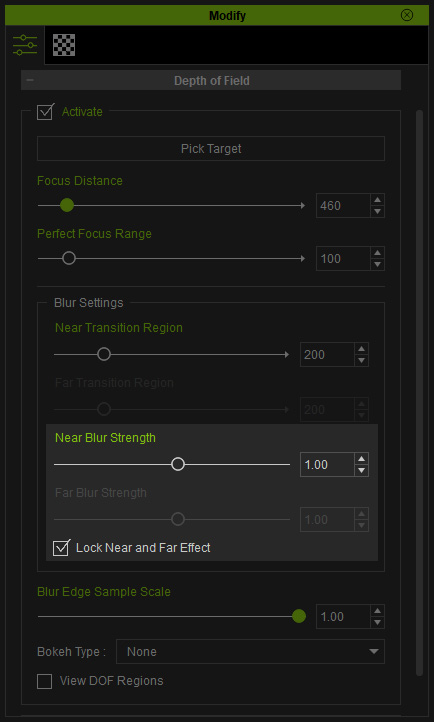
Because the Lock Near and Far Effect checkbox is activated, the Far Blur Strength is disabled and its value will be auto-set along with the value of Near Blur Strength. - If you want to respectively modify the blurriness for the near and far blur regions, then deactivate the Lock Near and Far Effect checkbox.
- Respectively adjust the value for the Near Blur Strength and Far Blur Strength.
In this case, the Far Blur Strength is increased to make the object in this region more blurry while the Near Blur Strength is decreased to show the objects within this region more clearly.
