Sharing Identical Textures in Materials by Linkage Feature
An object in iClone can carry multiple materials with a number of textures assigned. Previously, iClone made no attempt to optimize identical texture across the materials of the object and materials in the scene. This had the negative side-effect of file bloat along with the added hassle of having to change every texture individually when one wanted to make the same edit across the board.
Concept
Take the Diffuse textures of the bed prop shown below as an example, the texture and the materials relations are:
You must edit the texture one by one in order to have the same appearance for the sub-meshes of the object:
By linking all of the identical textures, only one image will be used as the source for
all of the linked Diffuse channels: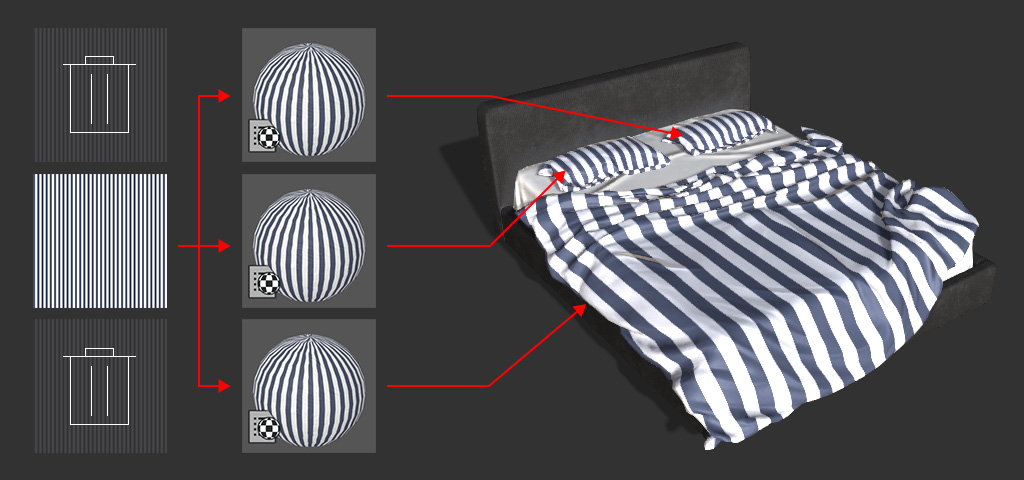
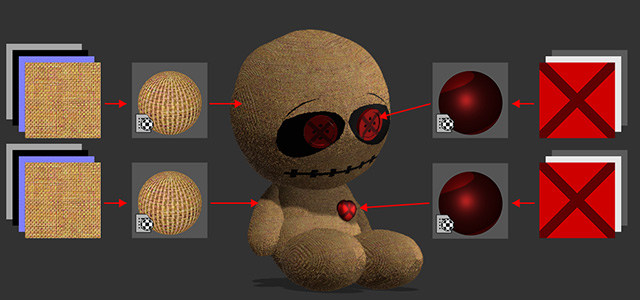
You only need to edit one texture to
propagate the changes to all of the sub-meshes:
Link Textures - Object Level
-
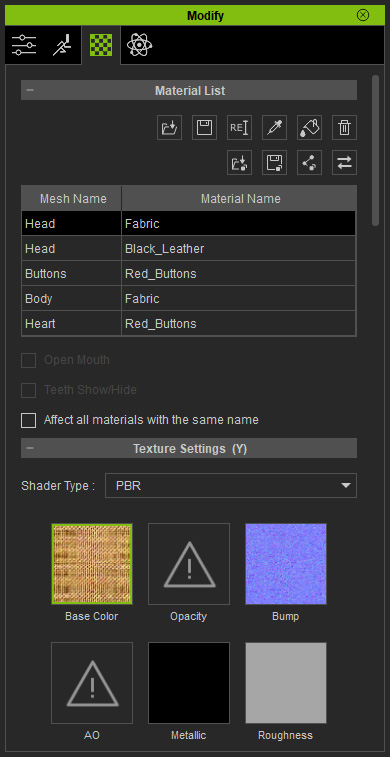
Apply a prop with multiple materials, and these materials are assigned with individual but identical textures (take the Base Color Channel as an example).
-
Select the prop and pick any of the materials in the Material List.
-
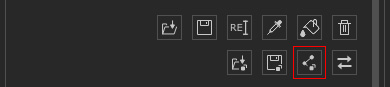
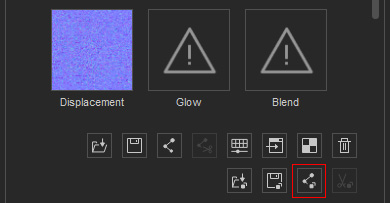
Click the Auto-link All Object Texture button.
iClone then scans this prop, finds the identical textures in all the channels, keeps only one and removes the rest, and links the channels together.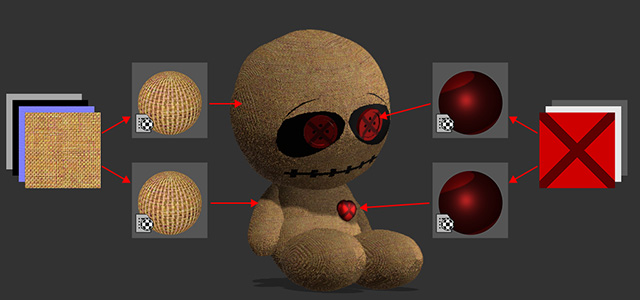
- Check out the linked channel image. You will see a link icon at the
bottom left corner of the channel slot.
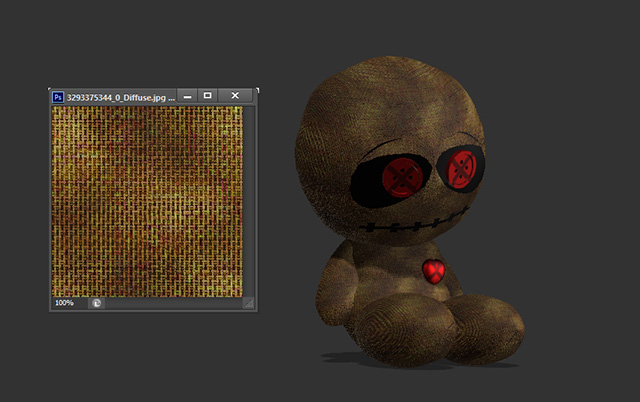
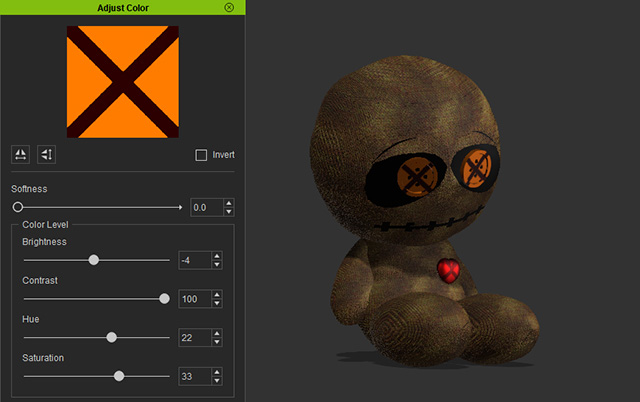
- When you adjust the texture by Adjust Color panel or any image editor, the materials with the liked textures will be synchronously adjusted.
Adjust Color panel:
Image Editor: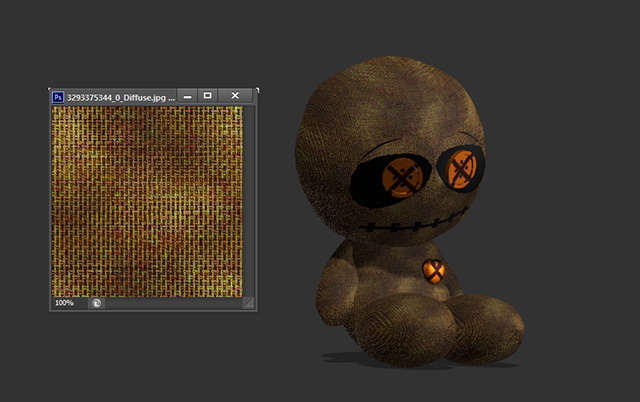
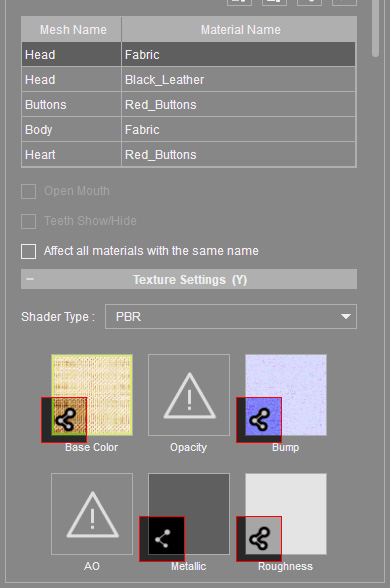
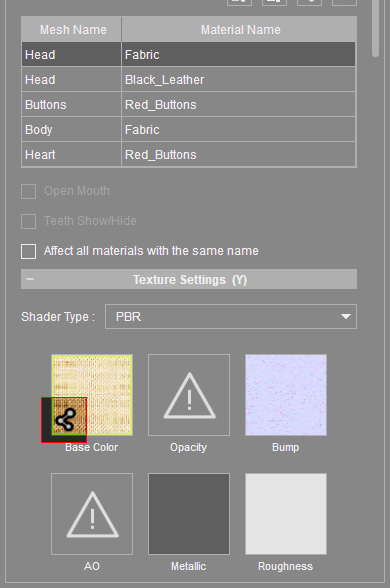
Link Textures - Material Level
-
Apply a prop with multiple materials, and these materials are assigned with individual but identical textures.
-
Select the prop and pick the materials you want to do the texture-linkage method in the Material List, in this case, the Fabric material.
-
Click the Auto-link All Material Textures button under the channels.
iClone then keeps only one of the identical textures and removes the rest, then links the channels together.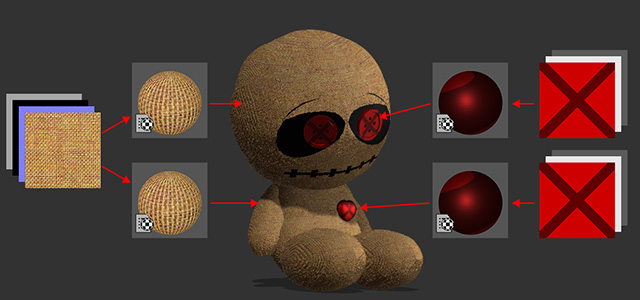
- Check out the linked channel image. You will see a link icon at the
bottom left corner of the channel slot.
- When you modify the texture with the Adjust Color panel or any image editor, the materials with the liked textures will be synchronously adjusted.
- However, the textures that are not selected and linked can only
be edited separately.
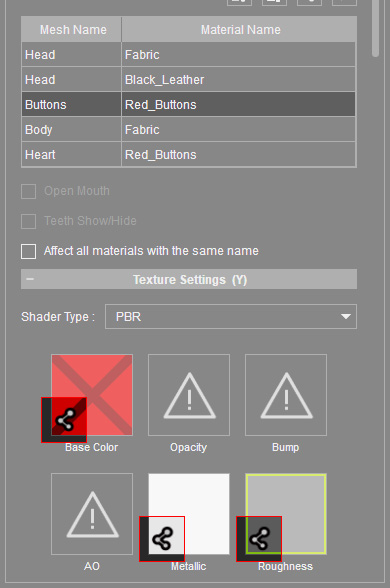
Link Textures - Channel Level
In iClone, you can have specific channel and its texture linked without affecting the rest of the textures in other channels.
-
Apply a prop with multiple materials, and these materials are assigned with individual but identical textures.
-
Select the prop and pick the target materials in which a texture you want to make it linked (in this example, the Base Color texture for the head's Fabric material.
-
Click the Auto-link Selected Texture button.
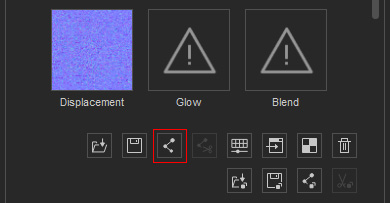
iClone then links only this texture.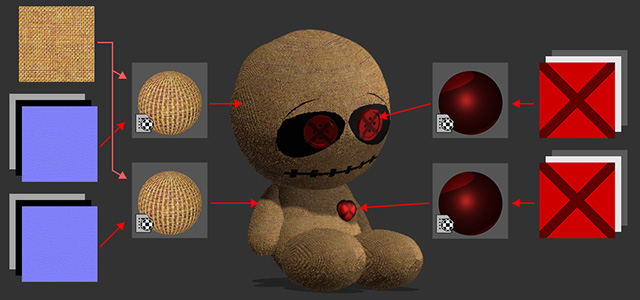
- Check out the linked channel image. You will see a link icon at the
bottom left corner of the channel slot.
- When you adjust the linked texture by Adjust Color panel or any image editor, the materials with the liked textures will be adjusted together.
Take the Adjust Color panel as an example:
- The textures no linked can be separately adjusted.
Take the Image Editor as an example:
