Exporting Selected Objects from CTA
In Cartoon Animator,
you can export selected objects from a CTA project for post-production in Adobe After Effects.
This smart video pipeline utilizes the Export to After Effects feature to generate object-size image sequences or transparent videos by objects,
and then you can import the CTA projects to AE with the installed Cartoon Animator - AE Script panel.
( Watch Tutorial - Export CTA Project to After Effects )

Follow the steps below to export your CTA project as a package. You can choose which objects to be packed for further editing in Adobe After Effects.
- Create a project with some objects in Cartoon Animator.
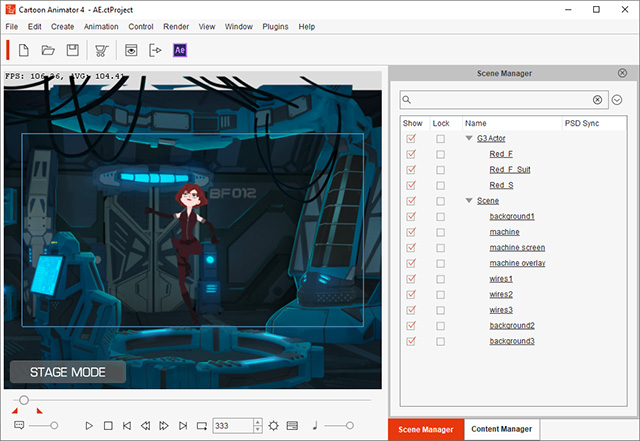
- Click the Export to After Effects button on the Project Toolbar.

Alternatively, execute the Render >> Export to After Effects command from the Main Menu.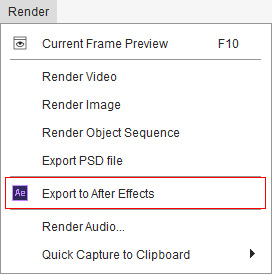
- The Export to After Effects panel will open.
Make sure you have installed the AE Script for importing CTA projets to AE.
- In the Select Object(s) section, choose the desired objects and the media type you wish to export (PNG Sequence or MOV Video).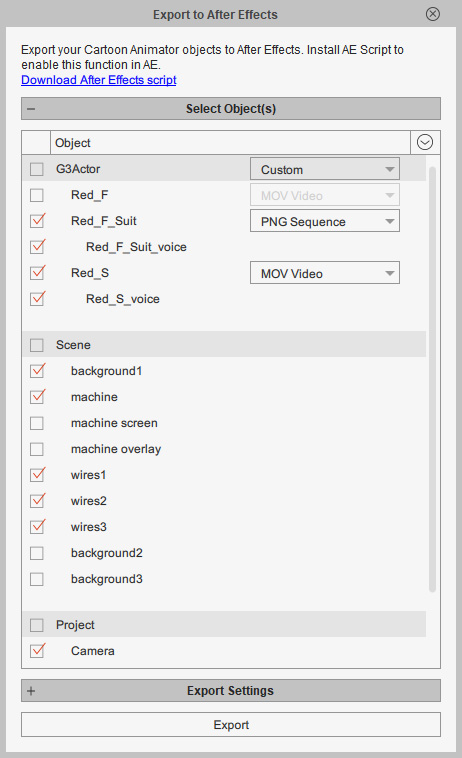
- In the Export Settings section, decide the image resolution, frame size, frame rate, and export range.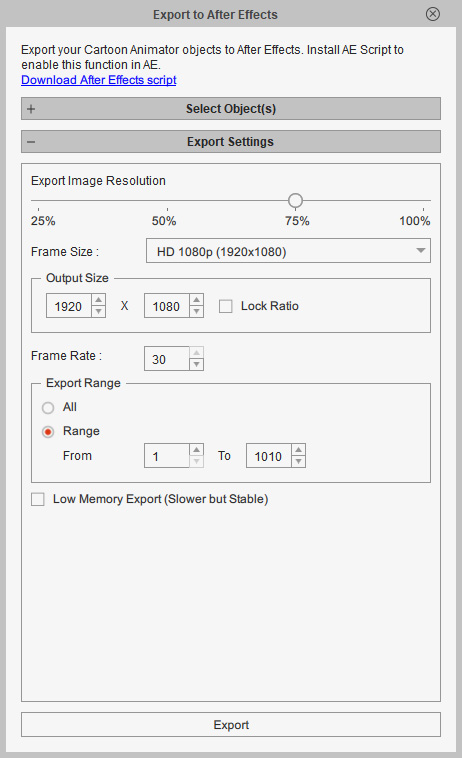
- Click the Export button and browse to a location where you want to save the CTA package.
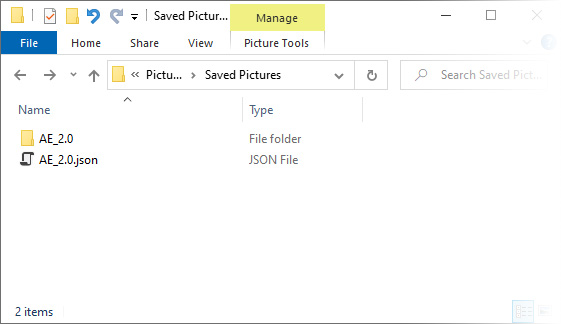
Give a name to the CTA package and meanwhile the JOSN file to be created for importing the CTA project to After Effects (AE_2.0 in this case).
When the rendering is done,
the browser window will show with the CTA package along with the JOSN file.
- Note that when the motion offset of an object is detected to exceed the maximum MOV output size (4096 x 4096),
a message will pop up as shown.
You can review the excluded objects through the link on it,
before clicking OK to generate the PNG image sequences instead of a MOV video.
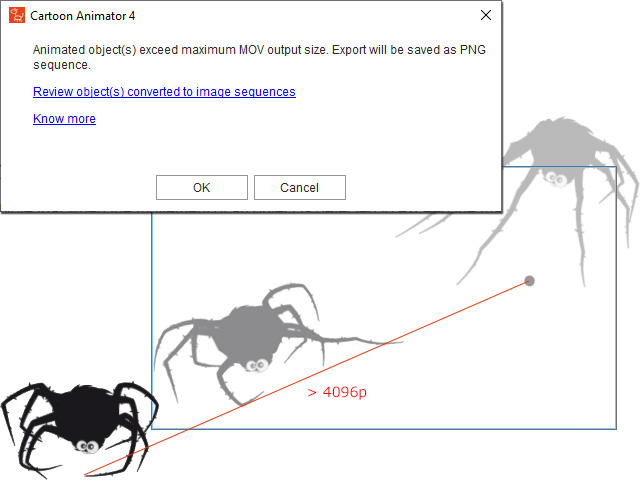
The motion offset of an object, or between an object and its Sprite element or attached accessory exceed 4096 pixels.
- Note that when the motion offset of an object is detected to exceed the maximum MOV output size (4096 x 4096),
a message will pop up as shown.
You can review the excluded objects through the link on it,
before clicking OK to generate the PNG image sequences instead of a MOV video.
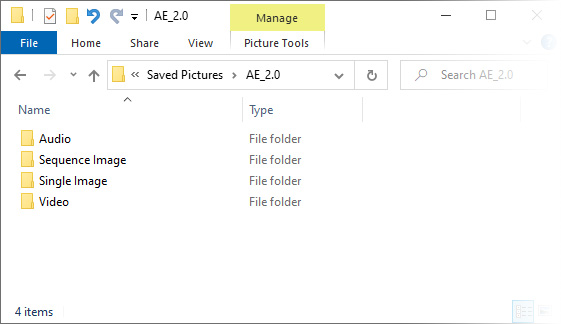
- In the CTA package folder, the exported objects are categorized into corresponding folders:
Audio, Sequence Image, Single Image, and Video.
Please refer to the What's inside the CTA Package section to locate your objects.
As long as you keep identical Export Settings in the Export to After Effects panel, you can add any objects to a CTA Package which you have exported. You can also modify an existing object by renaming the modified object and exporting the project again.
Given that you have exported the character to PNG Sequence for the first time.
After adding animation to the existing character,
you can export it again by selecting MOV Video in order to update the animation in AE.
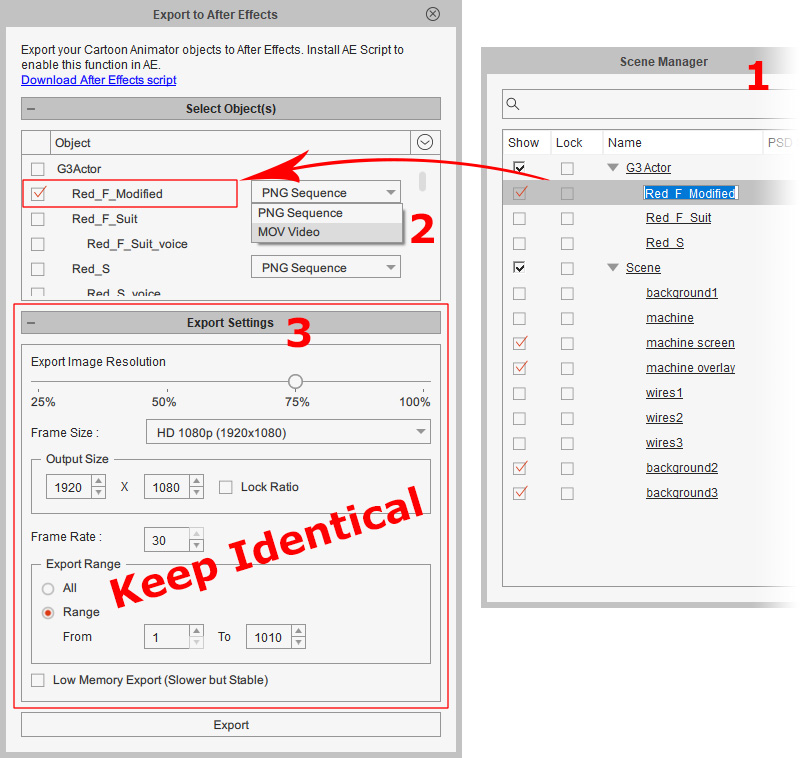
- Rename the modified object by selecting the object in the Scene Manager and press F2. The object name in the Export to After Effects will be synchronized.
- Select the new object(s) which you wish to add to the CTA Package. Then choose the media type from the drop-down list beside the object (MOV Video in this case).
- Make sure the Export Settings, including the image resolution, frame size, frame rate, export range and so on are identical to your last output to the target CTA Package.
- Click Export, and then choose to overwrite the previous JSON file (AE_2.0 in this case).

A confirmation message will show. Click Yes.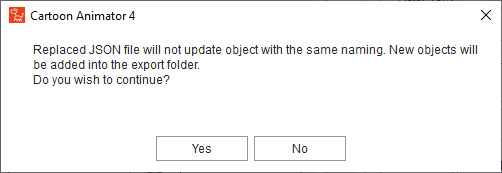
- The JSON file will be updated, and the additional objects will output in corresponding folders. After importing the CTA project (JSON) to AE again, manually adjust the layer order for the new objects. The Transformation keys from the PNG sequenced images exported for the first time can be copy-and-paste to the newly imported MOV video to update the CTA animation in AE.
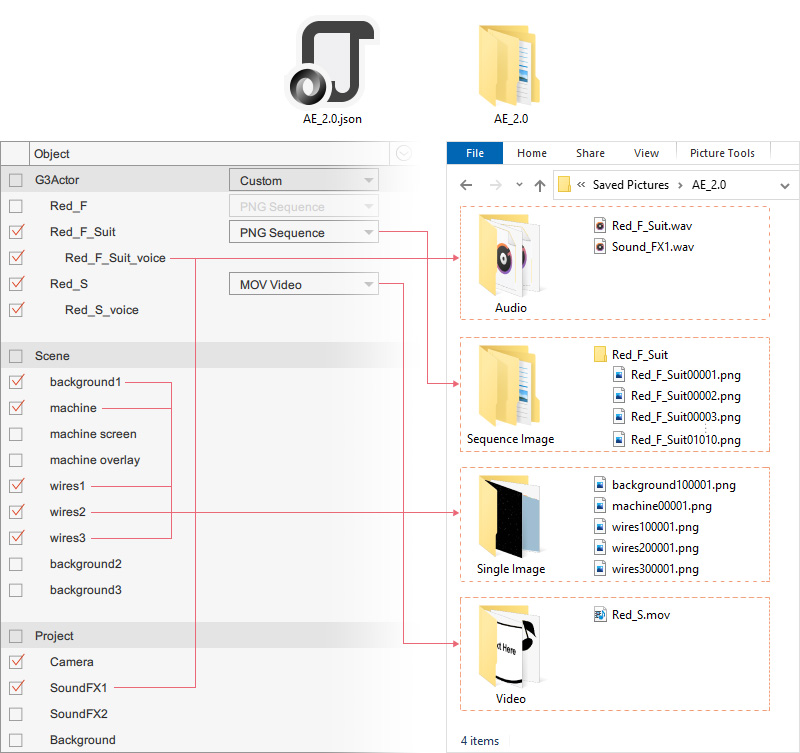
The JSON file with the same name outside the CTA Package folder, allows you to represent the identical scene structure in Adobe After Effects. You will need this JSON file when importing CTA projects via the Cartoon Animator - AE Script panel in Adobe After Effects. It gives essential information on the following:
- The output settings in Export to After Effects panel: image resolution, frame size, frame rate, export range, etc.
- Project and object information: camera movement keys, object naming, depth, layer order and transformation keys such as position, rotation and scale.
The objects inside the CTA package folder are categorized in four corresponding folders: Audio, Sequence Image, Single Image, and Video.
The audio data from the project Sound FX1, Sound FX2, Music tracks will be output to this folder.
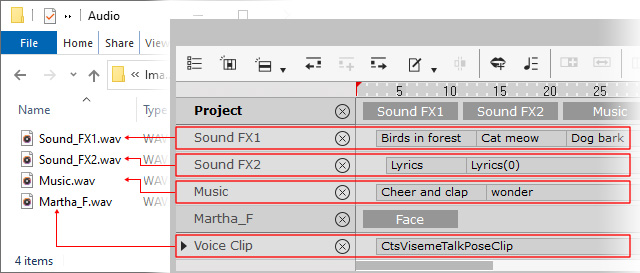
- Clips on the each track under the Project main track will be output to one media file in WAV format, named after the track.
- Object voice will also be output to this folder when you choose PNG Sequence for export. For example, a character's voice from the Voice Clip track will be output to one media file in WAV format, named after the object.
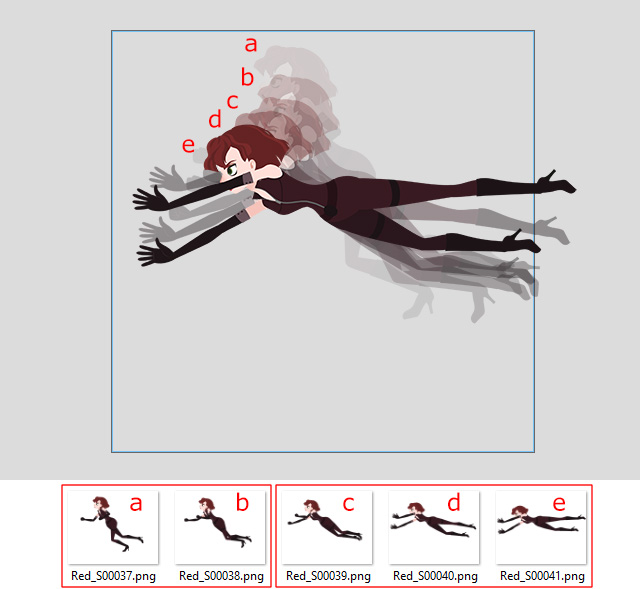
Animated objects of the PNG Sequence option will be generated to their respective folders under this folder. They can be Actor (along with its accessories), Prop, Scene Element, Image Layer, Text Bubble, Effect, or Background.
The rendered image sequences will be the original size of the objects and fit their maximum bounding for the motions.
That is, they are not limited by the Safe Area as shown.
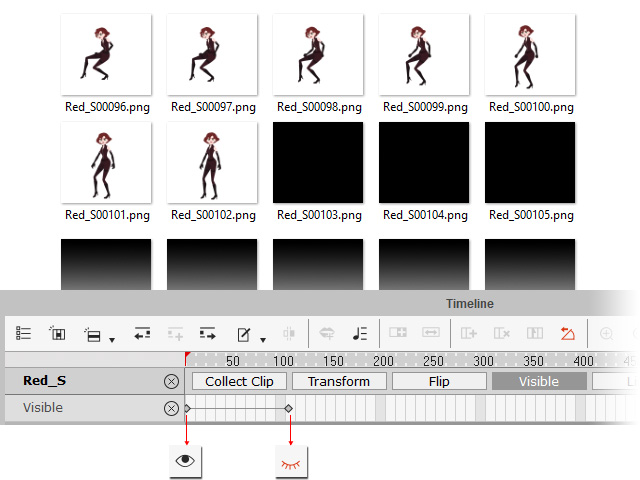
If the object is set to invisible in certain time frames,
the transparent PNG image sequences will be output in black,
which indicates the alpha channel at 0, as shown.
Static background, objects, or objects with transformation keys only can be output to this folder.
The rendered image sequences will be the original size of the objects.

- The Prop, Scene Element, Image Layer, Text Bubble or Effect without animation or animated with Transformation keys (on the Transform track) only will be output as a single image,
because the Transformation data (Position, Rotation, Scale) can be recorded in an extra JSON file and brought to the object layer properties in AE.
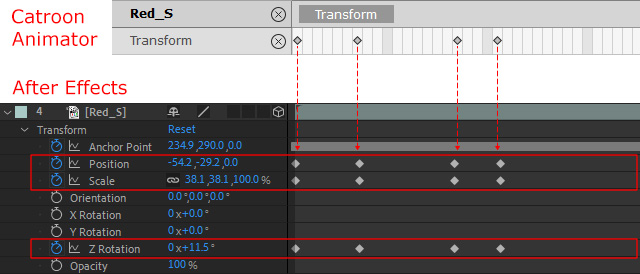
- The background image may come from the Scene > Background library,
or the preset background color or image in the Project Settings panel.
If there is no background image applied, the default background, grey as shown in the viewport, will be generated in PNG format.
 Note:
Note:The background media can be video from drag-and-dropping. When you choose PNG Sequence for the export, image sequences will be output to the Sequence Image folder. When you choose MOV for the export, a video will be output to the Video folder.
Animated objects of the MOV Video option will be exported to individual transparent videos in this folder. They can be Actor (along with its accessories), Prop, Scene Element, Image Layer, Text Bubble, Effect, or Background.
The rendered videos will be the original size of the objects and fit their maximum bounding for the motions. That is, they are not limited by the Safe Area.
The object animation in the viewport. | The object video presents complete animation at the original object size. |
- When the movement of an object exceeds the maximum MOV output size (4096 x 4096), the PNG image sequences will be generated in the Sequence Image folder instead of a MOV Video in this folder.
- The object video will contain the voice from an object, if you select to export the object voice.
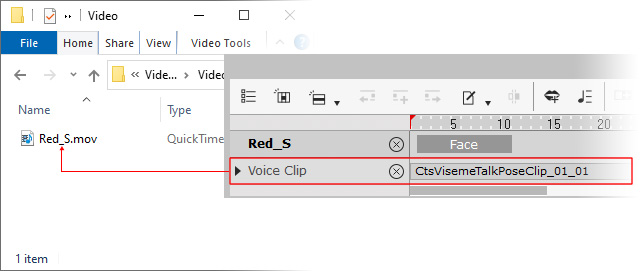
For example, a character's voice on the Voice Clip track is contained in the generated object video.
