Creating Props of Official SVG Hierarchical Structures
You can combine parts or sprites into one single prop, and then arrange their layer orders to create animatable hierarchical objects. By following the intuitive SVG layer naming rules, you can set object hierarchy for structured animation.
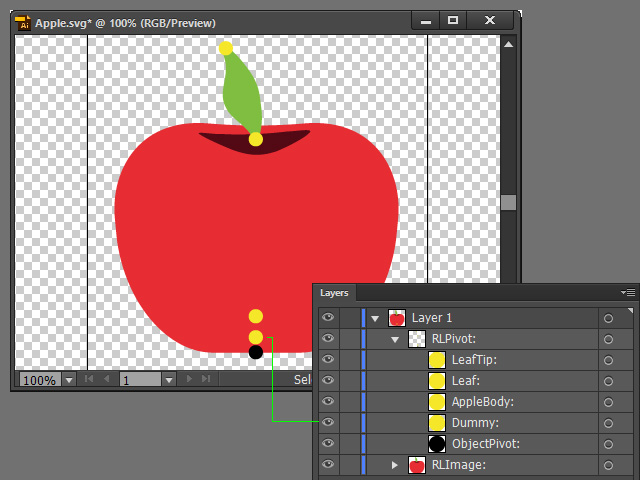
Take the following SVG project as an example. There are two sub-group layers under the Layer 1.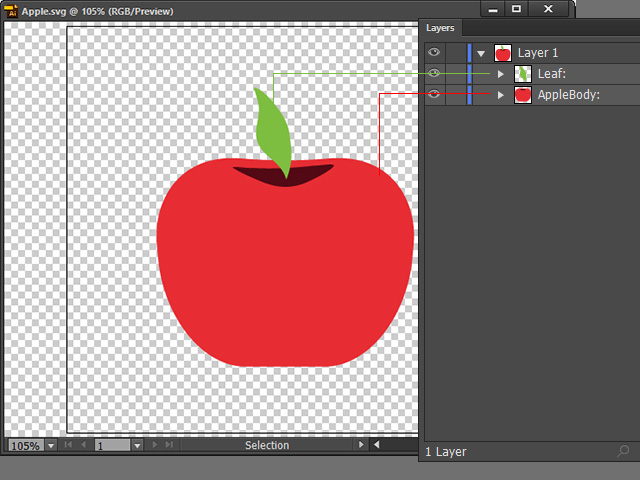
- In your SVG project file, create two sub-group layers with the standard names: "RLPivot:" and "RLImage:" under the "Layer 1". Move the graphic sub-group layers into the "RL_Image" folder. Please note that the colon following the name string is essential and cannot be omitted.
- RLPivot: - This group will be used to set up the pivot of the corresponding graphic layers.
- RLImage: - This group will be used to house all graphic layers that compose a prop.
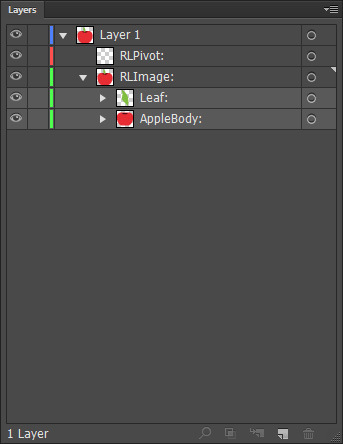
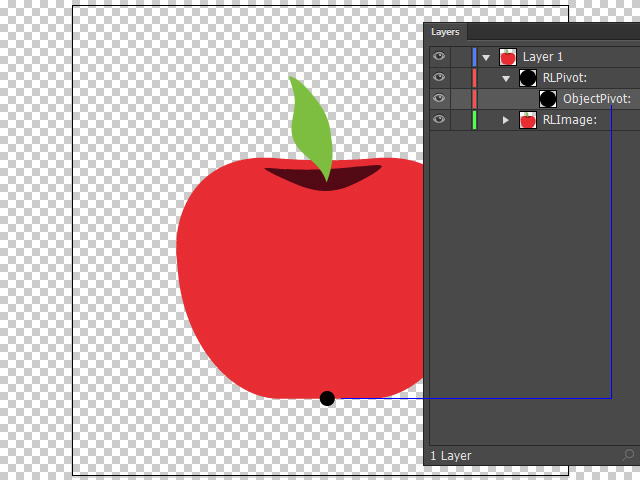
- Inside the "RLPivot:" group, create a new image layer and rename it as "ObjectPivot:". Add any image representing the pivot into it. Reposition the graphic in the layer and it will be taken as the pivot for the entire prop.
- Create other layers with custom graphics. Rename the layers to the same names under the "RLImage:" group. The pivot of the graphics in the layers will be taken as the centers of the components (Sprites).
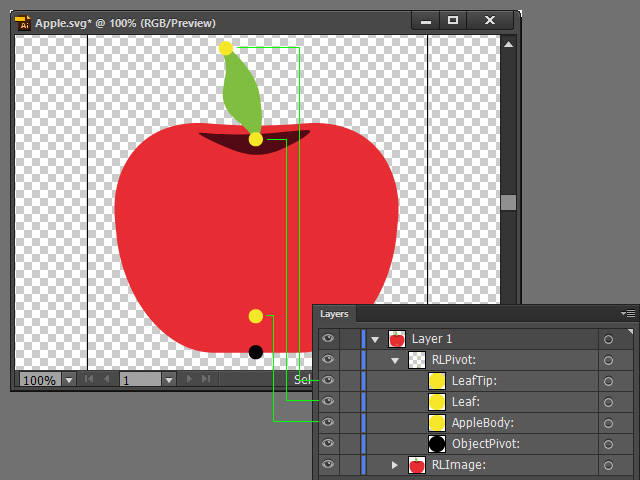
- Also, create another layer with the graphic to define the root of the bone chain, rename it as "Dummy:".
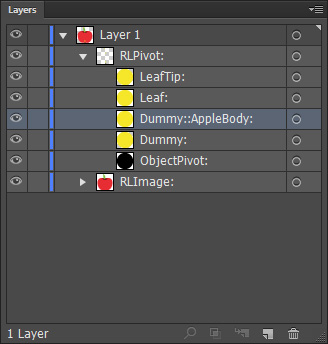
The Benefits of Dummy:- Considered as the root grouping for all the bone chains and sprites.
- Transforming the Dummy in Cartoon Animator can adjust all the bone chains and the sprites at once.
- Define the layer of the prop (in this case, "AppleBody:") as the first level by renaming it to "Dummy::AppleBody:".
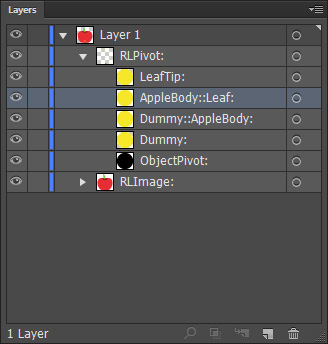
- Assign the graphic layer that connect to the "AppleBody:" for the second level (in this case, the "Leaf:"). Prefix the layer name to "AppleBody::Leaf:".
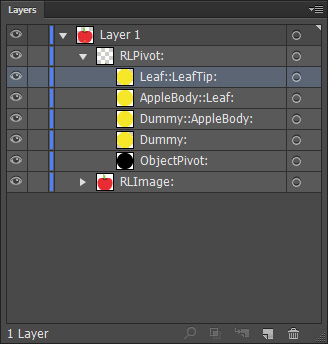
- Assign the graphic layer that is designed for the third level (in this case, "LeafTip:"). Prefix the layer's name to "Leaf::LeafTip:".
- Save the document to a file in SVG format.
- Drag and drop the SVG file to the viewport of Cartoon Animator. It will be converted into one object named "Apple" under the "Prop" type.
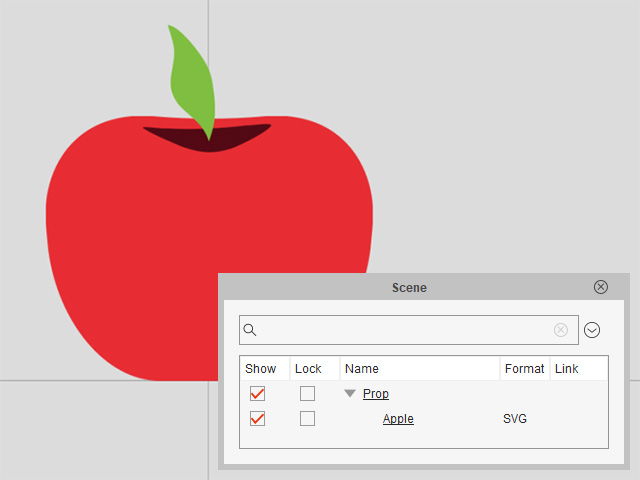
- Select the prop object and enter the Composer mode, in the Scene Manager, you will see the hierarchy of the prop:
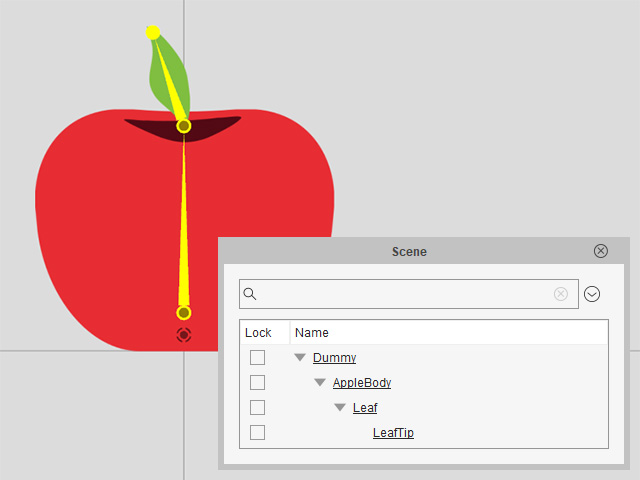
- 1st Level: AppleBody
- 2nd Level: Leaf
- 3rd Level: LeafTip
-
After dragging the SVG file into Cartoon Animator, you can animate the multi-part prop with the Prop Key Editor.
Assign each sprite part with unique animations, and stagger their playback time.
Refer to the following sections for more information: