Image Section
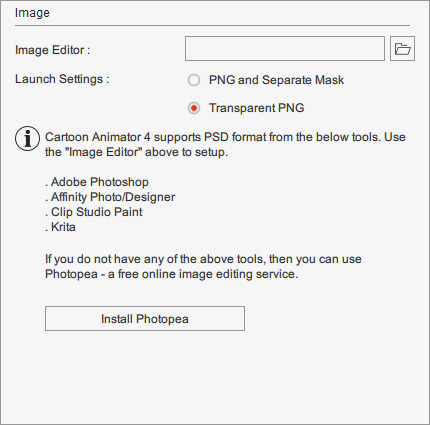
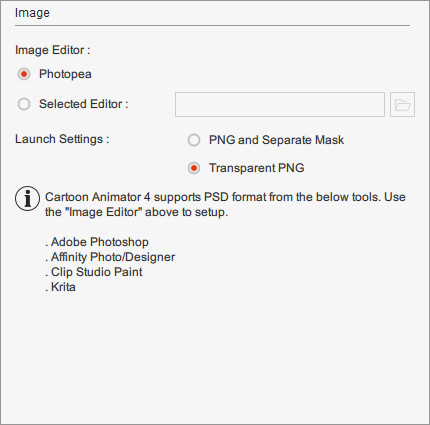
The interface will be a bit different in the Image Editor settings after you've installed the free Photopea plugin.
|
|
|
Before installing the Photopea plugin. |
After installing the Photopea plugin. |
You can select an external application for use as an image editor with Cartoon Animator. Images edited using the "Launch" feature of the Cartoon Animator material editor will open with the image editor selected in this section.
-
Click the Open File
 button and browse to the executable
file of a suitable image editor. (e.g. Adobe Photoshop)
button and browse to the executable
file of a suitable image editor. (e.g. Adobe Photoshop)
Alternatively, you can also click the Launch PSD Editor button on the Add-on Tool Bar of the Main window.

Images edited using the "Launch" feature of the Cartoon Animator material editor will open with the image editor selected in this section.
- Selected Editor:
You can select an application for use as an image editor with Cartoon Animator.
Click the Open File button and browse to the executable
file of a suitable image editor. (e.g. Adobe Photoshop)
Alternatively, you can also click the Launch PSD Editor button on the Add-on Tool Bar of the Main window.
When you click the  Launch to External Image Editor button in the Composer to
edit the image-based elements in a sprite,
you are allowed to decide the way the image is opened in the external editor.
Launch to External Image Editor button in the Composer to
edit the image-based elements in a sprite,
you are allowed to decide the way the image is opened in the external editor.
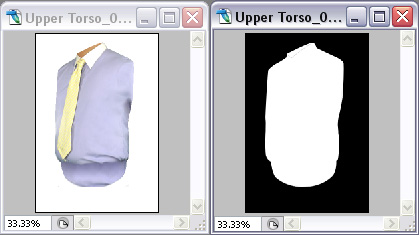
- PNG and Separate Mask: Choose this radio button to open the image as two PNG files.
One is the original image and the other is a black-and-white PNG that depicts the opacity mask.
- Transparent PNG: Choose this radio button to open the image as
single PNG file with transparent background (alpha channel).