Creating Props with PSD Editor (New for v4.1) 
By working with image editors, you can turn any PSD image into a custom prop in Cartoon Animator. The converted prop can then be animated with Elastic Motions, Transformation or FFD effects, or Sprite switch animations.
The following steps will describe how to create a prop with a PSD editor,
and then bring it into Cartoon Animator for animation.
-
Given that a scene is created in the view port as shown.
Now you want add a moon prop to this scene to make the moon rise from the back of the mountain.

- Click the custom PSD editor button (in this case, Photoshop) on the toolbar,
and choose either of the import options in the following dialog.
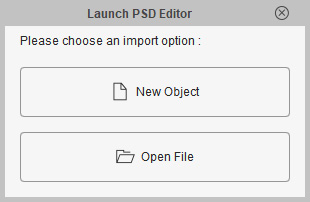
- New Object: This option will invoke the custom PSD editor with a blank new file.
- Open File: This option will open the file browser for you to choose an existing PSD file and then load it into the custom PSD editor.
 Note:
Note:- If you want to create a sync relationship with Cartoon Animator, you have to click the Open File option in this dialog.
- Alternatively, you can drag the PSD file to the working area of Cartoon Animator. If you want to continue editing the PSD file, you can launch it to an image editor.
- Click the Open File button,
and browse to the prepared image, named Moon in this case, for the PSD editor.
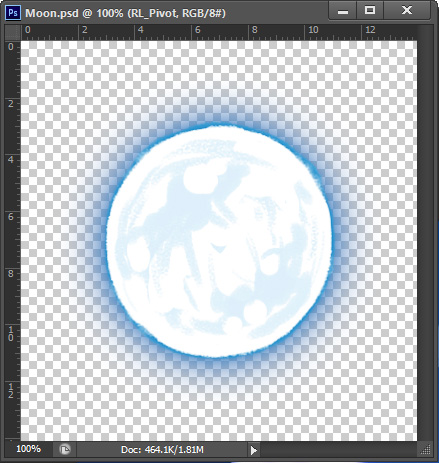
- Make your modifications and save the PSD file.
Press the hot keys: Ctrl + S in the PSD editor to send the image to Cartoon Animator.
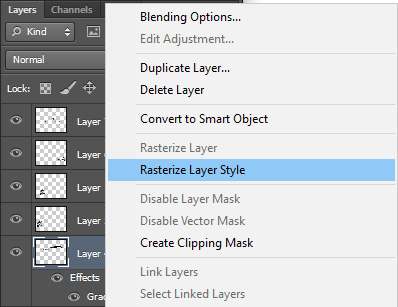
Note:
Please make sure that you Rasterize the image layer before saving the project in order for the effects applied by your image editor to be flatten onto the layer. Otherwise, the effects will be ignored in Cartoon Animator.
-
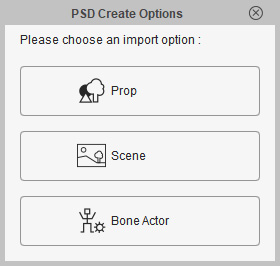
Return to Cartoon Animator and click the Prop button in the dialog.
-
The PSD image will then be converted to a prop, synchronizing with the image editor
You can find this new prop item named Moon under the Prop group in the Scene Manager.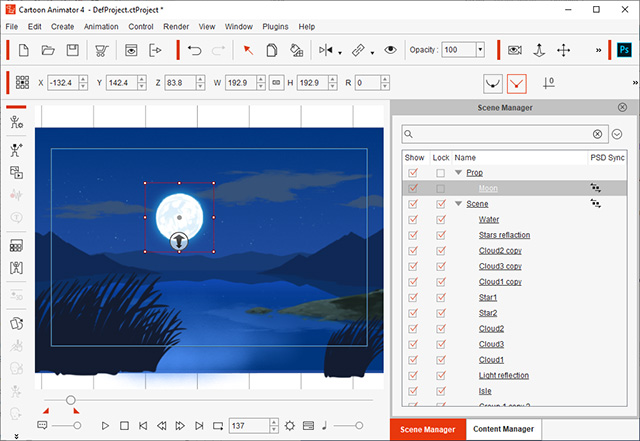 Note:
Note:- The PSD Sync
 icon indicates that this object is currently synced to its PSD project in the image editor.
Please refer to the Managing Multiple Projects in PSD Editor section for more information.
icon indicates that this object is currently synced to its PSD project in the image editor.
Please refer to the Managing Multiple Projects in PSD Editor section for more information.
- You can add this prop into the custom Prop library of Content Manager for further usage.
- The PSD Sync
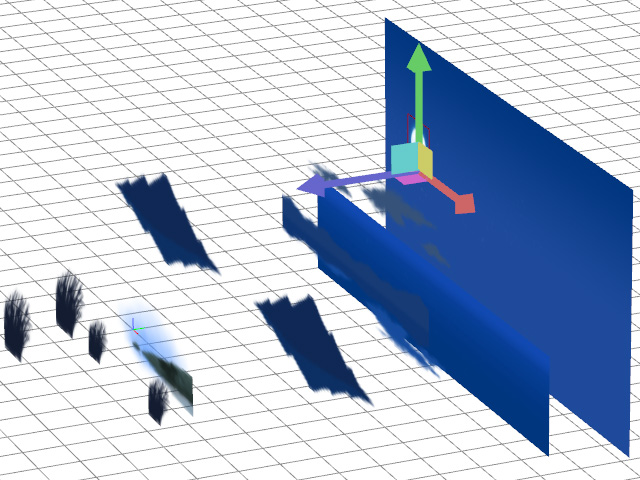
- Click the 3D View
 button on the Camera Toolbar to adjust the Z-depth layer of the prop in this scene.
-
In the initial time frame,
click the
 Button on the General Toolbar to set an Invisible key to hide the moon.
-
Go to a later time frame,
click the
 Button on the General Toolbar to set a Visible key to show the moon.
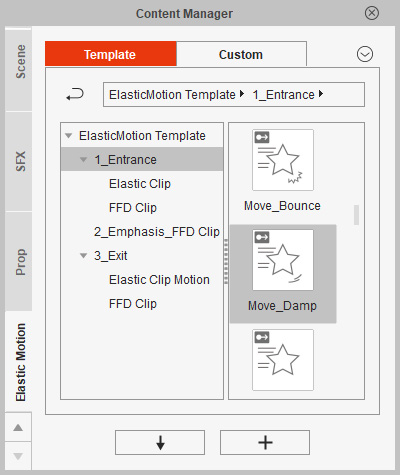
- Apply Elastic Motion effects to the prop for an entrance style.
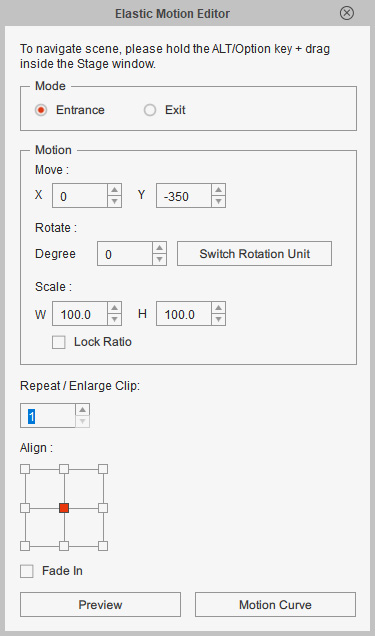
- Fine tune the applied elastic motion clip in the Elastic Motion Editor panel.
In this case, adjust the X and Y parameters to change the direction of moon rise.
-
Playback to view the prop animation.