Adjusting Bone Hands (New for v4.4) 

Except the Bone Hand characters (with thumbnails marked with a bone ![]() icon),
the embedded G3 or G3 360 Human characters are generally designed with Sprite Hand.
Therefore, in order to perform the Bone Hand animation from the original 3D motions,
you will need to apply a Bone Hand onto them before deploying the Perform templates that are converted from 3D motions.
icon),
the embedded G3 or G3 360 Human characters are generally designed with Sprite Hand.
Therefore, in order to perform the Bone Hand animation from the original 3D motions,
you will need to apply a Bone Hand onto them before deploying the Perform templates that are converted from 3D motions.
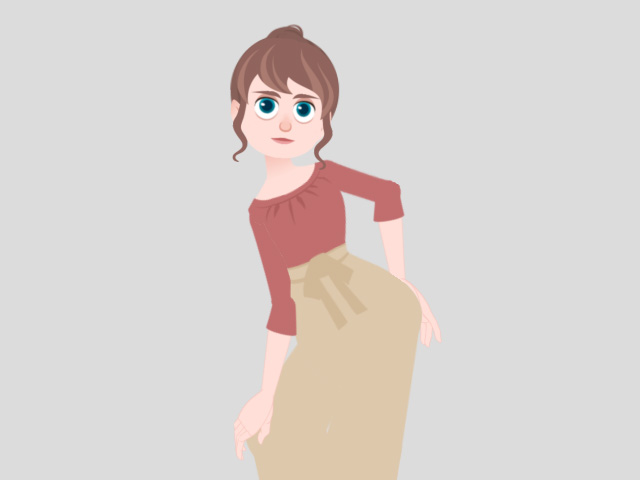
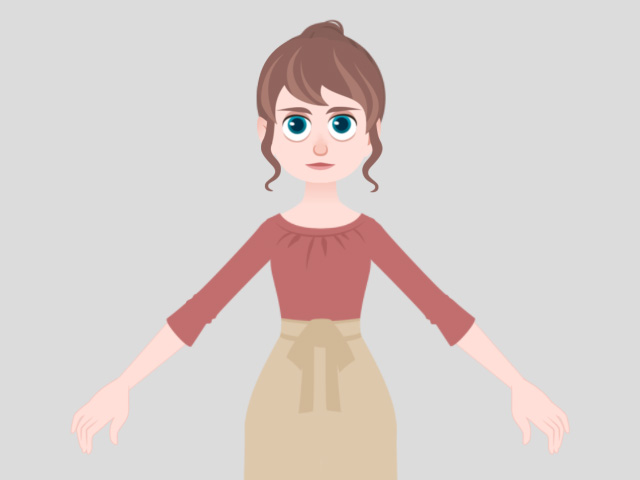
| Perform template applied on the default Sprite Hand. | Perform template applied on the ready Bond Hand. |
In addition, because these Perform templates are performed by 3D Motion Dummies, which are made of Bone Hand templates with special palm facing and hand flip direction for 3D motions, you will need to adjust a character's Bone Hand after applying these Perform templates.
| The original Bond Hand animation in the Perform template. | The modified Bond Hand animation in the Perform template. |
Follow the steps below to apply Bone Hand to a character before applying the Perform templates, and then adjust a character's Bone Hand after applying the Perform templates.
- Apply a G3 Human character, like this "Martha Front":
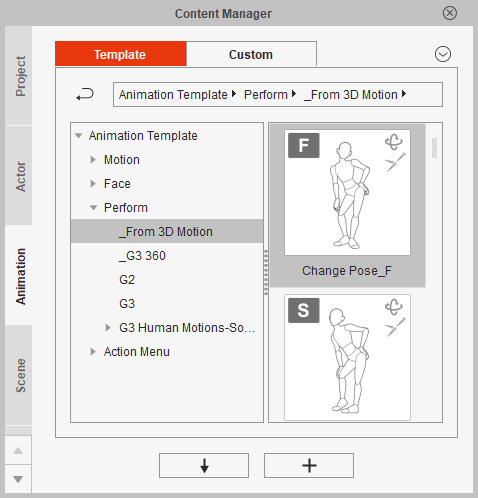
- Apply a Perform template from 3D motion, Change_Pose_F in this case.
A dialog will show with the message of Bone Hand animation will not performed on a Sprite Hand character. Click Cancel.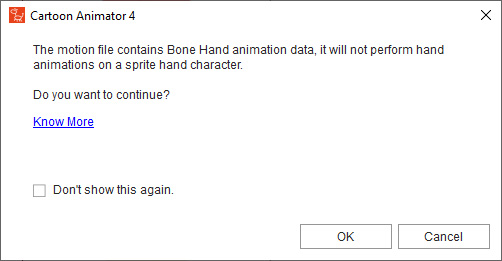
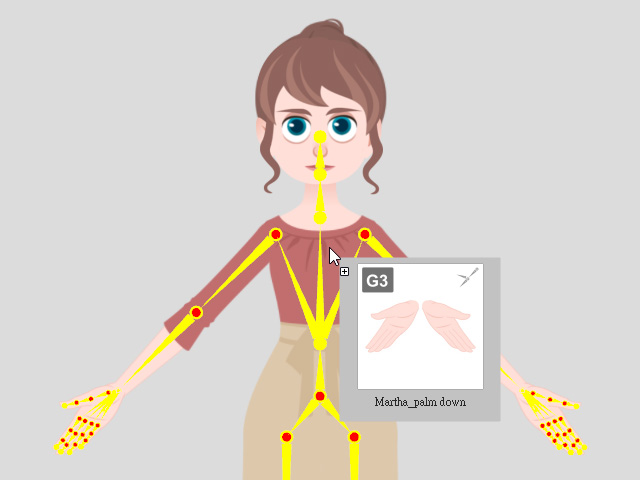
- Go to the Composer.
Apply a Bone Hand for the character, Martha_Palm Down in this case.
- Back to the Stage.
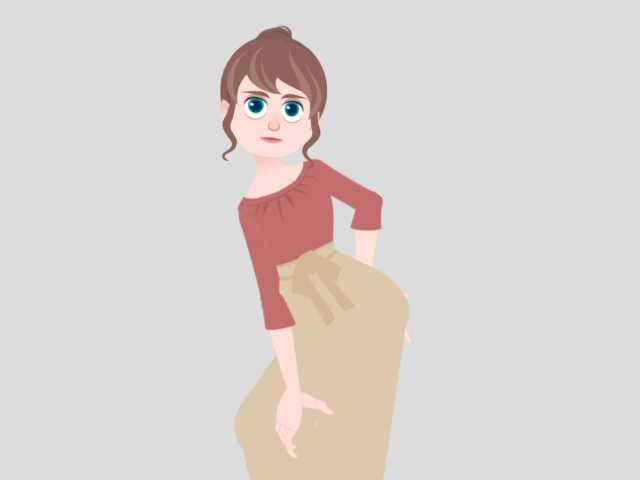
Apply the Perform template from 3D motion again.
Though the character can perform the Bone Hand animation,
you will find the thumb bones bend unnaturally.
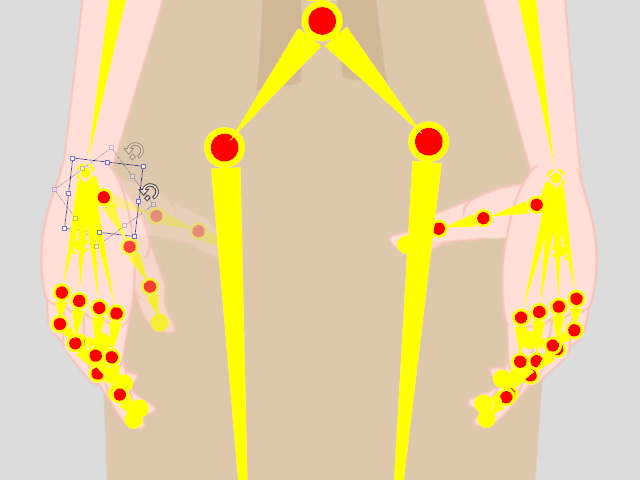
- Go to the start frame of the motion.
Press K key to open the 2D Motion Key Editor.
Choose the Selected Part option.

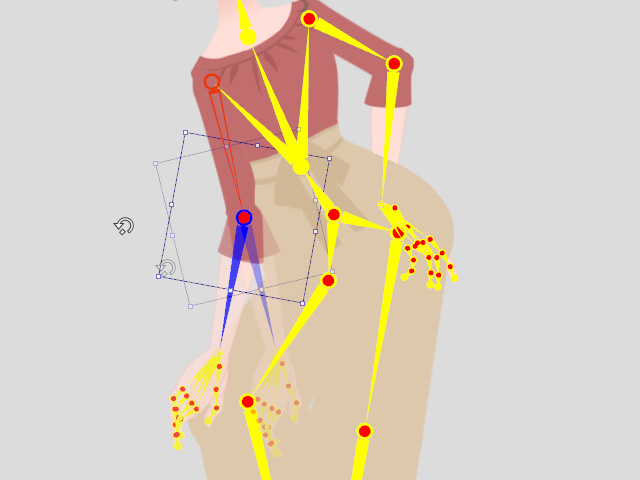
- Pick the root bone of the thumb.
Rotate the thumb bones inwards for the both hands.
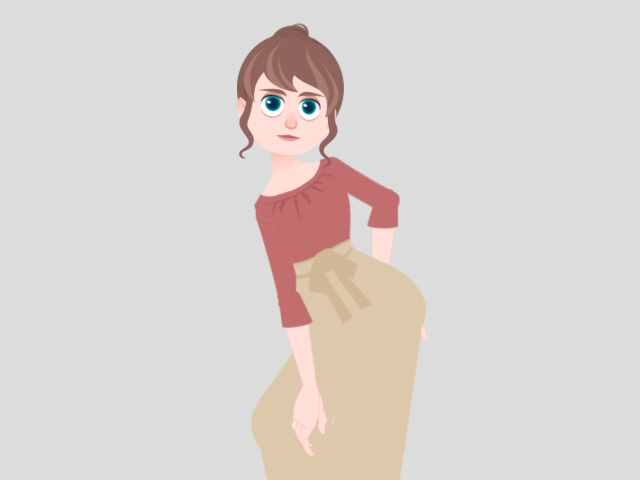
- Close the 2D Motion Key Editor.
Playback to observe the modifications.
- You can also fine-tune the poses of the other body parts with the 2D Motion Key Editor.
Press K key to open the 2D Motion Key Editor again.
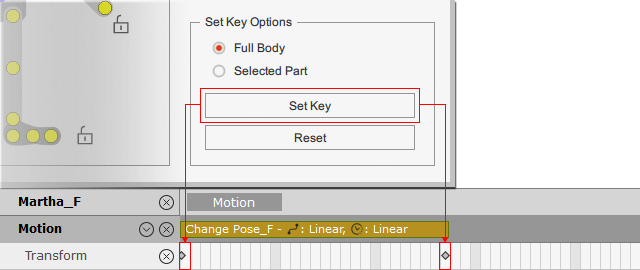
Choose the Full Body option first.
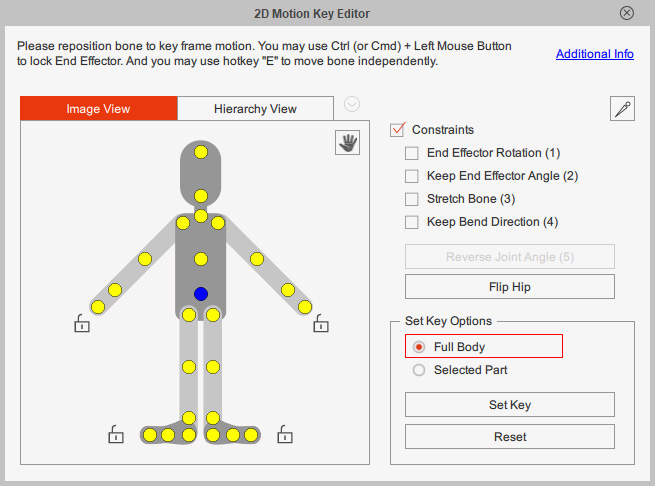
- Set a neutural key on the start and end frames of the motion.
- Go to the frame where you would like to reposition the body part.
Choose the Selected Part option and then pick the bone to adjust the pose.
- Close the 2D Motion Key Editor.
Playback to observe the modifications.