Conforming Hair on Head (New for v. 4.1)
Unlike the eyebrows and beards, the hair on the head are not given skin weights when they are applied, therefore, when the character performs facial expressions, the hairline around the forehead does not move along with the facial muscles, which can lead to mesh penetration.

|
|
|
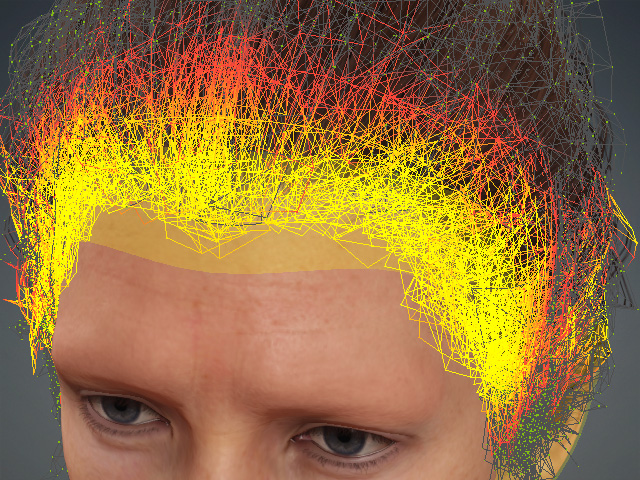
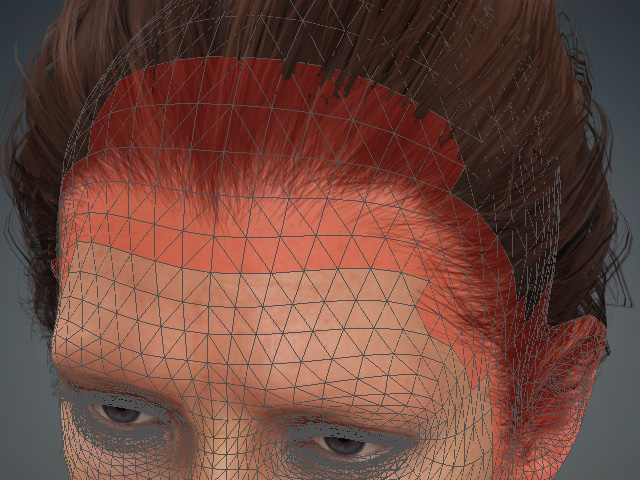
The hair applied to the head. |
Issues
|
When this issue occurs, you can use the following steps to conform the hair to the head:
- Select the hair.
- Click the Facial Hair Vertex Assignment button in the Attribute > Modify section on the Modify panel.
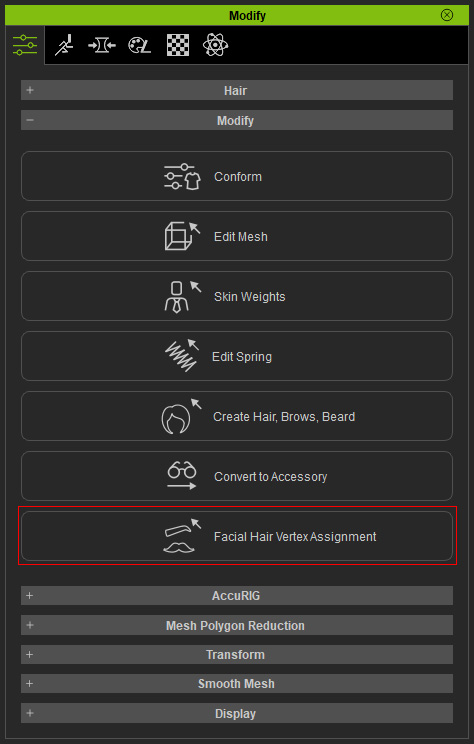
- The Facial Hair Vertex Assignment page will appear. Toggle on the Active checkbox.

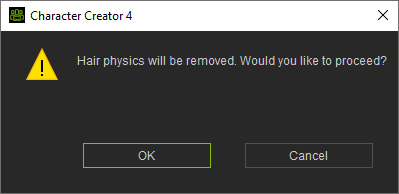
- Character Creator will inform you that the physics effect of the hair will be removed. Click the OK button.
- The settings in the page will be enabled.
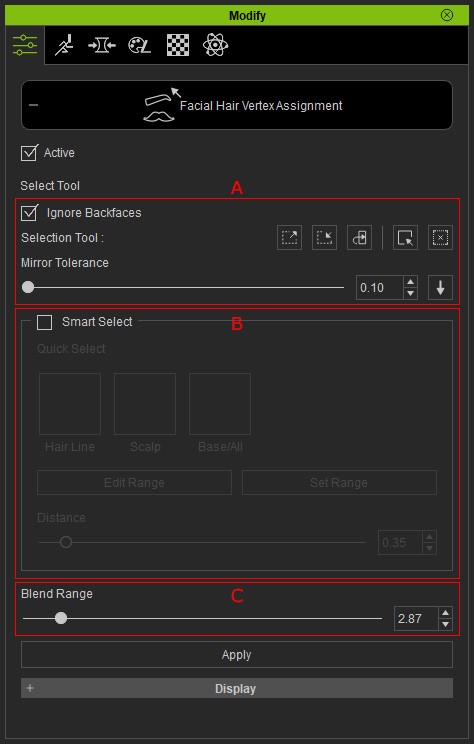
- Select Tool: Use these tools to pick the vertex of the hair mesh for conforming. Please refer to the Selecting Mesh Components section for more information.
- Smart Select: Activate the Smart Select checkbox to have the program automatically select vertices.
- Blend Range: Drag this slider to increase the selection range and add adjacent vertices.
Manually Select Vertex and Conform
- To manually select the vertices, drag the cursor within the viewport. with Shift key held, more vertices can be picked. Press Shift + Ctrl to deselect vertices.
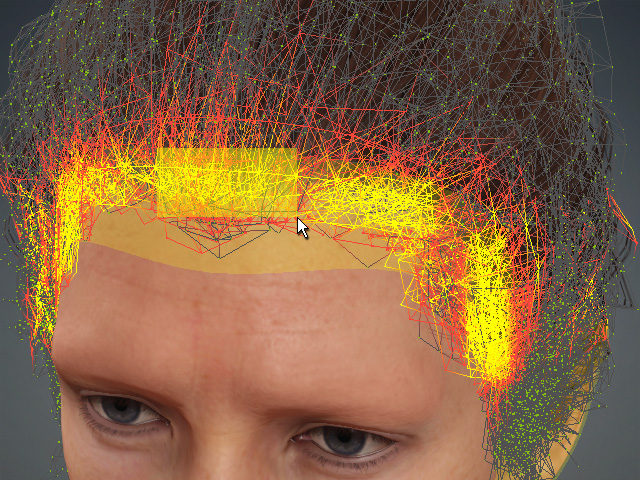
- Drag the Blend Range slider to increase the range for including more adjacent vertices (in this case, to 2.00).
- Click the Apply button to finish the conform procedure. Exit the mode by clicking the Facial Hair Vertex Assignment button again.
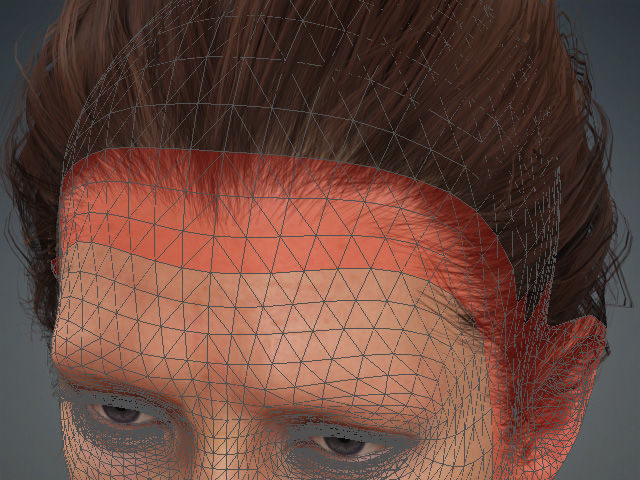
- The facial expressions will now drag the hair root to move with the morphs.
Smart Select Vertex and Conform
- To smart select the vertex, activate the Smart Select checkbox.
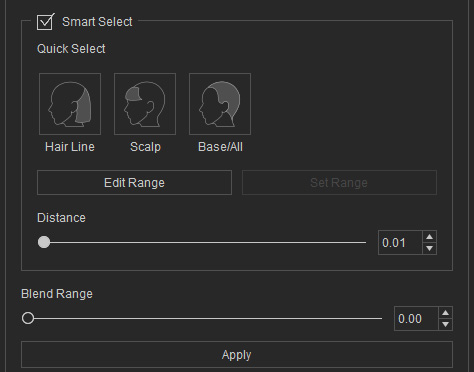
- Pick the specific mesh faces on the head by clicking one of the three presets, in this case, the "Hair Line".
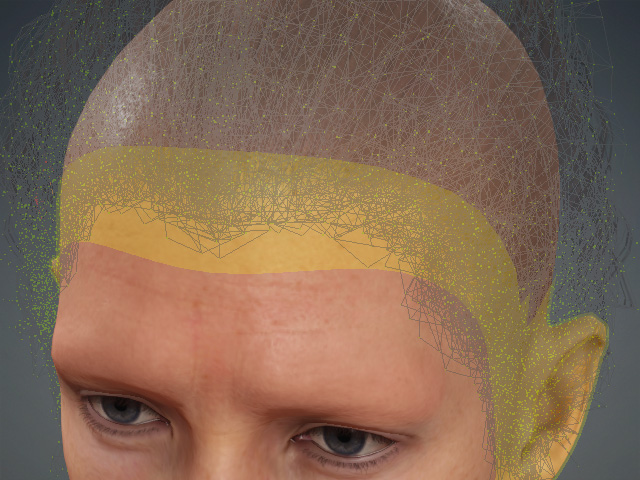
- If you intend to modify the range of selected mesh faces, then click the Edit Range button. You will see the wireframe of the head with the selected mesh faces.
- Modify the range by selecting (with Shift key held) or deselecting mesh faces (with Ctrl+Shift keys held).
- Click the Set Range button to finalize the range.
- Drag the Distance slider to select vertices in accordance with the absolute distance between the vertices and the selected mesh faces.
- Optionally adjust the Blend Range slider to increase more of the adjacent vertex of the range.
- Click the Apply button to finish the conform procedure, exit the mode by clicking the Facial Hair Vertex Assignment button again.
- The facial expressions can drag the hair root to move along.
