ZBrush Character-only Pipeline
Posing and switching poses in ZBrush is often a time-consuming process. The ZBrush Pose Tools plugin simplifies this convoluted process into single-click procedures, allowing artists more time to focus on the creative process.
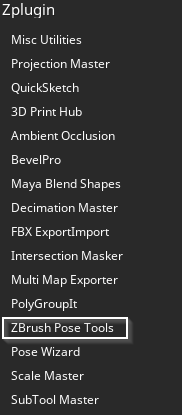
- Open your ZBrush project and click on Zplugin > ZBrush Pose Tools from the menu bar.
The ZBrush Pose Tools panel will open.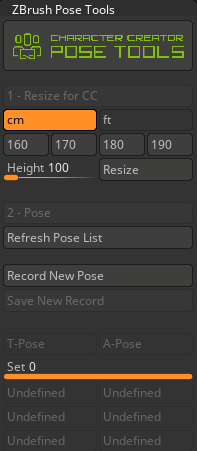
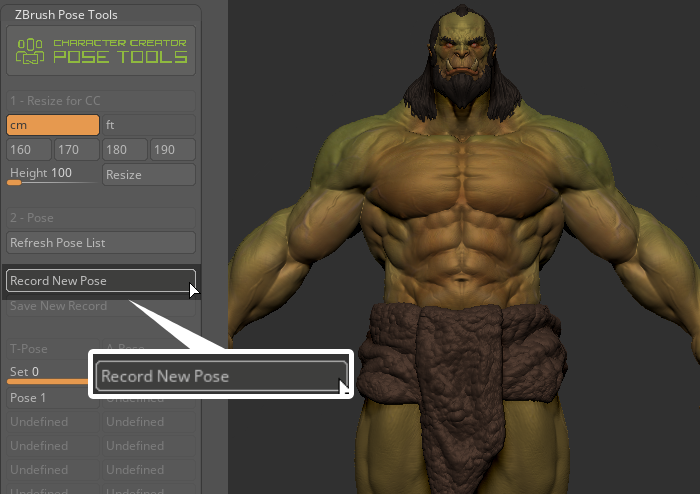
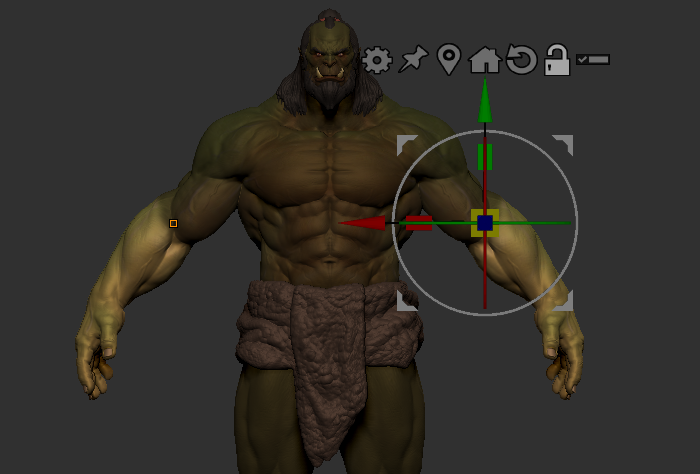
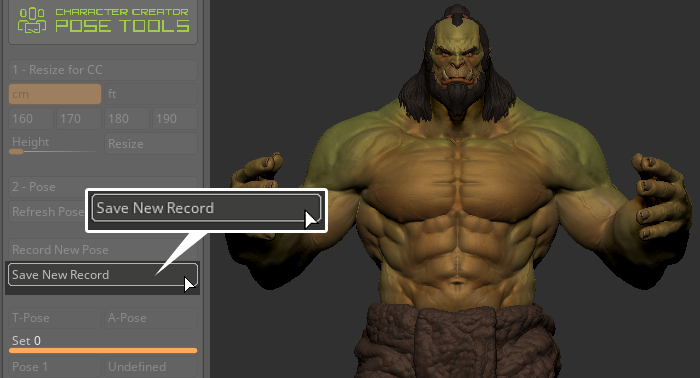
- Use Gizmo 3D to pose your model and save the pose with ZBrush Pose Tools, then click the Record New Pose button to enter the pose creation mode.
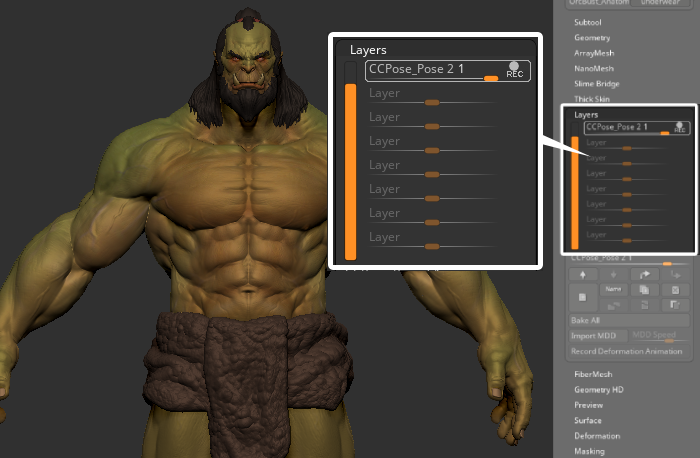
- A new layer with the “CCPose_” prefix will be added to the top of the subtool layer list.
- Use Gizmo 3D feature to edit and shape the individual poses of the tool.
- Once the editing is finished, click the Save New Record button to complete the editing process.
You will see both ZBrush Pose Tools and the Layers section will have saved this pose information.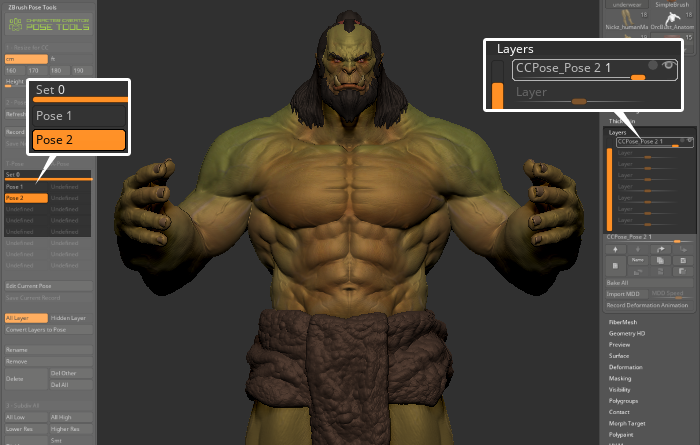
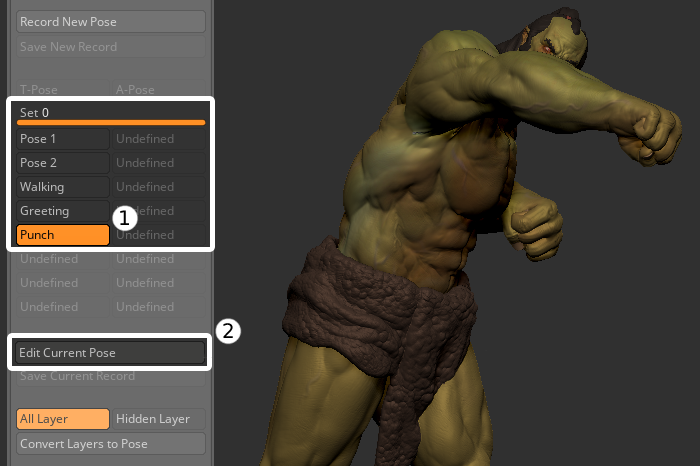
You can also use the Transpose Master to pose your model. - After saving multiple poses in the ZBrush Pose Tools you can start viewing different poses by clicking on the pose names.
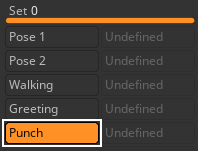
The plugin enables users to switch between poses quickly without having to adjust the layers for each subtool repeatedly.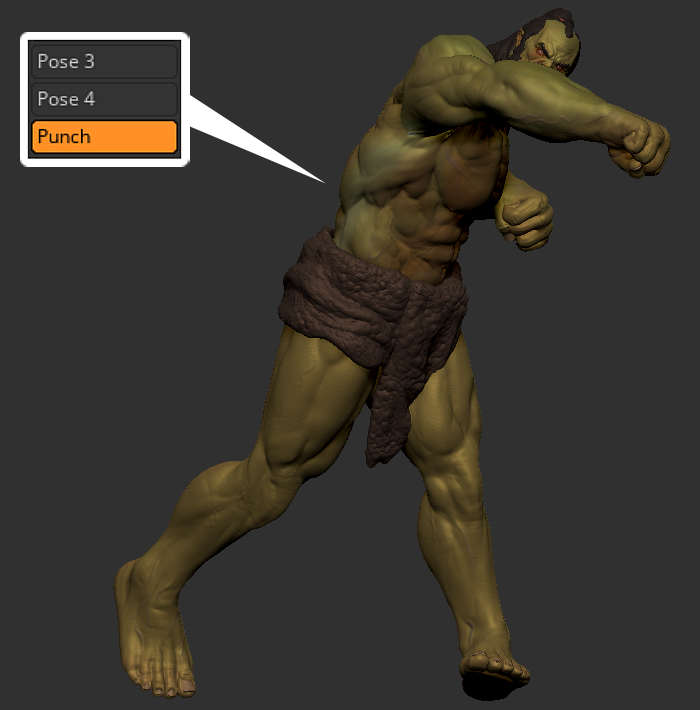
Punch
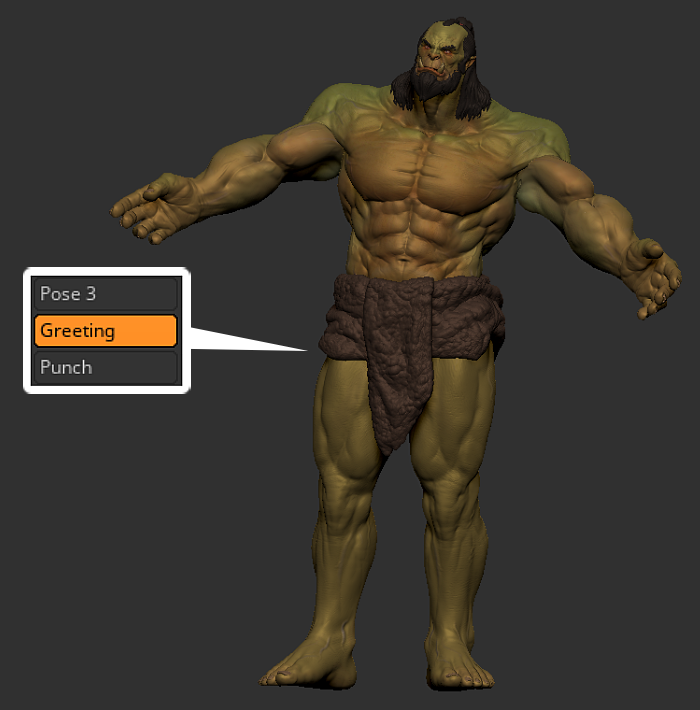
Greeting
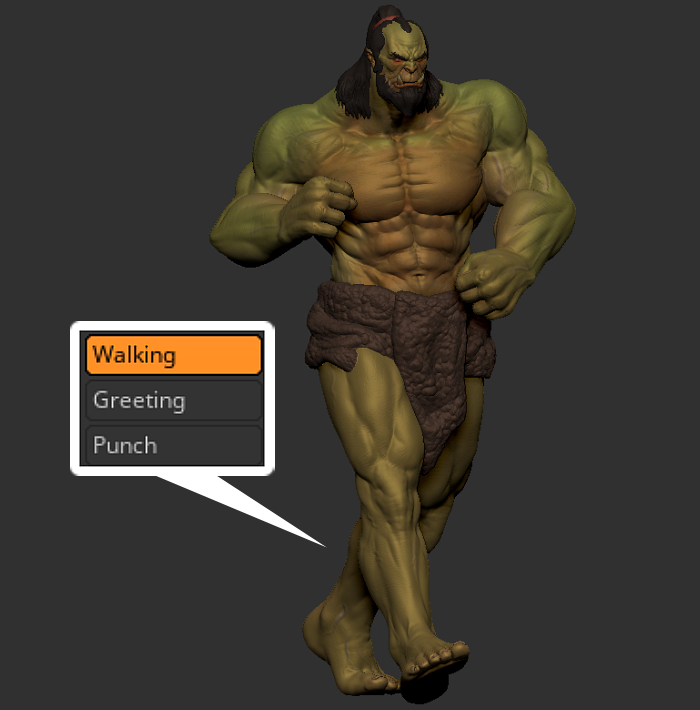
Walking
- To begin editing the pose in ZBrush, select the target pose then click on Edit Current Pose.
The layers for the current pose will be set to record, making them ready to receive modifications.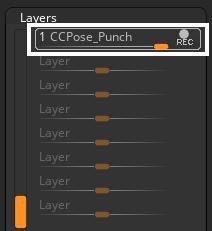
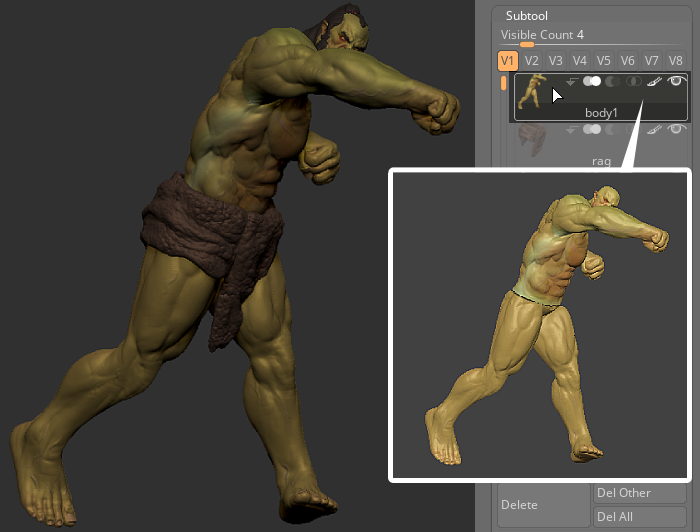
- Choose the subtool you want to edit, and start editing your mesh, like adding detail or changing its shape.
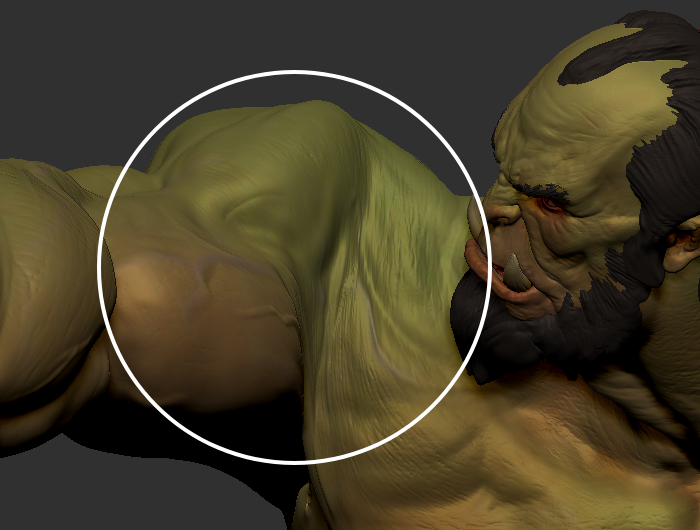

Before
After
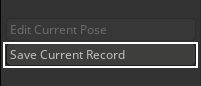
- Once you're done editing your model, click Save Current Record to save the newly edited pose.
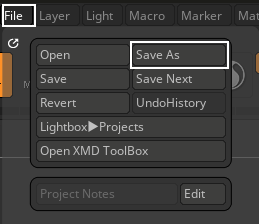
- After everything is completed and want to save your project, click on File > Save/Save As from the menu bar to save your project.