Setting Nose Profile and Nostril Lengths (New for Version 8)
The profile curve of the nose is important to show the characteristics of the actor as well; moreover, the curve plays an crucial role to show the gender, race, age of the actor.
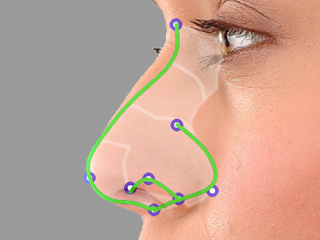
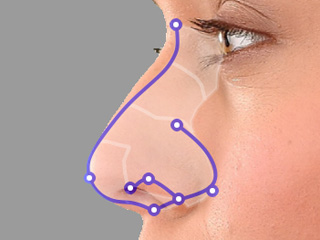
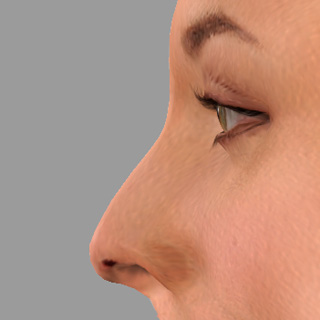
Once you enter this sub-step, you may see the profile of the nose is automatically generated with inadequate appearance.

|

|
| The auto-generated profile curves | Inadequate side nose appearance |
Unlike the fitting methods you do in the front Fitting Nose page, it is highly suggest set the curve first with the morphing areas before fitting the feature points.

|

|
Morphing Nose
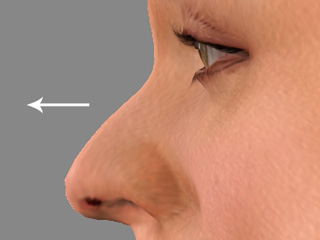
Using the morphing areas to obtain a curve line that look similar to the profile of the side face in the photo.
- The nose root area - Dragging within this area horizontally can set the depth of the nose root.
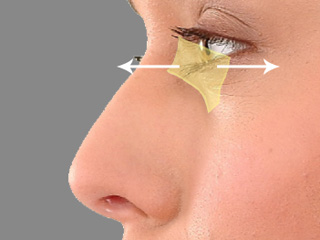
- The nose bridge area - Dragging within this area horizontally can set the depth of the nose bridge.


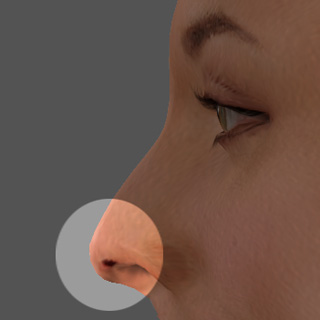
- The nose size and alea area - Dragging within this area horizontally can adjust the size of the nose and alea.


 Note
Note- Adjusting within this area is the same as you do for the nose morphing method in the Fitting Nose step.
- Please note that over shrinking the nose size may encounter the mesh-broken issue.

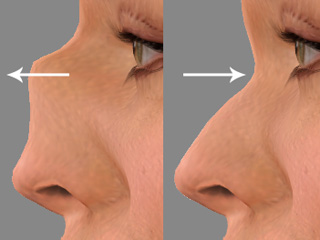
- The nose tip area - Dragging within this area vertically can adjust the height of the nose tip.


The dragging in the morph areas maps to the facial feature sliders in the Detail Morph step. Please refer to the Fine-tuning with Detail Morph section for more information.
Fine-tuning Nose Curve Position
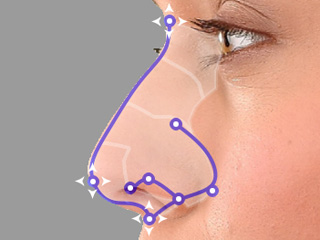
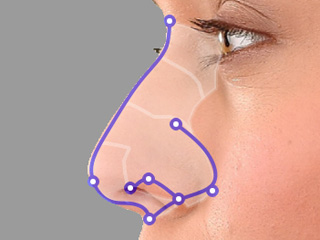
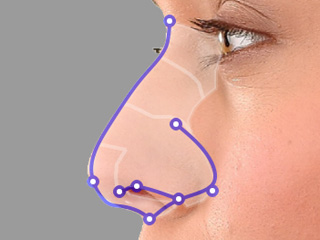
After the basic curve line is approximately determined, you may then use the deform feature points to fine-tune the shape of the nose, including the shape of the nostrils.
- Nose Root - Fit this point to the nose root of the face in the photo.
- Nose Tip - Fit this point to the tip of the nose.
- Notril Points - These two points should be moved to the front and side edges of the nostrils.
- Nose Ala - Move the three points to frame up the ala.
- Nose Base - Move the bottom point to the base of the nose.
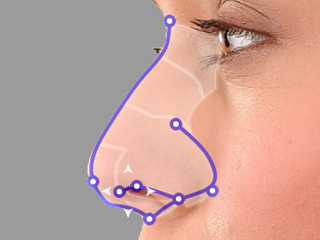
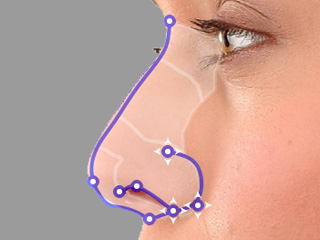
Using the Deform Points
- Drag the entire set of the wireframe lines to fit the nose in the photo by directly dragging it.
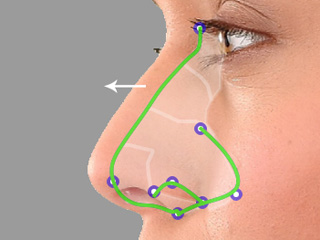
The initial position detected by CrazyTalk. Move the set of wirframe lines to fit the nose in the photo. 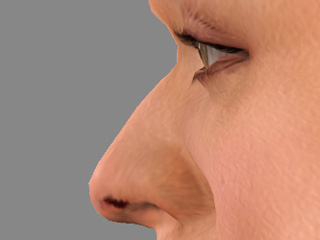
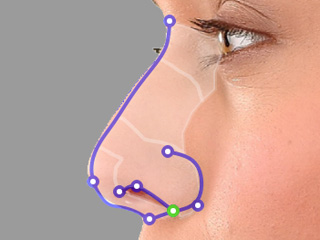
The initial position of the nose. The nose is moved more outward from the face. - Move the nose root, tip and base points if necessary.
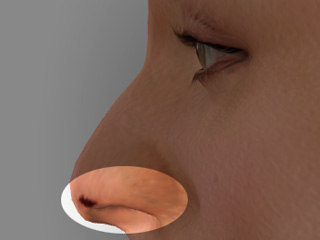
The positions of the nose base, tip and bottom points. Move the points to fit the proper positions in the photo. 
The appearance of the nose before adjustments. The three points are adjusted to have the look more similar to the one in the photo. - Adjust the two nostril points to form the shape of the nostril.
The positions of the nose base, tip and bottom points. Move the points to fit the proper positions in the photo. 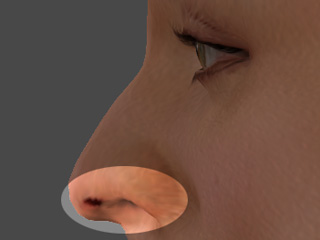
The appearance of the nose before adjustments. The three points are adjusted to have the look more similar to the one in the photo. - Adjust the three ala points to form the shape of the nose alea.

 Note
NoteThe lowest point of the three forms is a special point, which forms both the shapes of nostrils and the alae.
- Fine tune the morphing area and the points in order to optimize the fitting result for the nose.
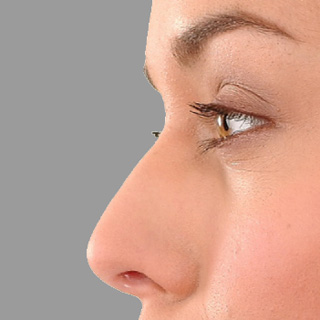
The original photo of the nose. The fitting result. - Check out the Fitting Nose section for fixing the dirty spot under the nose tip.