Suggested Workflow
If you are a new developer and you want to create a G2 Character for use with CrazyTalk Animator 2, then please follow the suggested workflow to create a custom character. However, if you are already familiar with the theory and the workflow, feel free to create your own custom workflow.
Basic
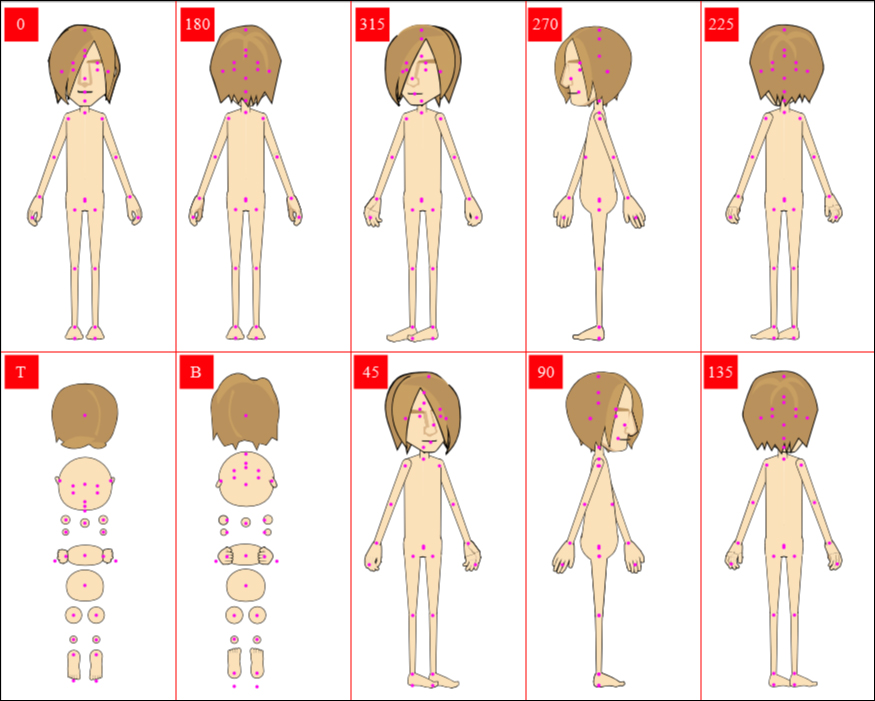
Steps for Single Angle
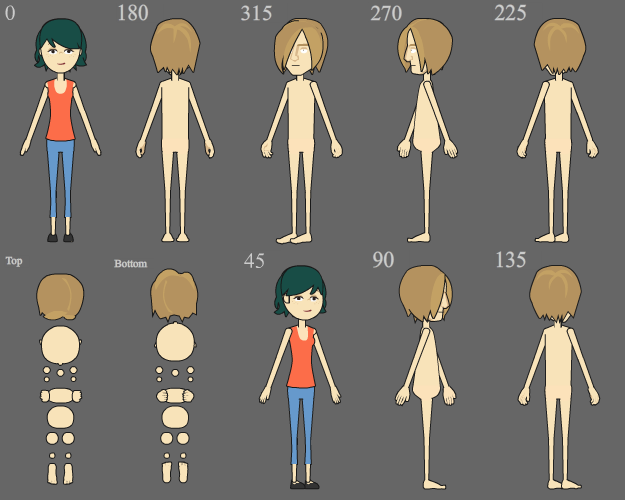
These steps are suitable for the ordinary characters or non-symmetrical characters.
- Open the downloaded Dummy_Template_Body.dpa in DrawPlus.
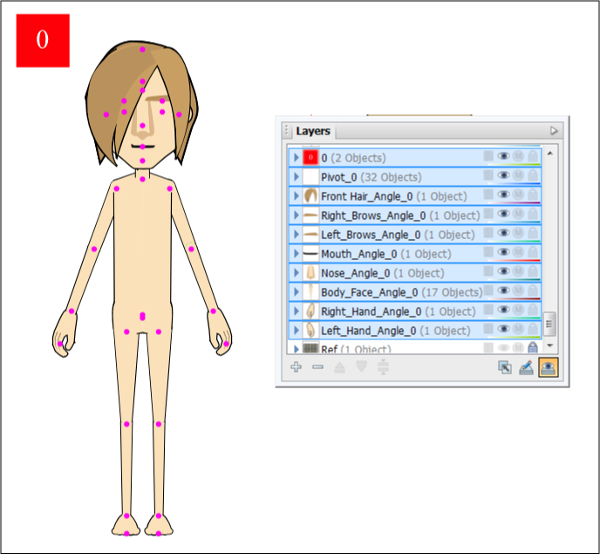
- Please find the body layer of
angle 0 on stage or in the
layer panel as we are about to modify the character at the 0 angle profile
|
Note: |
|
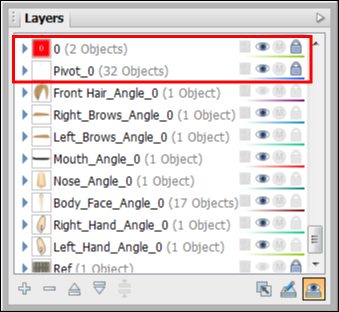
o Do not edit any sprite in the 0,
Pivot_0 layer
unless
you're very familiar with its purpose. o You may hide or lock these three Layers
to avoid
accidentally editing those shapes. o In the following steps, the Upper
Torso is taken as an example. |
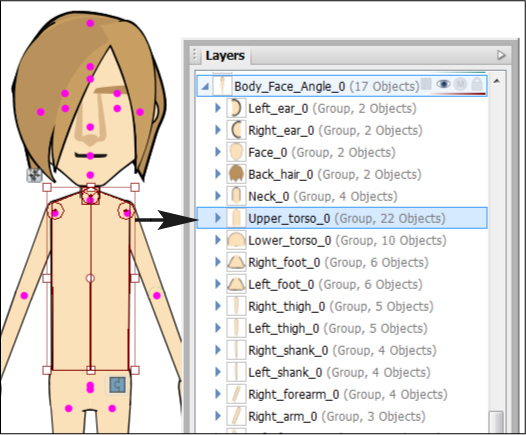
3. Expand the Body_Face_Angle_0 layer
to show its
sub-layers.
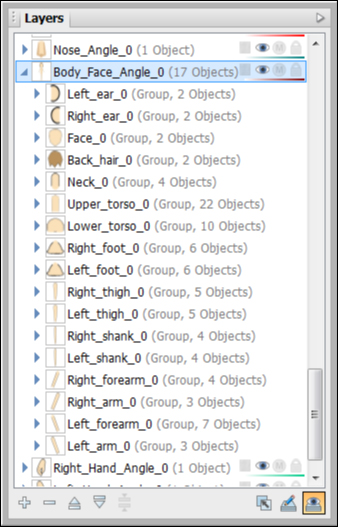
4.Select
the Upper_torso_0 layer, and the upper torso shape
will be highlighted.
5.Draw
a new upper body.
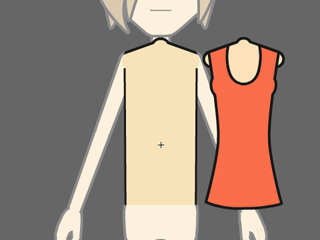
6.Delete the dummy's original upper
body.
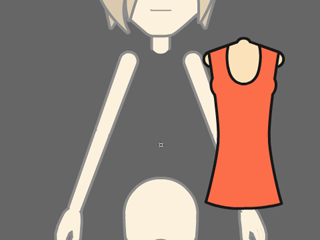
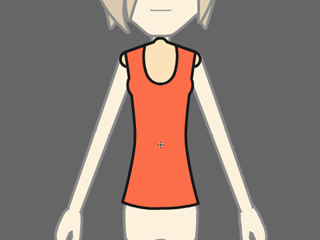
- Align
the new upper body to an appropriate position.
- Follow the same steps to
replace the facial features. Please refer to the Creating Multi-pose
Elements section for creating multiple pose facial features.
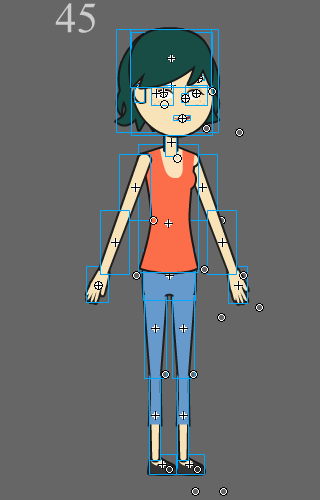
- Show the pivots in the Pivot
Layer. Adjust the pivot positions as described in the Setting Pivots
section.
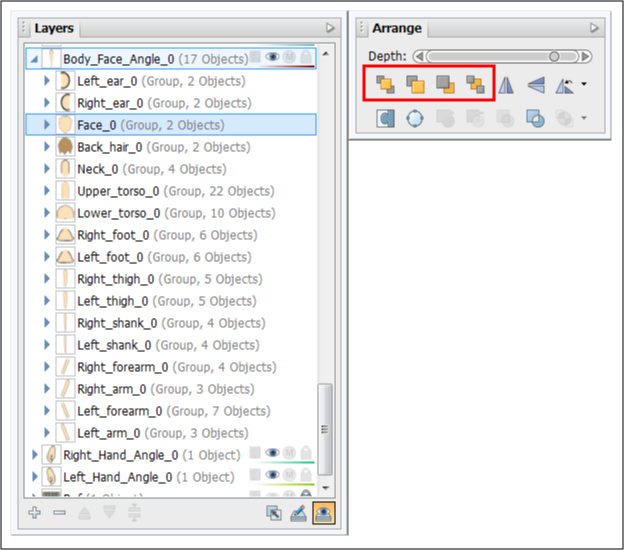
- Change the layer order by using
the Arrange panel to move layers up or down the hierarchy according to the
joint styles.
|
Note: |
|
Please note that the layer order in Angle 0 is the base order. Even if you set different orders for other angles in Flash, the final character's sprite layer order in each angle will be determined based on the one in Angle 0 in CrazyTalk Animator 2 after you click the Confirm Multi-angle Settings button. |
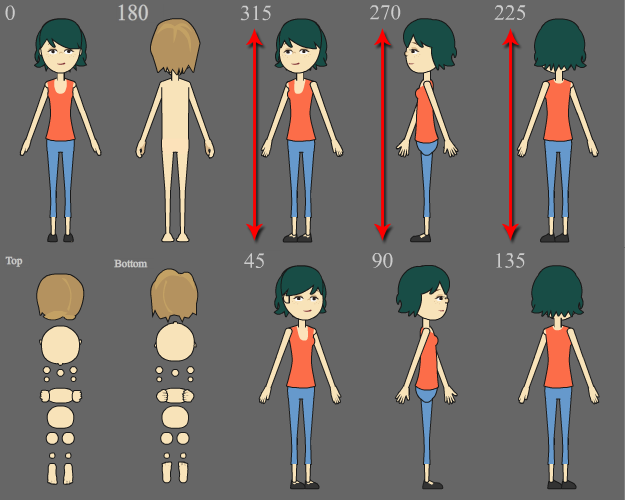
Copy and
Flip for Symmetrical Character
You may use the previous steps to replace the character sprites in each angle profile one by one, but if you want to skip the redrawing steps, you can also utilize the Copy and Flip skill.
|
Note: |
|
Please note: � This is an optional workflow not recommended for beginner
users. � It only works for perfectly symmetrical characters. � You should never use this workflow for any symbol in the Number,
Pivot and Pivot Base tracks; it can only be used for body parts
and facial features. |
1.Make sure you have correctly
replaced a character in an angle (in this case, 45 degrees).
2.Select all of the replaced symbols
of the character from the stage.
|
Note: |
|
Hide the Number, Pivot, and Pivot Base tracks because you do not need them for this skill. |
- Copy the shapes from Body_Face_Angle_45 and Angle_45_Front_Hair.
- Paste to the Body_Face_Angle_315 layer and Angle_315_Front_Hair.
- Flip
the character horizontally.
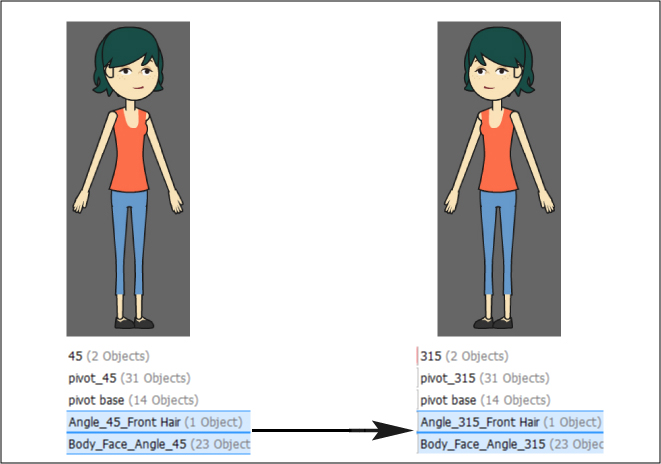
- Follow the naming rules to
rename every sprite of the flipped character.

- Repeat the entire procedure to
complete all of the angle profiles.
Exporting
Character
After all of the angle profiles have been completed, export the data.
1.Save this template as another
project file (*.dpa) first because you may need it for
further fixing in the future.
2.Export the entire project as a SWF
file (*.SWF) by either File >> Export >> Export
Movie... or Ctrl + Alt + Shift + S.
3.Refer to the Refining G2 Multi-angle Character
in CrazyTalk Animator 2 section for the next steps.