Determining Projection Angle for CTA Characters
In Cartoon Animator, there are five main facing angles,
Front, Front Side, Side, Back Side and Back,
designed for 2D characters.
Although the motions designed for 3D characters can be projected in full 360 degrees as shown in the 3D view,
the movement of these 2D characters are limited to the facing angle of the sprite images they were designed for.
Therefore, you have to apply a suitable projection angle in order to flawlessly perform the 3D motions.
( Watch Tutorial - Camera Projection & Motion Alternatives )
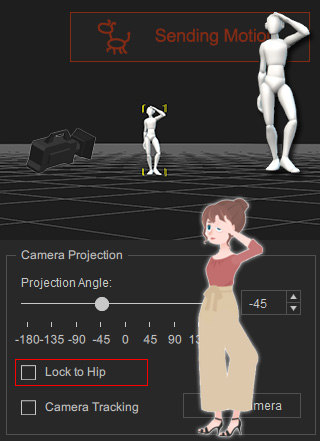
The Front Side character in an unsuitable projection angle 0 (default). | The Front Side character in a suitable projection angle -45. |
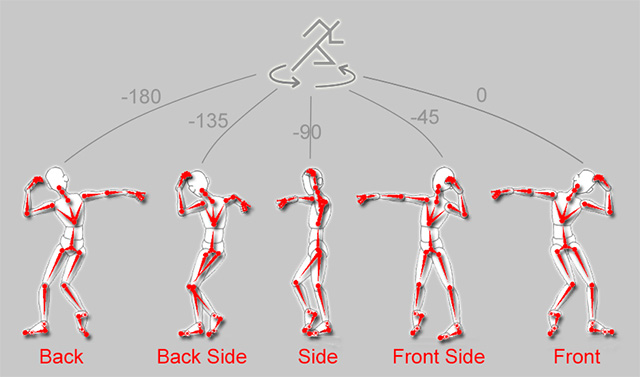
The ideal angle of a 3D motion projected to characters of each facing angle.

In the Sending Motion mode,
you can drag the Projection Angle slider to preview the imported 3D motion at different projection angles and
ajust it according to your needs.
Or you can click on the angle presets to quickly switch from different angles.

Taking the 1:1 bone scale Dummies for 3D Motion for example,
the most suitable projection angles are as follow:
- Dummy, Front: Suitable projection angle around 0.
- Dummy, Front Side: Suitable projection angle around -45 or 45 (activating Flip Body).
- Dummy, Side: Suitable projection angle around -90 or 90 (activating Flip Body).
- Dummy, Back Side: Suitable projection angle around -135 or 135 (activating Flip Body).
- Dummy, Back: Suitable projection angle around -180 or 180.
Although the 2D characters in Cartoon Animator are designed to facing left by default,
you can utilize the Flip Body feature to turn the characters to the opposite side for the 3D motion
when sending motion to Cartoon Animator.
Please refer the Flipping Character to Another Side section for more information.

Camera Projection = -45.
| Camera Projection = 45.
|
If the motion contains turning movements or
the CTA character's body parts distort after giving a suitable projection angle,
you can make the camera follow the dummy character's hip movements.
In this way, no matter how the dummy character moves or rotates,
the camera will lock onto the hip direction with the specified projection angle.

|

|
|
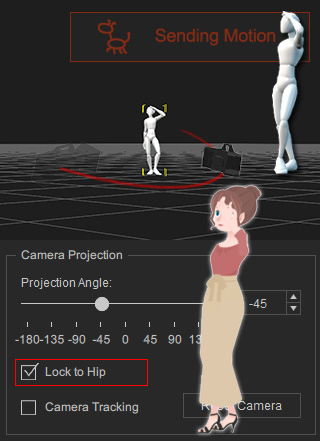
Lock to Hip = Off (default).
|
Lock to Hip = On.
|
-
The CTA character can perform a 3D motion completely when Lock to Hip is disabled by default.
However, when a motion includes turning movements or the upper and lower body parts move in different direction,
you may see the character's body parts bend unnaturally.
In this situation, consider activating Lock to Hip to shift the camera view automatically,
or manually fix the rotation direction of the bones in the 2D Motion Key Editor of Cartoon Animator.
-
After activating the Lock to Hip on the frame when the 3D motion can be performed no problem by the CTA character,
you can largely avoid the body part distortions.
However, due to limiting the camera view to hip movements of the dummy character,
a foot sliding issue may therefore occur on the CTA character,
which may need further modification in the 2D Motion Key Editor of Cartoon Animator.
