Connecting to LIVE FACE (New for v1.1)
For faster and more stable data transferring, the computer and iPhones that participate in the connection sequence must be in the same domain. You could choose either of the following methods: shared Wi-Fi, Hotspot, or USB cable.
* It is highly recommended that you connect the iPhone and the computer through a USB cable, in order to avoid a Wi-Fi connection quality problem and to ensure a smoother capture frame rate.
Ethernet Connection
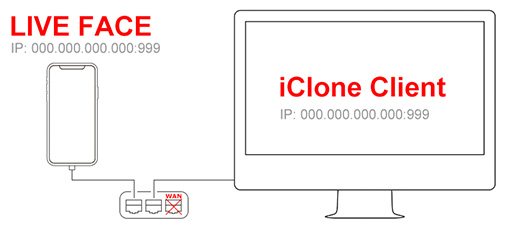
Your PC and iPhone can be connected through the Ethernet.
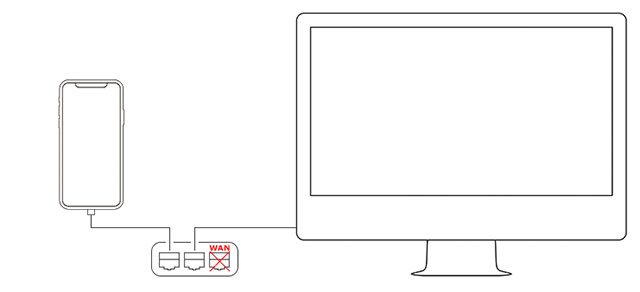
- Connect your PC and iPhone to an Ethernet hub (avoid from the WAN socket).
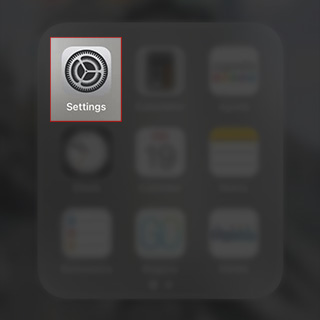
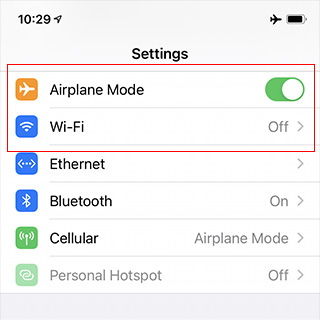
- Click the Settings icon of the iPhone.
- In the Settings, turn ON the Airplane Mode and turn OFF the Wi-Fi of your iPhone.
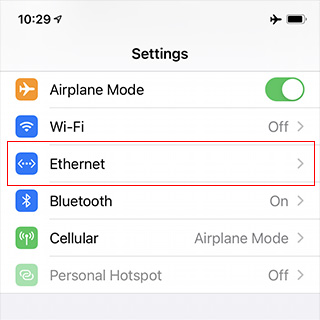
- Click the Ethernet item in the Settings page.
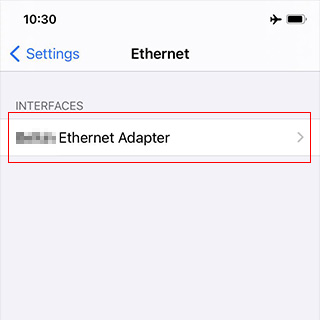
- You will see the interface name for connecting iPhone to the Ethernet, click it.
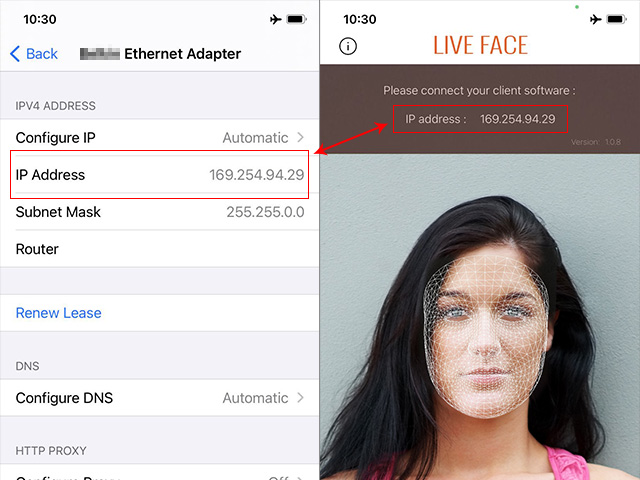
- Make sure the IP addresses of iPhone and on LIVE FACE are identical.
USB Connection
If your mobile data connection is enabled, then you can use the iPhone hotspot (3G/4G SIM card required) to share internet to the computer via USB tethering.
- Make sure that the latest version of iTunes is installed on the computer, which allows your iPhone to be recognized by the computer.
- Connect the USB cable to the computer.
- On your iPhone, go to Settings > Cellular > Personal Spot and turn it on. If your Wi-Fi is disabled, then select Bluetooth and USB only.
- Complete the settings on the computer and automatically get connected.
Wireless Connection
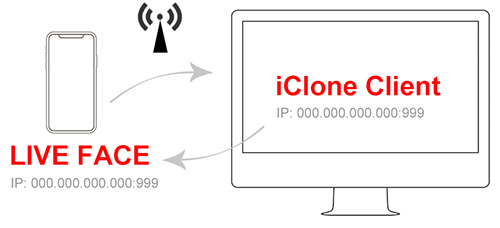
- Make sure your computer has a wireless LAN card embedded, in order to detect Wi-Fi networks.
- Turn on Wi-Fi and connect your iPhone and computer to the same Wi-Fi network from the list.
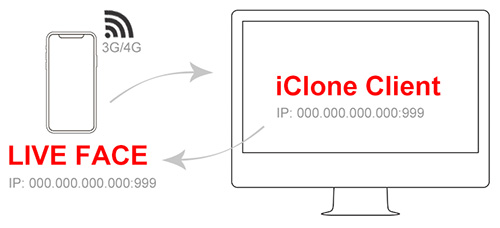
If your mobile data connection is enabled, then you can share Wi-Fi internet from the iPhone hotspot (3G/4G SIM card required) to the computer.
- Make sure your computer has a wireless LAN card embedded in order to detect Wi-Fi networks.
-
On your iPhone, go to Settings > Cellular > Personal Spot and turn it on.
If your Wi-Fi is disabled, select Turn on Wi-Fi.
* Stay on this screen and wait until the computer is connected to the Wi-Fi network. - On a Windows computer, look for the iPhone hotspot in the Wi-Fi list and get connected.
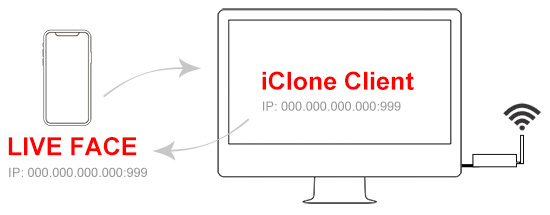
If you are using a desktop computer and connecting to the internet via Ethernet, then you could share Wi-Fi internet through a Wi-Fi hub or switch.
- Install a Wi-Fi hub to share the wireless network.
- On your iPhone, turn on Wi-Fi and look for the computer in the Wi-Fi list to get connected.
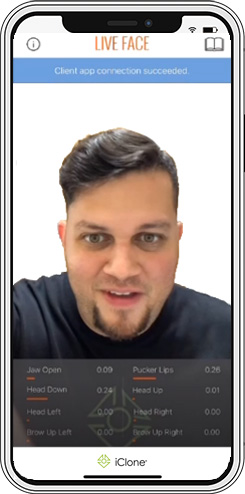
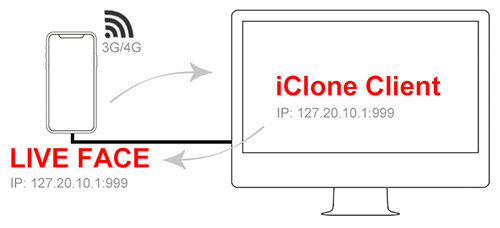
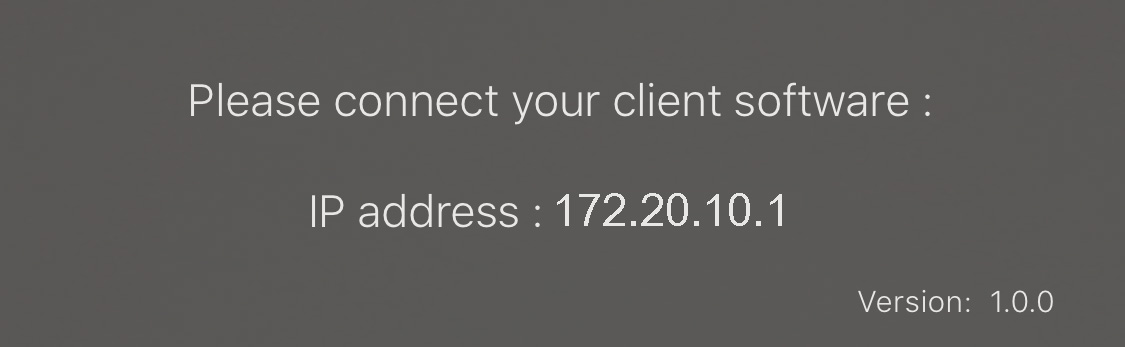
Once the connection between the iPhone and computer is done, launch the LIVE FACE on the iPhone to get the gear's IP address for completing the Facial Expression Capture workflow on the iClone client. In this case, using USB connection that comes with the default IP address 172.20.10.1 as shown.
When LIVE FACE is successfully connected to the client, a blue success message will appear on the top and a client logo will shown on the bottom as well.