Using Decal Tool
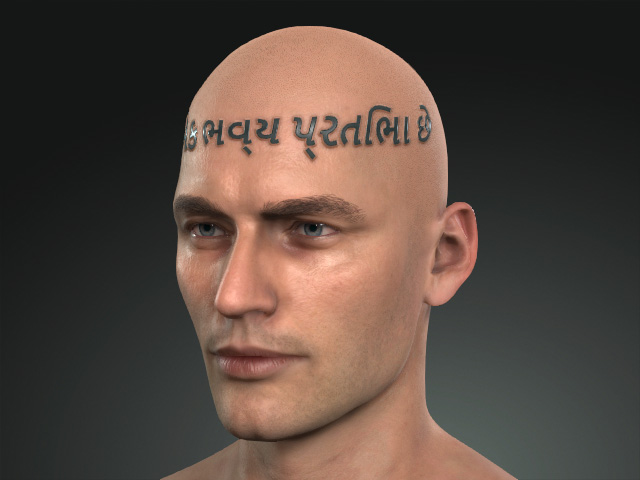
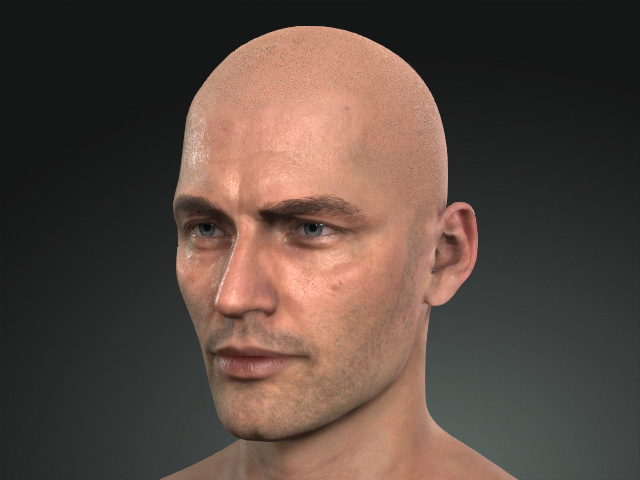
After you apply the Decal tool, the patch will be adhered to the different materials of the skin.
Material |
Before |
After |
Head |
||
Body |
||
Arm |
||
Leg |
The user interface for the Appearance Editor resembles the following illustration:
Contains the mask for the layer effect.
Refer to the Layer Mask section for more information.
After you apply the Skin - Decal tool, the default textures in the Texture Settings section are as shown in the following illustration:
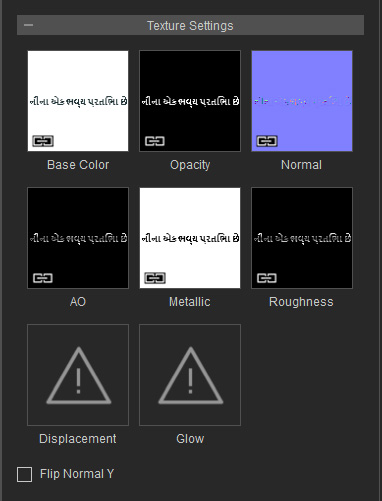
These textures can be edited, including being replaced, deleted, launched and modified in your image editor.
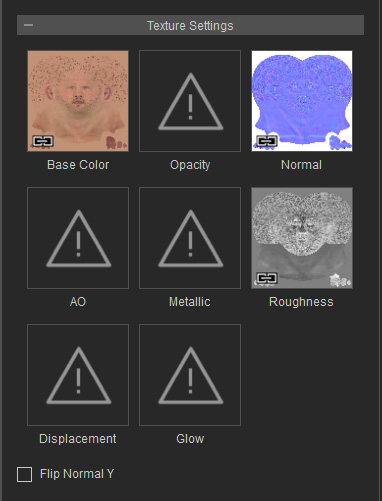
Before the Decal Tool textures are edited |
After the Decal Tool textures are edited |
The Transform settings are only suitable for the effect that are not focused on specific parts of the body; for example, Freckle effect, you can adjust them with the transform settings.
- Scale
Scale = 1.00
Scale = 2.00
- Width
Width = 1.00
Width = 0.00
- Height
Height = 1.00
Height = 0.00
- X, Y
X, Y = 0.00, 0.00
X, Y = 1.00, 1.00
- Rotation
Rotation = 0.00
Rotation = 0.30
If the Opacity channel is inserted with textures, then you can create Bevel effect and adjust the result with the settings in this sub-section.
- Strength
Strength = 0.00
Strength = 1.00
- Expansion
Strength = 0.10
Expansion = 0.00
Expansion = 0.05
- Soften
Soften = 0.00
Soften = 0.50
This section contains subsections with settings for modifying the textures listed in the previous point.
- Opacity: This setting blends the Base Color texture to the Skin Base with adjustable opacity values.
Opacity = 0.00
Character with Skin Base only
Opacity = 1.00
Blended with base color texture of the Skin Details template.
- Adjust Color
Brightness = 0.00
Contrast = 0.00
Hue = 0.00
Saturation = 0.00
Brightness = 0.25
Contrast = 0.45
Hue = 0.00
Saturation = -0.10
- Strength: This setting modify the Normal texture to increase or decrease the normal effect.
Strength = 0.50
Strength = 0.85
- Strength: This setting adjust the AO texture to increase or decrease the effects of the creases and lines of the wrinkles.
Strength = 0.00
Strength = 1.00
- Adjust Color
Brightness = 0.00
Contrast = 0.00
Brightness = 0.20
Contrast = 1.00
- Strength: This setting adjust the Metallic texture to increase or decrease the reflectivity on the skin.
Strength = 0.00
Strength = 0.50
- Adjust Color
Brightness = 0.00
Contrast = 0.00
Brightness = -0.20
Contrast = -0.70
- Strength: This setting adjust the Roughness texture to increase or decrease the smoothness to create the oil or moisture on the skin.
Strength = 0.50
Strength = 0.10
- Adjust Color
Brightness = 0.00
Contrast = 0.00
Brightness = 1.00
Contrast = 1.00
- Strength: This setting adjust the Displacement texture to increase or decrease the bumps on the skin.
Strength = 0.00
Strength = 0.50
- Adjust Color
Brightness = 0.00
Contrast = 0.00
Brightness = 0.30
Contrast = 0.20
- Strength: This setting adjust the Glow texture to increase or decrease the glowing effect.
Strength = 0.00
Strength = 1.00
- Adjust Color
Brightness = 0.00
Contrast = 0.00
Hue = 0.00
Saturation = 0.00
Brightness = -0.50
Contrast = 0.10
Hue = 1.00
Saturation = 1.00
- Strength: This setting adjust the Micro Normal Mask texture to increase or decrease the micro normal on the skin.
Strength = 0.50
Strength = 1.00
- Expand: You can use this setting to expand or shrink the mask of the micro normal texture. The micro normal effect outside of the mask can be set by the settings in the Digital Human Shader.
Expand = 0.00
Expand = -0.25
- Blur: This setting can be used to determine the edge blurriness of the mask in order that you can not see the sharp edge of the mask.
Blur = 0.00
The edges of the mask is little bit sharp.
Blur = 0.80
The edges of the mask is blurred out.