The Introduction of LUT User Interface
|
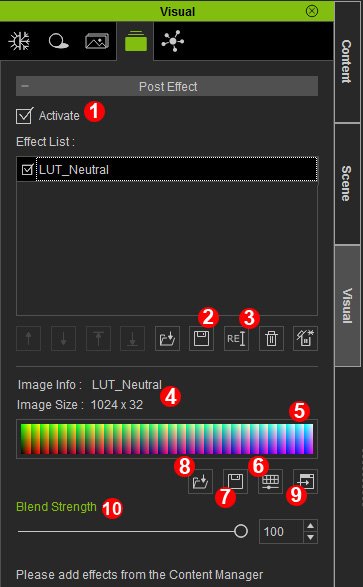
1 |
Activate |
Used to enable or disable Post Effect. When it is unchecked all of the components under Post Effect will be disabled. |
|
2 |
Save |
Save the entire Effect List including timeline keys to an .iEffect file. |
| 3 |
Rename |
Change the name of the currently selected effect. Name of the timeline track will also be affected. |
| 4 |
Image Info and Size |
Image Info displays the LUT image file name (not including the extension). Image Size displays the dimensions of the LUT image in pixels. |
| 5 |
LUT Image |
Displays an image representation of the LUT data in the .iEffect file. Users can double click on the image or drag and drop a file to replace the LUT data. |
| 6 |
Adjust Color |
Make adjustments to the LUT image. Check out here for more detailed explanation: |
| 7 |
Save File |
Store the LUT image to an external file. |
| 8 |
Open File |
Open an external LUT image file. Current supported formats are PNG, TGA, BMP at resolutions of 256x16 and 1024x32. |
| 9 |
Launch Editor |
Send the LUT image to a 2D image editor. |
| 10 |
Blend Strength |
Adjust the effect contribution. LUT effect allows for multiple layers and, like IBL, can be keyed for animation. |
