
Creating Auto-aligning Accessories

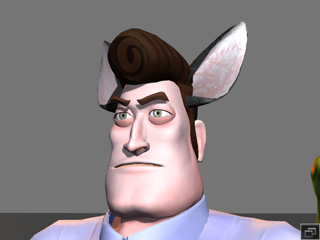
In addition to puppeteering accessories,the Builder is capable of setting the align position when the accessories are attached to different characters. This means that no matter which character you apply your accessories to, they will always be perfectly aligned to that character as long as you have previously defined the alignment position.

Setting Relation of Alignment

  1. Apply two characters.
  2. Attach a custom accessory to one of the characters. Please make sure the accessory is built using the recommended structure.
  3. Apply the Builder to the scene.
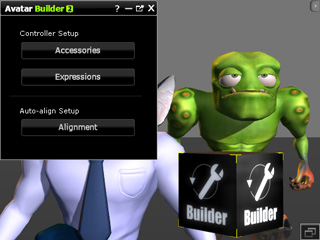
  4. Click the Alignment button in the Home Panel and pick the accessory.
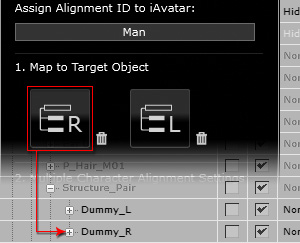
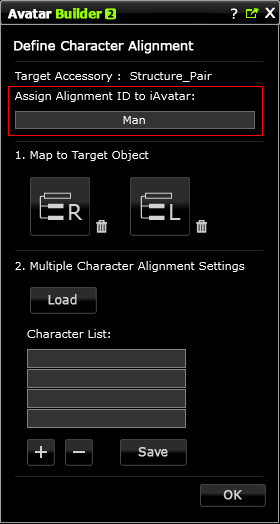
  5. In the Define Character Alignment page, give the character a unique ID by typing it in the Assign Alignment ID to iAvatar field.

    Note:

    It is highly recommended that you follow the rule below to assign the ID to the character for ensuring the maximum accessory compatibility:
    <AuthorName>_<PackName>_<CharacterName>

    For example, Reallusion_ToonMaker_A means the character is the A character included in the ToonMaker content pack released by Reallusion.

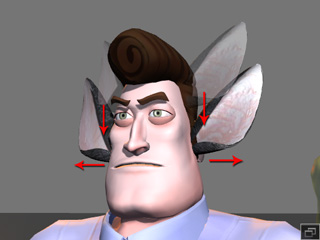
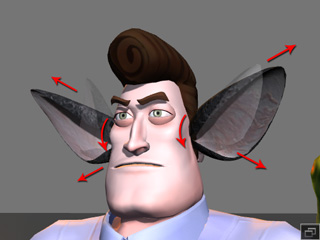
  6. Translate the Dummy_S, Dummy_R or Dummy_L so that the accessory spacing matches the shape of the character.
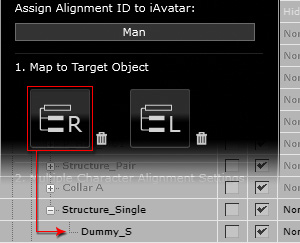
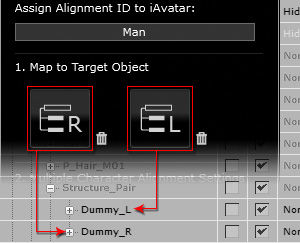
  7. Click the R button in the Map to Target Object step and then pick the Right Dummy in the Scene Manager.

    Note:

    • This step ensures the distances between the Dummy_S, Dummy_R and Dummy_L and their roots, Structure_Single and Structure_Pair, can be customized and kept for different characters the accessories are attached to.
    • If the accessory is composed of single part, then you only need to map the R button to the Dummy_S under the Structure_Single node.
    • If the accessory is composed of pair parts, then you need to map both the R and L buttons to Dummy_R and Dummy_L unser the Structure_Pair node before proceeding the following steps.

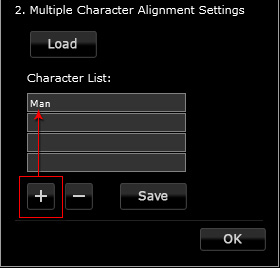
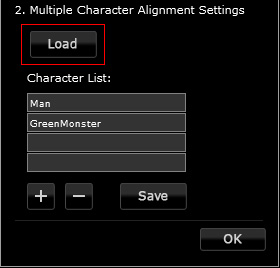
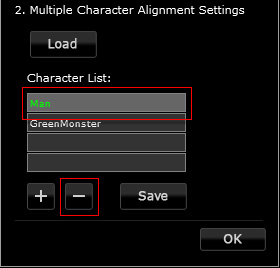
  8. Click the + button in the Multiple Character Alignment Settings step. The character's unique ID will be added into the Character List.
  9. Detach the accessory and attach it to the other character.
  10. Repeat step 5 and 6 for the accessory to keep the alignment data.

    Note:

    There is no need to perform the mapping(s) as it has already been done in step 7.

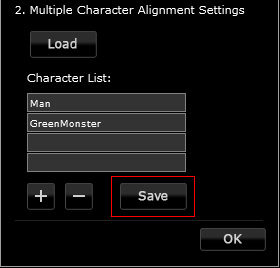
  11. Afterward, the character list will have two unique IDs.

    Note:

    If you have more characters and you want to set the alignment data for, then follow the steps described above until the characters' IDs are all added into the Character List.

  12. Click the Save button to keep the alignment data for the characters whose IDs are in the list.

    Note:

    After the Save button is clicked, the characters' IDs will be stored into the accessory. One accessory can have several character IDs and corresponding location settings.

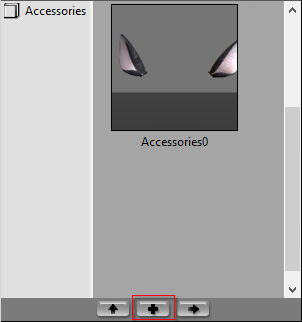
  13. Click the Add button under the Content Manager to add this accessory with aligning data to the library. Each time the accessory is applied to a character whose ID is in the list, the part or parts of the accessory will go to the correct position according to the transform data specified previously.
  14. Whenever the accessory is applied to these specified characters, its parts will go to the correct position.

Adjusting Relation of Alignment

If you want to adjust the part or parts of the accessory to fit the character better, then follow the steps below:

  1. Make sure the character's ID has been added into the list as shown in the steps in the previous section.
  2. Apply the accessory with aligning data to the character from the library.
  3. Apply the Builder, click the Alignment button and pick the accessory.
  4. Click the Load button to retrieve the alignment data from the accessory.
  5. Select the ID of the character from the list and click the - button to remove the ID and the aligning data.
  6. Translate the Dummy_S, or Dummy_R and Dummy_L to fit the character.
  7. Click the + button to add the character's ID and new alignment data back to the list.
  8. Click the Save button to keep the alignment data for the characters whose IDs are in the list.
  9. Click the Overwrite button under the Content Manager to replace the accessory containing old alignment data with new data.

    Note:

    Please note that the Auto Alignment feature only supports the Translation value data, but not the Rotation and Scale values. You need to manually transform the accessory to adjust these values after it is applied to the character.