Setting Spring Effects
After you apply a spring effect to a bone node (or any extended bones for a character), the node can then start to bounce in a rotational and translational manner. By further adjusting the settings for the node, you can adjust the bounciness.
Before applying spring effects to a node, you need to perform the following parameter adjustments:
-
Load a model with a bone-skinned structure (character or prop).

-
Click the Edit Spring button in the Spring section.
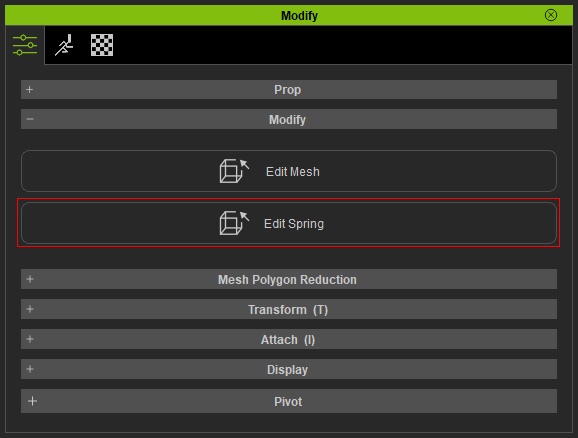
The Modify panel will switch to Spring Editing mode.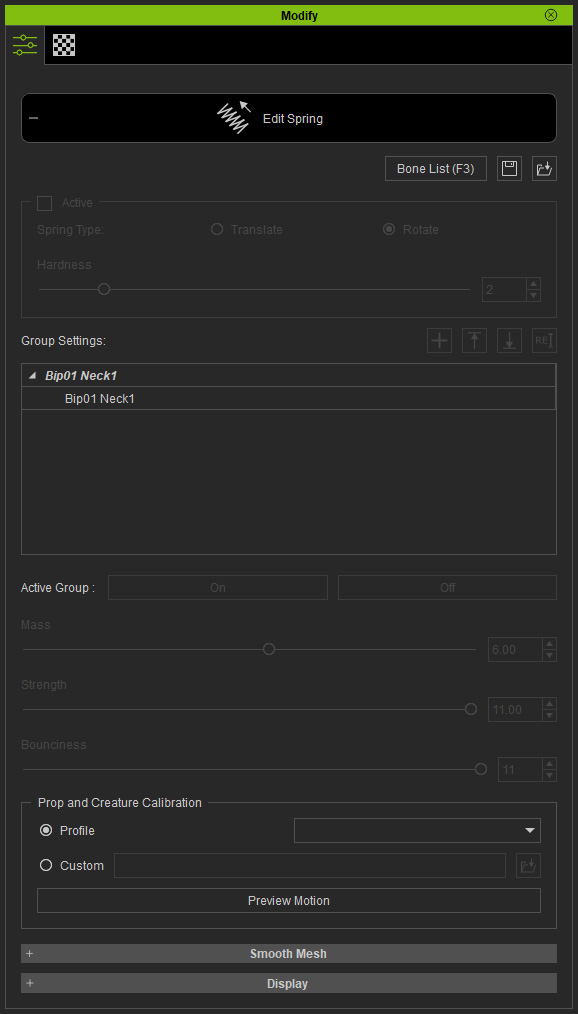
-
Select one or more bones to which you want to apply spring effects.
-
Click the Active checkbox

Translate and Rotate
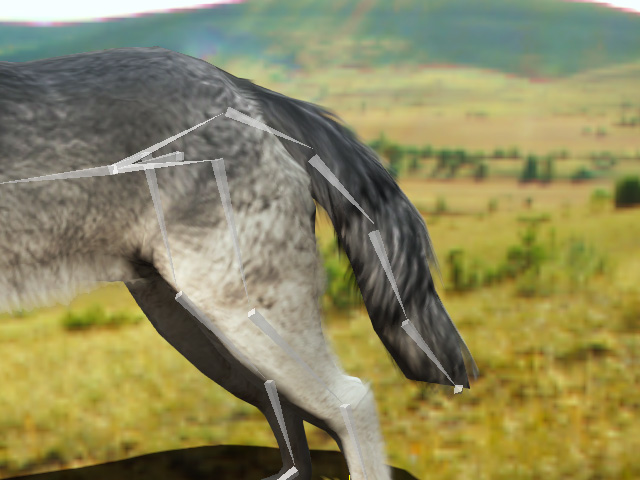
The spring type can be set to Translate or Rotate, which determines the bounciness for the nodes. *The result will be unpredictable if you apply a mixture of Translate and Rotate values to different nodes in a group.
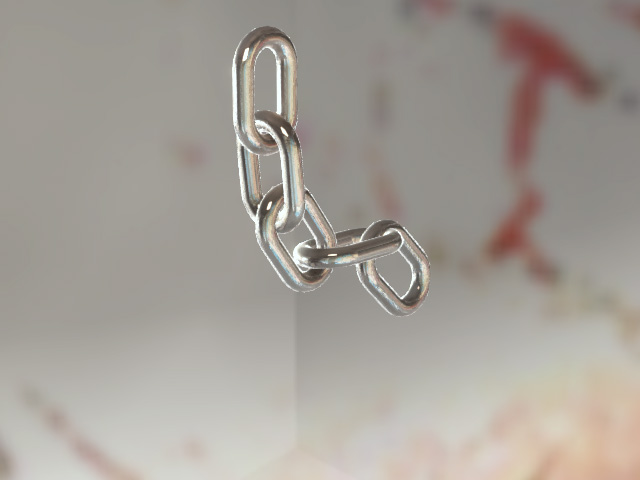
- Translate: when you want the nodes to exhibit a dramatic spring effect such as stretch or offset, then
you may select this radio button. The nodes will depart from the entity along with its movements.

Spring effect - Translate.
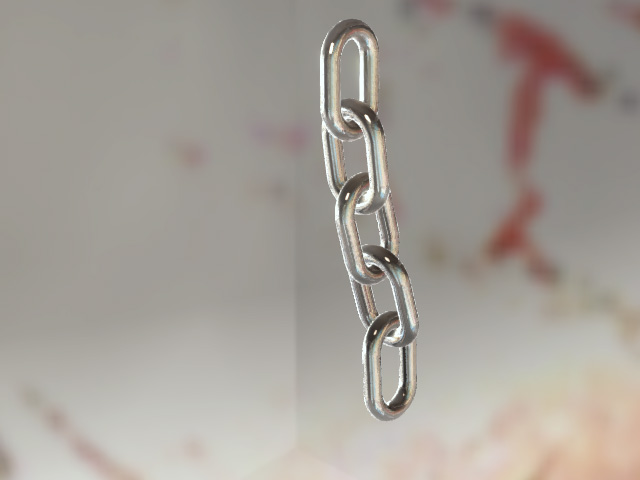
- Rotate: Select this radio button to set rotate spring effects such as waving or whirling.
This setting keeps nodes as firmly connected as possible while they rotate around.
However, when the mass is high or the node value is set rather soft, it might still show some offset.
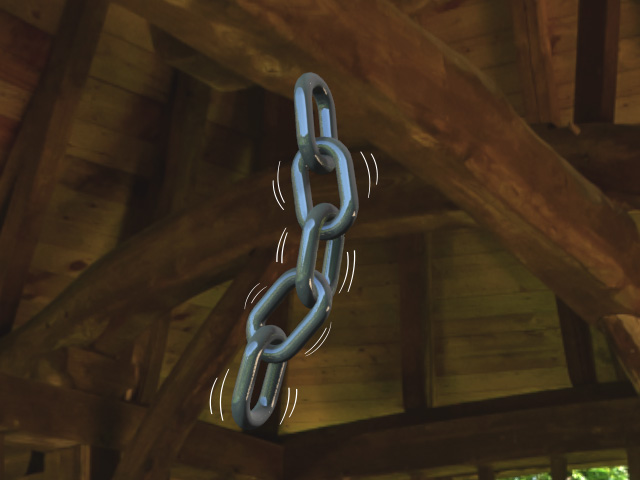
Spring effect - Rotate.
 Note
Note- The levels of the color indicate the strength of the Soft / Hard as described in the next section.
Soft and Hard
The softness of the spring effect can be applied to individual elements in a spring group (please refer to the next section for more information about the Spring Group), which determines the looseness of the nodes when they bounce.
Soft and Hard
Since the Soft / Hard slider determines the values of any element in a group, it is recommended that you set the nodes that are away from the root node with a harder value while the ones closer to the root with a softer one. This can ensure the spring chain naturally trembles without too much jittering.
|
Softest |
Hardest |
|
|
Please refer to the Managing Spring Groups section for more information about setting the overall spring effects.
