


Basic Conversion (New for v3.01)
The characteristics of BASIC conversion are:
- This conversion method applies to character's Skin, Eyes, Eyelashes, Teeth, Nails, Hair, Clothes, Accessories, Gloves and Shoes.
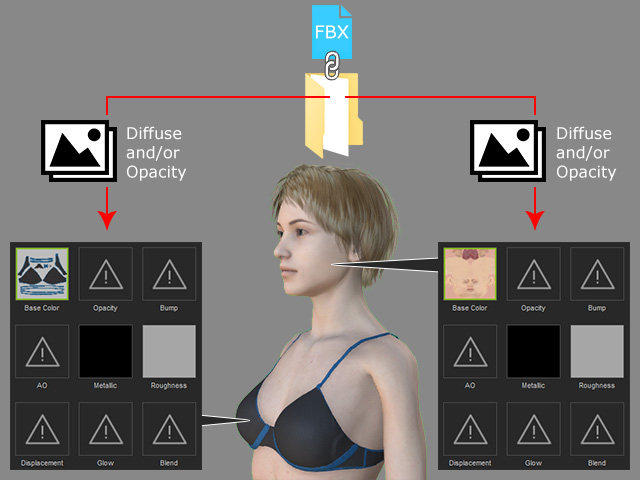
- The textures of the items listed above to be loaded and filled into the channels are Diffuse and Opacity (eyelashes only).
- It guarantees the correct texture conversion results.
- The fastest way to import DAZ assets.
- Best for Poser contents.
In the following steps, the G8 character from DAZ 3D is taken as an example.
Exporting Character from DAZ 3D
- Create a character in DAZ 3D, including the morphing and clothing.
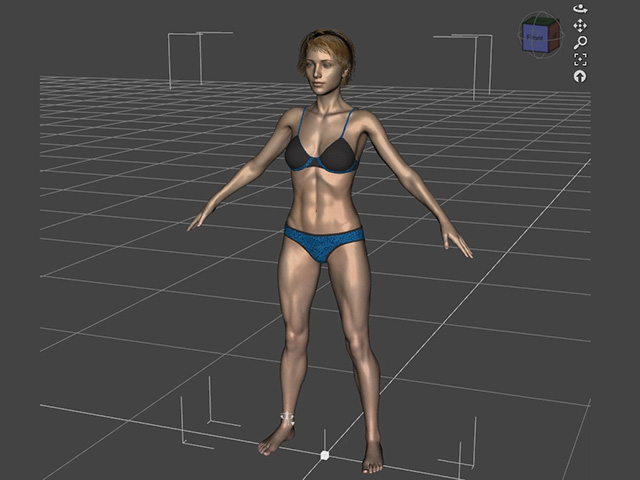
- Drag and drop a DUF file, G8FemaleT_pose.duf, onto the character to set it to T pose.
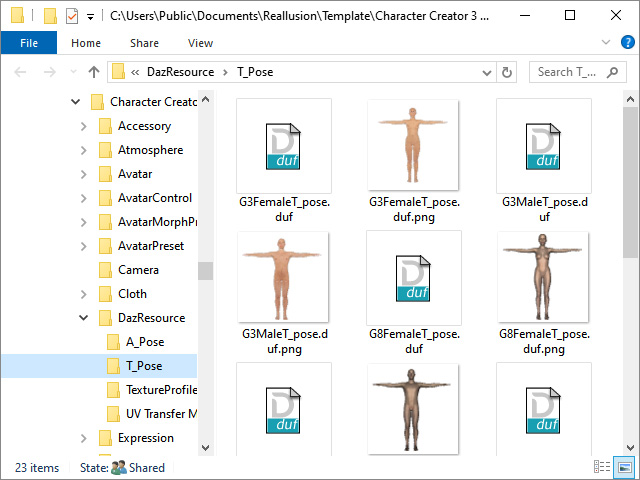
You can find the file in the path below after you have installed Character Creator 3 into the default path.
C:\Users\Public\Documents\Reallusion\Template\Character Creator 3 Template\DazResource\T_Pose - The character will act T-pose and be ready to be exported.

- Export FBX with the settings as shown in the illustration (FBX 2012 -- Binary is a must).
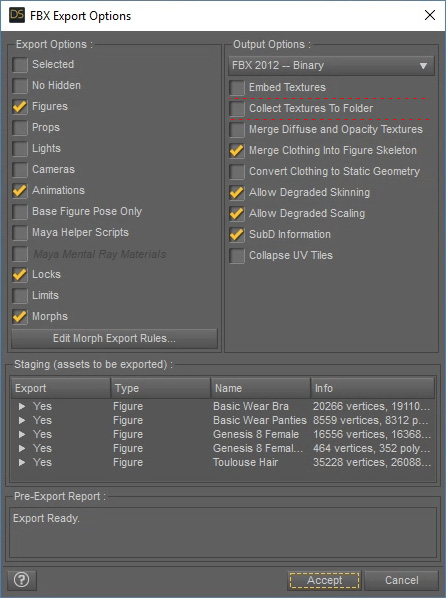
* Keep in mind that you DO NOT activate the Embed Textures and Collect Textures to Folder boxes. - Save the character as an FBX file.

Importing into Character Creator
- Launch Character Creator.
- Access the Create menu >> Transformer >> CC3 command.
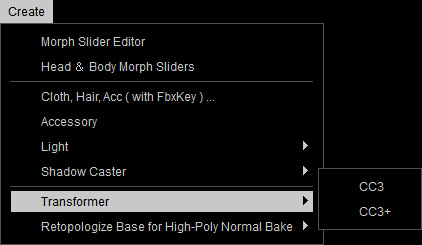
* Note that the CC3+ is for DAZ G3 and G8 characters only. - Select the file exported in the previous steps.
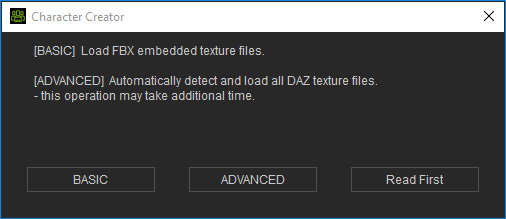
- When you encounter the dialog box, click on the BASIC button for loading the Diffuse and/or Opacity (for eyelashes only) textures the character ever be applied with in DAZ.
- In the Asset Import Status Report panel, activate the Bake Body Texture to adopt the DAZ textures for the converted character's Body skin, Eyes, Eyelashes, Teeth and Nails materials.
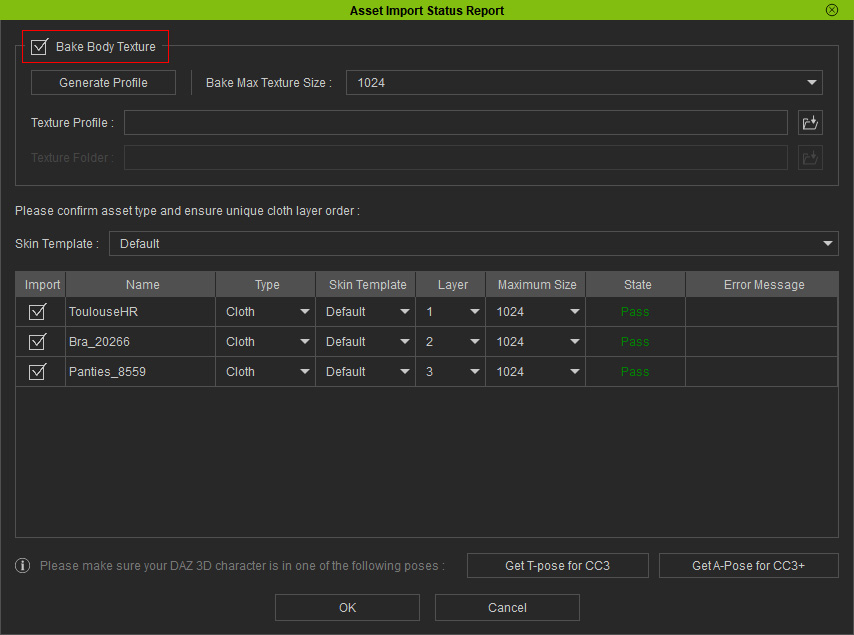
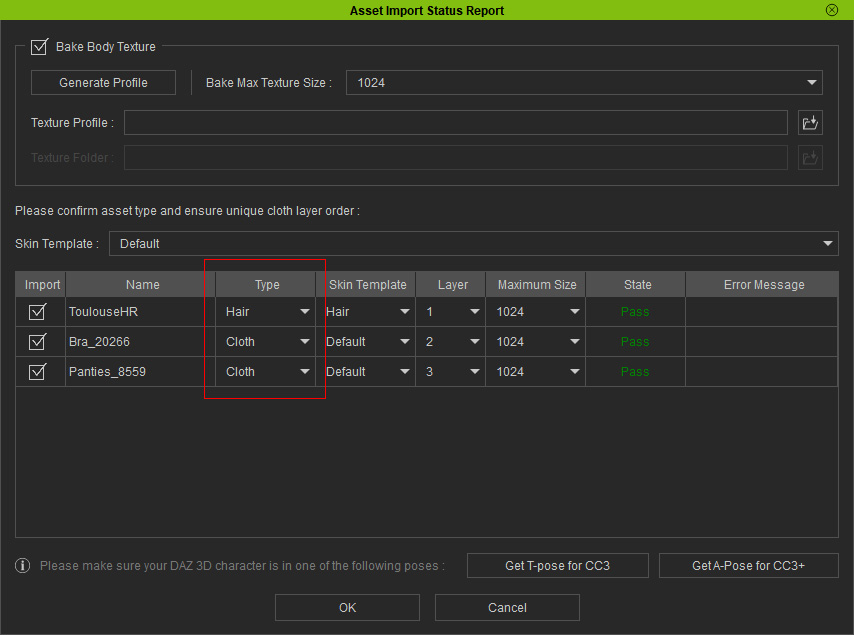
You can also set the textures' sizes after being baked by choosing from the Bake Max Texture Size drop-down list. - Identify the types of the contents of the character in the Asset Import Status Report panel.
 Note:
Note:- Usually, the Hair type need to be manually selected.
- If you skip the step 2 previously for applying T-Pose or A-Pose to the character, then you can click the Get T-pose for CC3 or Get A-Pose for CC3+ button at this step to put on the adequate poses to the character in DAZ.
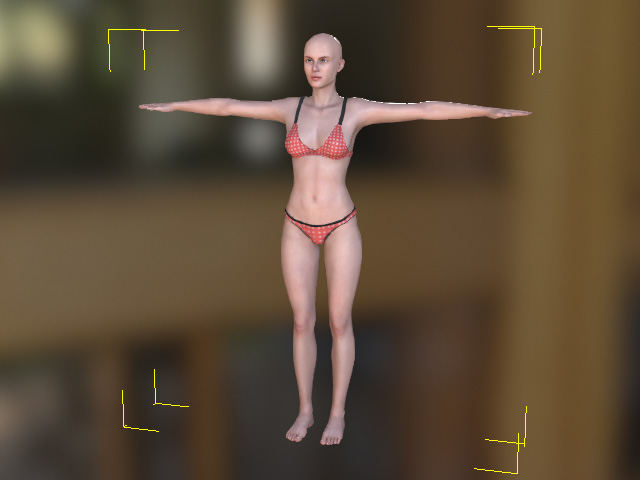
- Click OK to import the character and the assets on it. The DAZ 3D character thus is converted successfully into Character Creator.

- The Diffuse and Opacity (for eyelashes only) textures will be auto-loaded. You can check out the channels in the Texture Settings section. The folder is by default in the path: C:\Users\Public\Documents\My DAZ 3D Library\Runtime\Textures\...
 Note:
Note:The Metallic and Roughness channels are originally empty, but filled up automatically with default textures by Character Creator.
Please refer to the Procedures After Conversion section for more information.
