User Interface Introduction for Refine Face
Step 1 - LOAD IMAGE
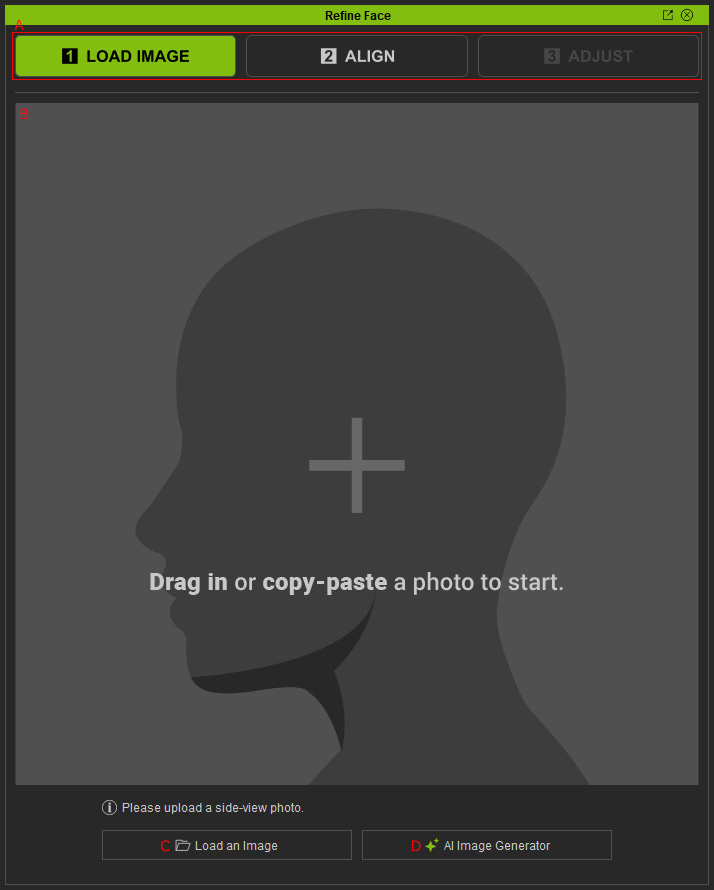
|
A |
Step Navigation Tabs |
Three numbered tabs at the top indicate the current refinement stage:
The active tab is highlighted, and users can switch stages as the workflow progresses. |
|
B |
Image Preview |
Display the loaded front face photo. There are three methods to load photos:
|
|
C |
Load Image |
Open the file browser for selecting a source image. |
|
D |
AI Image Generator |
Click to open the AI Image Generator panel. |
Step 2 - ALIGN

|
A |
Step Navigation Tabs |
Three numbered tabs at the top indicate the current refinement stage:
The active tab is highlighted, and users can switch stages as the workflow progresses. |
|
B |
Load Image |
Load Source Image of side face. |
|
C |
AI Image Generator |
Opens the AI Image Generator panel. |
|
D |
Selection Tool (Q) |
Switches to select mode for picking control points. |
|
E |
Camera Manipulation |
|
|
F |
Control Point Size |
Changes the size on the control points. |
|
G |
Control Point Opacity |
Changes the visibility of the control points. |
|
H |
Work Area |
|
Step 3 - ADJUST
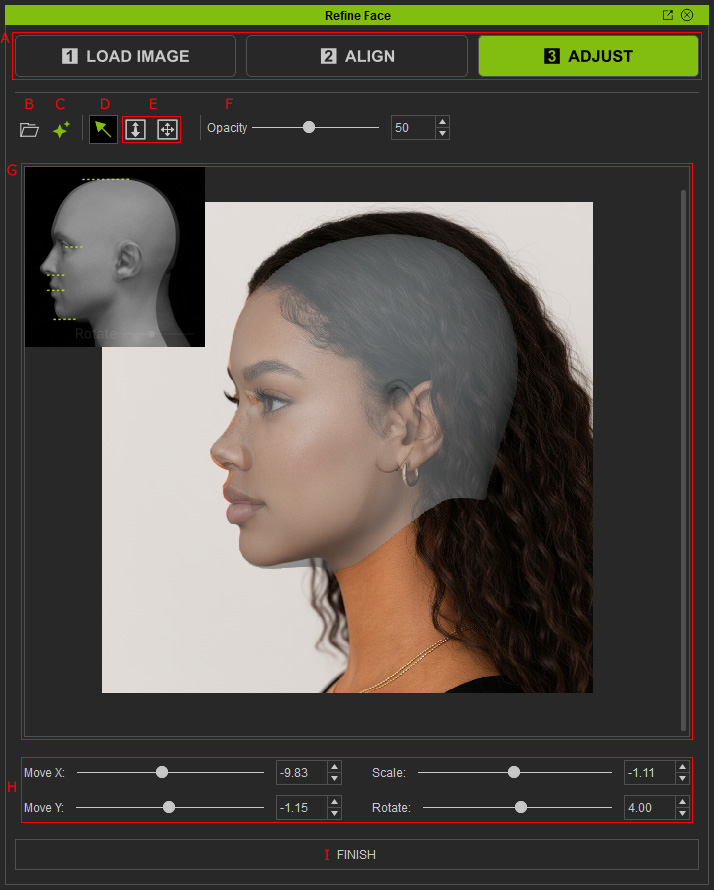
|
A |
Step Navigation Tabs |
Three numbered tabs at the top indicate the current refinement stage:
The active tab is highlighted, and users can switch stages as the workflow progresses. |
|
B |
Load Image |
Load Source Image of side face. |
|
C |
AI Image Generator |
Opens the AI Image Generator panel. |
|
D |
Selection Tool (Q) |
Switches to select mode for picking control points. |
|
E |
Camera Manipulation |
|
|
F |
Mesh Opacity |
Change the visibility of the dummy head mesh. |
|
G |
Work Area |
|
|
H |
Adjustment Sliders |
|
|
I |
FINISH |
Click after adjustment to finalize the Mesh Placement and enter the next stage. |
