Base Mesh Projection Workflow
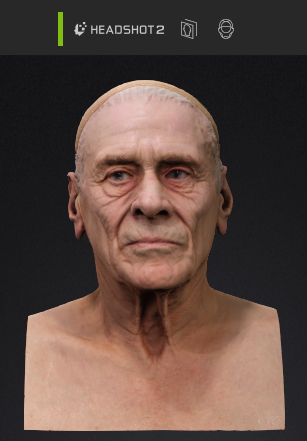
The base mesh projection workflow employs a neutral head scan model as the projection source for the Face Tools base model. This technique allows you to create a CC3+ character with precise facial mesh structures and highly detailed wrinkles that match the head scan model accurately.
- Import a neutral scan model as the base for Headshot 2 in CC.
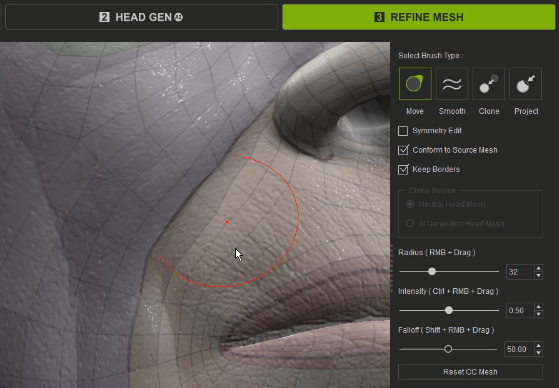
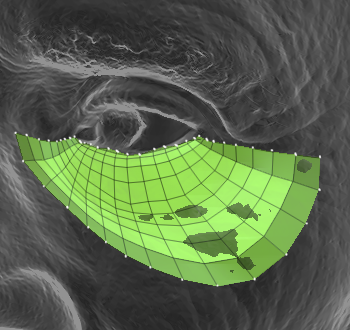
- During the Refine Mesh process make sure the range map wrinkles align accurately with the wrinkle positions on your scan model. Achieving this alignment correctly can help minimize wrinkle-matching issues during the subsequent expression projection process.
 Note:
Note:
Aligning the range map topology in Headshot 2 is far more convenient than doing so in ZBrush because the Face Tools plugin only offers support for recording sculpted mesh details and applying polypaint within ZBrush.
- After completing the Headshot 2 process, click the Face Tools icon located in the top toolbar.

- The ZBrush Face Tools dialog box will appear. Follow the setting parameters below before transferring your model to ZBrush.
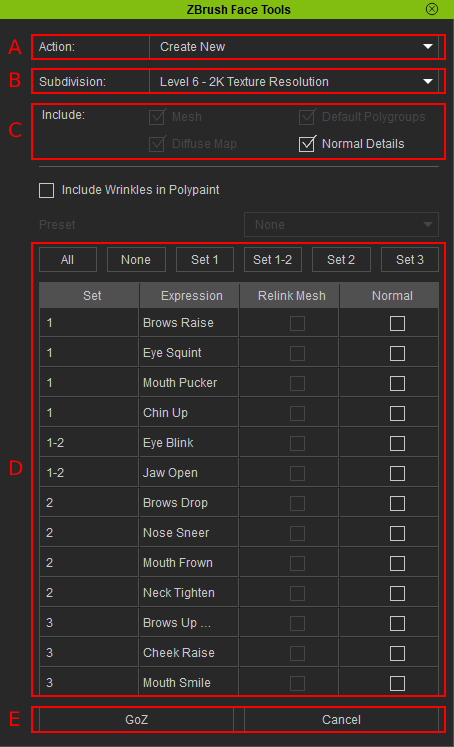
- For the Action field, opt for ‘Create New’, as you are creating a new project in ZBrush.
- For Subdivision, select the desired resolution for your ZBrush model.
- For the Include section, activate the Normal Detail option to utilize the CC default normal map for your character model.
- Deactivate all the wrinkle expression options, because you will project all the expression details from the scan models in ZBrush.
Note:
Deactivating all the expressions can streamline your workflow during the transfer process.
- Click the GoZ button near the bottom of the dialog box to send your character to ZBrush.
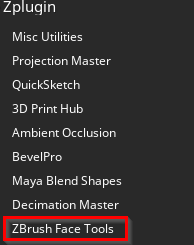
- In ZBrush go to Zplugin > ZBrush Face Tools to access the plugin.
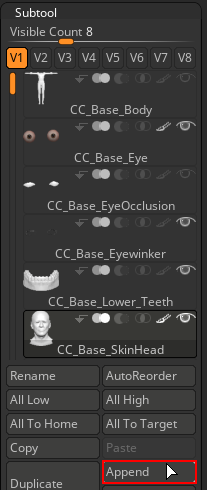
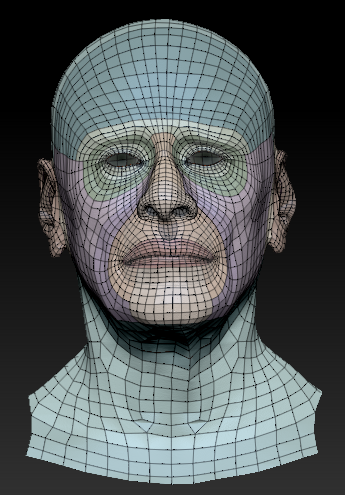
- To commence the projection process, which involves projecting the imported scan model onto your CC3+ model, begin by opening the Subtool > Append and selecting a 3D mesh. Following this, select the 3D mesh subtool and navigate to Tool > Import to import the identical scan model that you utilized in Headshot 2 into ZBrush.
Commencing Projection Process
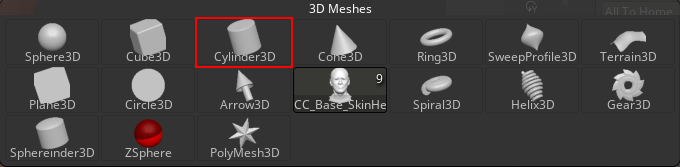
- Click the Append button.
- For this scenario, select the ‘Cylinder3D’.
- Click the Import button.
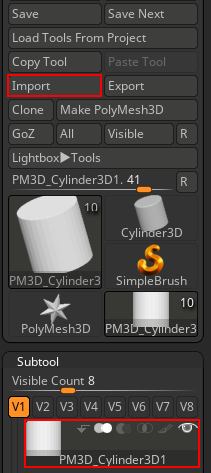
- Click the Append button.
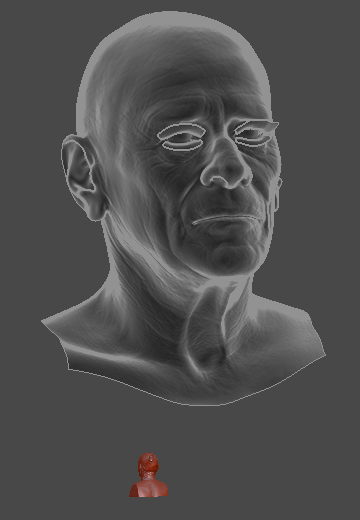
- Align the position and size of the imported scan model with the ‘CC_Base_SkinHead’ subtool using the 3D gizmo.
Before modifying the scan model’s position and size.
After modifying the scan model’s position and size.
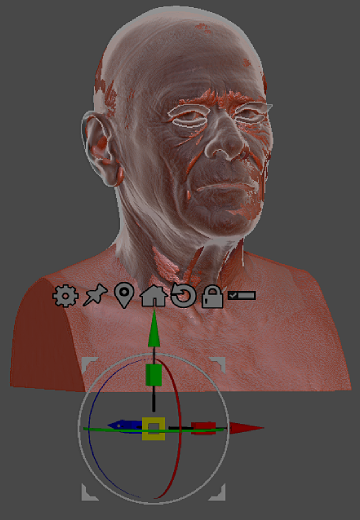
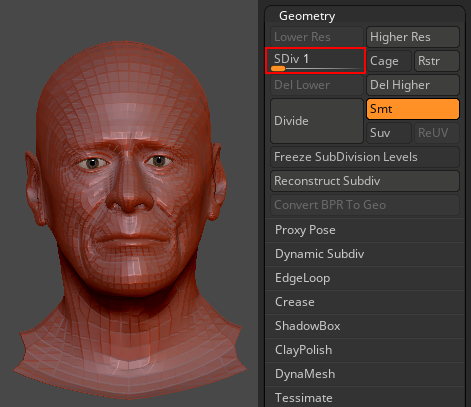
- Switch your ‘CC_Base_SkinHead’ subtool’s SDiv to level 1.
- Use the move brush to align the CC3+ mesh structure with the mesh shape of the scan model as closely as possible.
Note:
You can use the default polygroup for isolating the ears, eyes, and mouth meshes for more accurate adjustments.
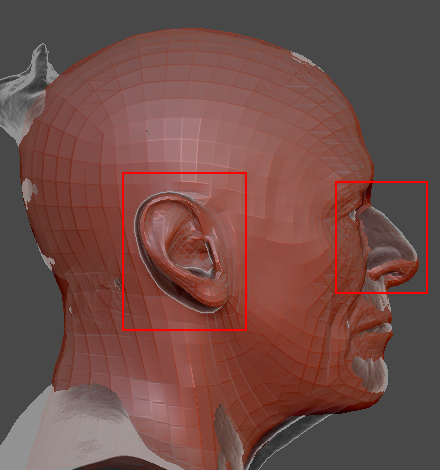
Before ears and nose mesh adjustments.
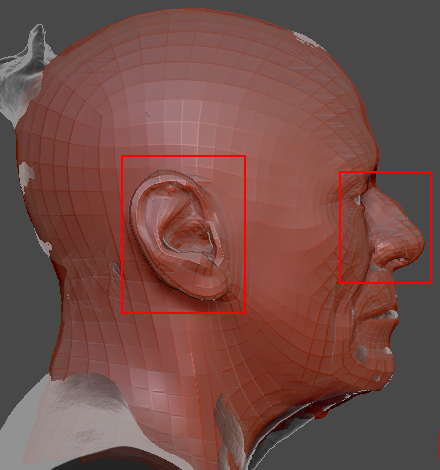
After ears and nose mesh adjustments
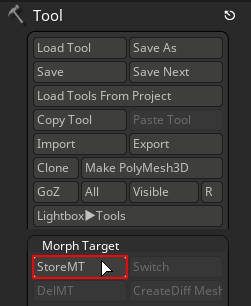
- Navigate to Tool > Morph Target > StoreMT to preserve your current mesh structure. This will prove beneficial for resolving mesh artifact issues that may arise after mesh projection in subsequent stages.
- In the Subtool section hide all the subtools, leaving only the subtools you intend to project onto visible.
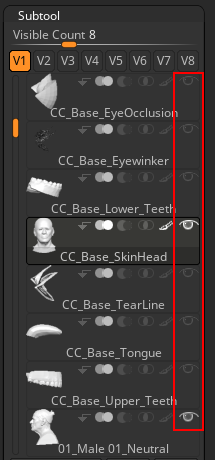
Use the default polygroup to isolate the polygroup you want to project.
Note:
The ZBrush Project feature will only project the visible subtools within the viewport, any hidden meshes will not undergo projection.
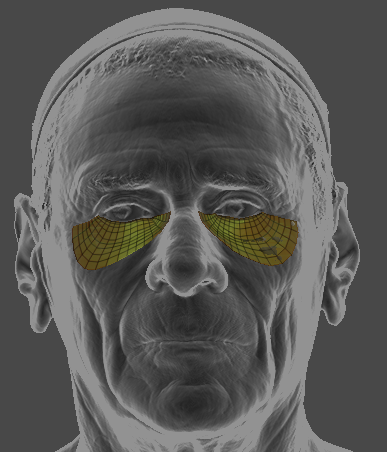
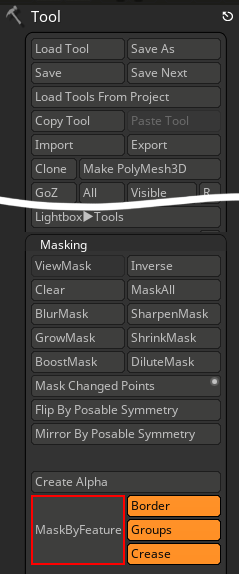
- Navigate to Tool > Masking > MaskByFeature to mask the border of your polygroup.
.png)
Before masking the border.
After masking the border.
When projecting or refining the mesh structure of your CC3+ model it is important to activate the range map and ensure precise alignment of your model’s wrinkle positions with the scan model, in order for your model to exhibit proper morphs and expressions in CC.
Note:
Applying a mask along the polygroup’s border can help prevent seam issues when projecting between different polygroups.
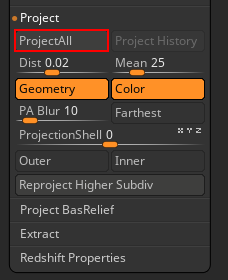
- In the subtool, open the Project dropdown menu and select ProjectAll to initiate the projection of your CC3+ model onto your neutral scan model.
Along the polygroup’s border you may notice the emergence of certain mesh artifacts. To solve this issue click the brush icon at the top left corner of the viewport and opt for the Morph brush.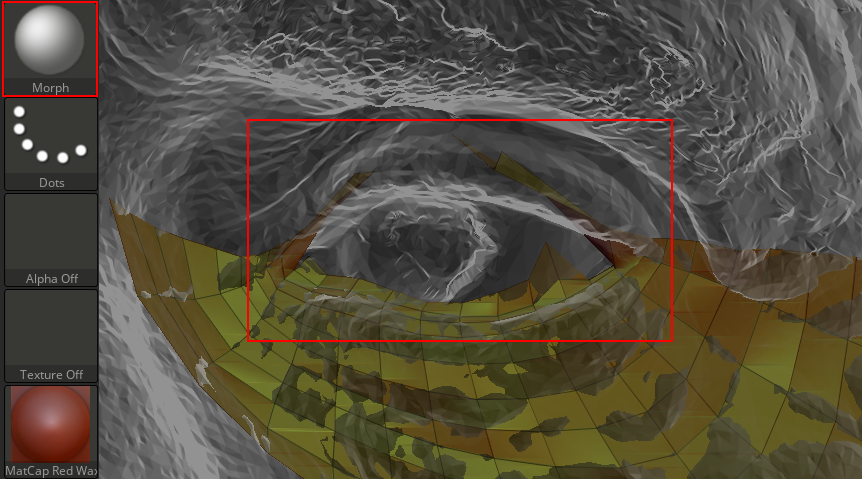
- Use the morph brush to brush over the mesh artifacts; this action will restore the mesh structure back to its initially saved state (Step 10).
Before using the morph brush to restore the mesh structure
After using the morph brush to restore the mesh structure
- Fine-tune the inner corners and borders of the mesh, such as the inner eyelids, inner mouth borders, and nostrils, to align with the scan model’s mesh position. We recommend manually adjusting these areas using the move brush, as they are particularly delicate and can encounter issues when using projections.
Before refining the inner borders of the inner lower eyelids.
After refining the inner borders of the inner lower eyelids.
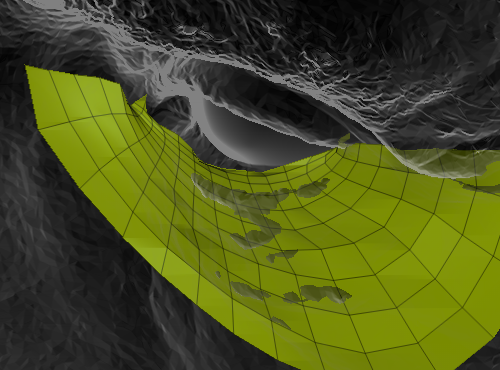
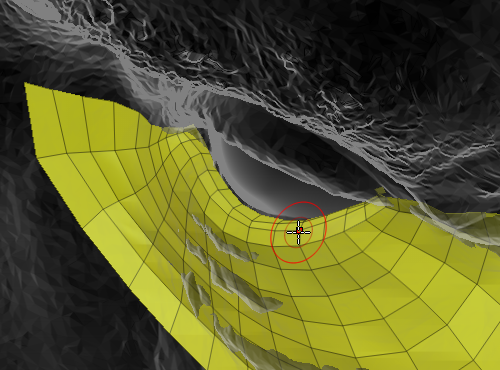
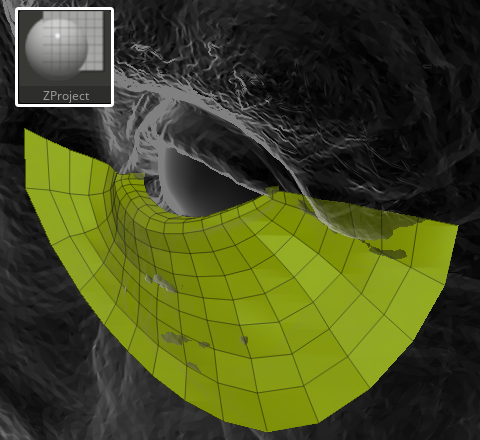
- To handle larger areas with simpler mesh structures, you can use the ZProject brush to project the scan model shape onto your CC3+ model.
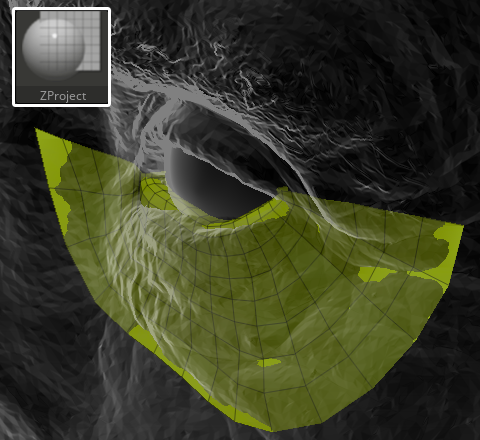
Before projecting the eye bag meshes.
After projecting the eye bag meshes.
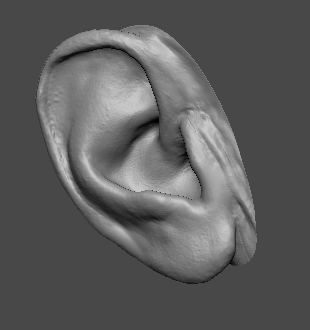
- Once the SDiv level 1’s mesh structure has completed the projection process, you can increase the SDiv level to project additional details onto your CC3+ model.
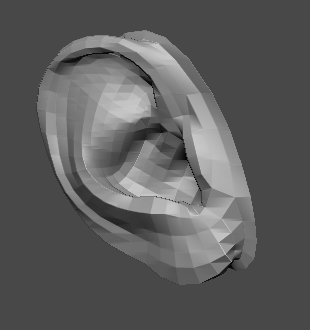

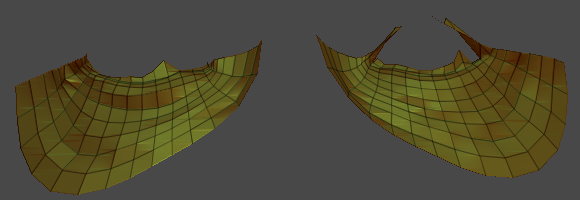
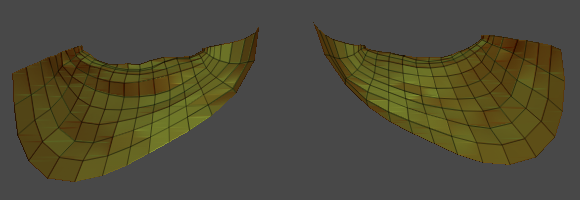
Ear polygroup in SDiv 1
Ear polygroup in SDiv 3
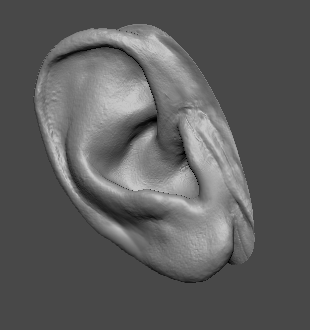
Ear polygroup in SDiv 5
Ear polygroup in SDiv 7
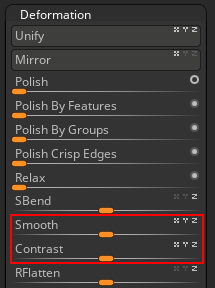
Note:
Should the mesh projection result exhibit multiple artifacts, you can use the Deformation feature’s Contrast slider by setting it to a negative value for removing mesh artifacts. Additionally, you can employ the Smooth slider, setting it to a positive value to alleviate noise on your mesh.
- Replicate the same process outlined in steps 12 to 17 for the remaining polygroups you want to project in your model.
- After the projection process is completed, use the 3D gizmo and the Move brush to align the position of your tear duct mesh, ‘CC_Base_Eye’, ‘CC_Base_Lower_Teeth’, ‘CC_Base_Upper_Teeth’, ‘CC_Base_Eyewinker’, and ‘CC_Base_Tongue subtools’ to match the scan model’s position.
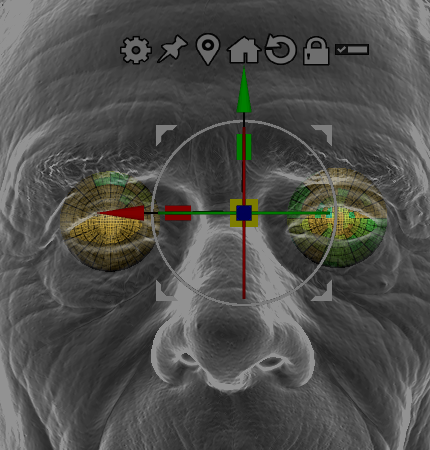
- CC_Base_Eye:
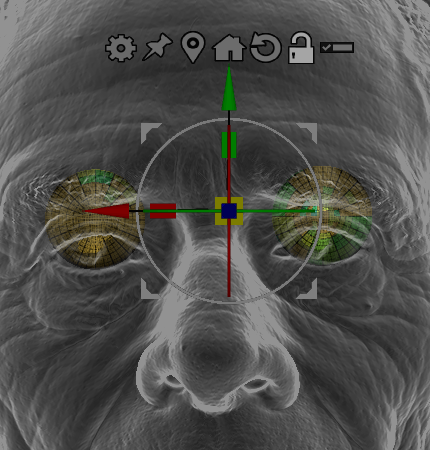
Before adjusting the position of the CC_Base_Eye mesh.
After adjusting the position of the CC_Base_Eye mesh.
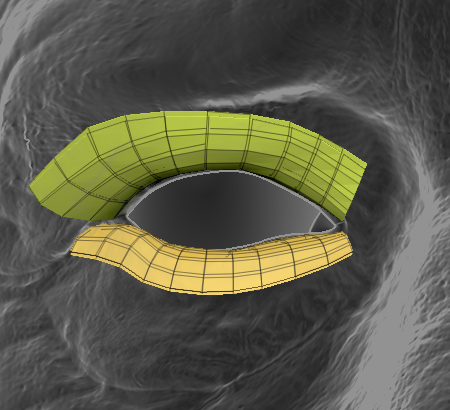
- CC_Base_Eyewinker:
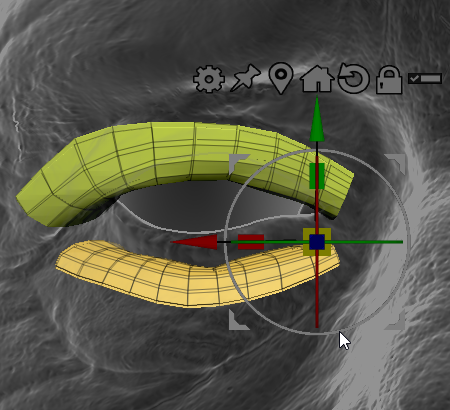
Before adjusting the position of the CC_Base_Eyewinker meshes.
After adjusting the position of the CC_Base_Eyewinker meshes.
- CC_Base_Eye:
- Continue to this page to perform the projection of the scan model’s diffuse map onto your CC3+ model as polypaint, or you can click the Update to Character Creator button to update your current model to CC.
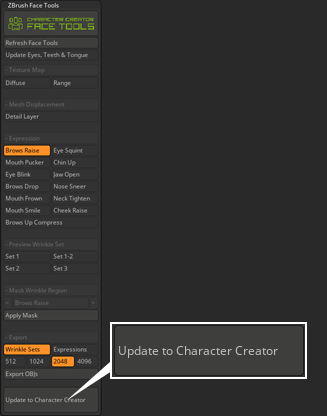
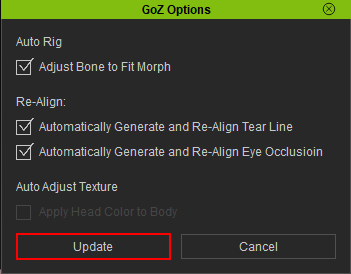
- Update to Character Creator dialog box will appear; here, you should deactivate the Update Expression / Wrinkles option to reduce transfer time, then click the Update to Character Creator button.
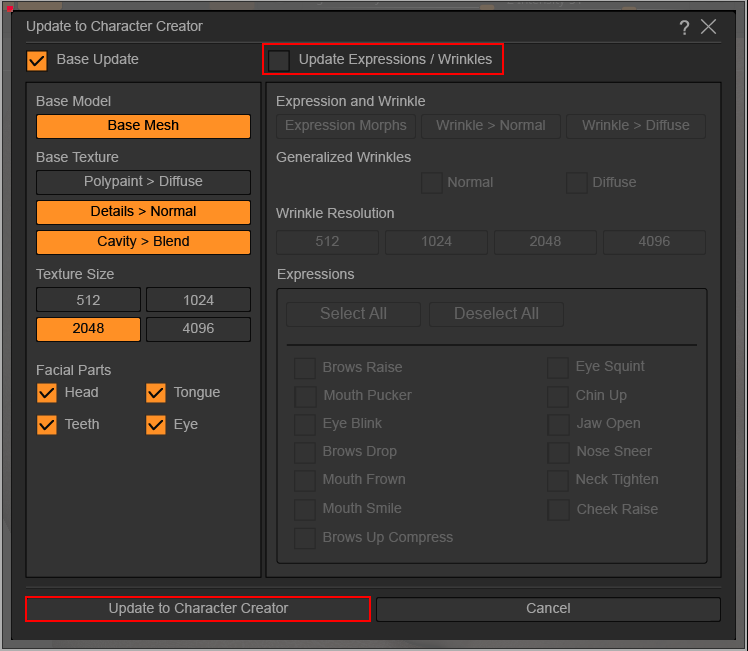
- In CC, use the default settings in the GoZ Options Dialog box and click Update.
- The new scan model will be updated to the character model in CC.
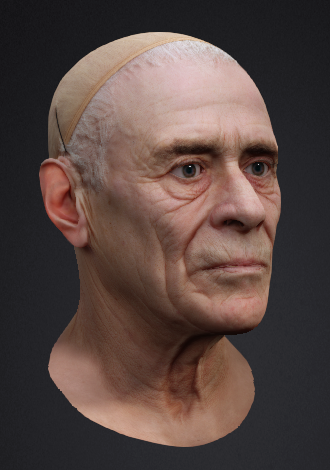

Before the projection update.
After the projection update.
