


Creating a Path Animation
Once you create a character or a prop, you may then create a path for it. When you playback the project, the character or prop will then move along the path you set.
-
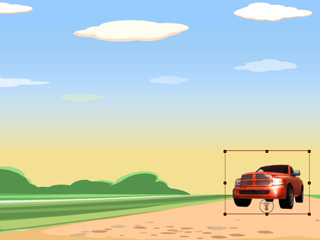
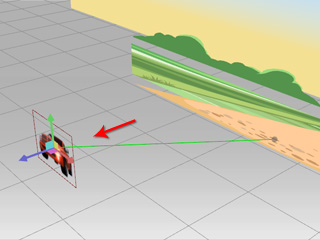
Select a character or a prop (character in this example) in the Stage Mode. By default, Cartoon Animator switches to the
Transform mode as soon as you select a character or a prop.
-
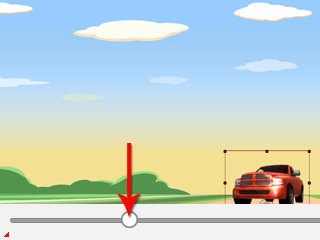
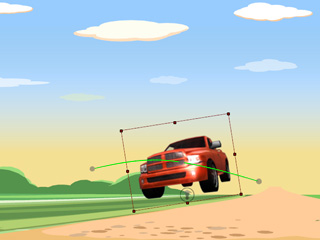
Go to another time frame.
-
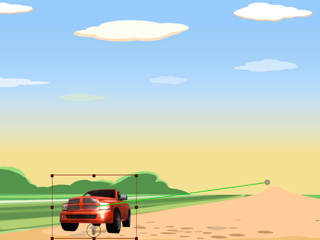
Set a key by transforming
inside the working area. A green path automatically forms.
-
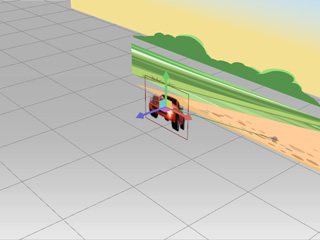
If you want to set a key on the Z axis, then you may do so by
adjusting the Z values with 3D view.
-
Play back the project to see the result.
 Note:
Note:- Each sprite in a prop can also have its own animation. Please refer to the Sprite Transformation Animations section for more information.
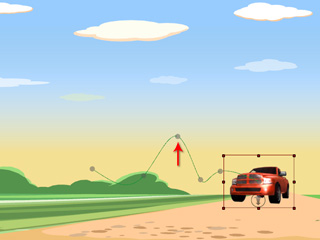
Once the path is created, you may need to edit it.
-
Go to another time frame. Move, scale or rotate the prop away in order to
generate a new transform key.
-
Repeat Step 1 to add more points to the path.

-
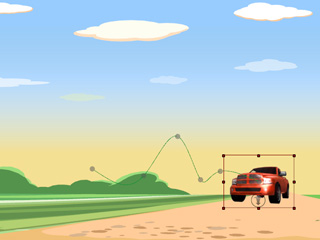
Drag a point on the path, but away from its current location. The line between the two key points will be automatically modified.
-
Show Property Bar on the working area.

-
Switch between the
 and
and  buttons to change the path from
a curve to a straight line.
buttons to change the path from
a curve to a straight line.

Curve
Linear