Adding Tags to Items 

Tagging an item helps you find it among a large content library. Custom tags can be applied to both template and custom content.
- Tags added to template content in Content Manager are stored locally and remain unaffected by installation status.
- Custom content tags are directly written into the metadata. Updates to custom content tags sync with the original content when added to a custom pack. When the pack is published in the Marketplace, these tags become developer tags in the Content Information panel.
Follow the steps below to add tags.
-
Switch to the Item View.
Move to a content category with the Category Buttons on the top, or by clicking the categories in the tree-view.
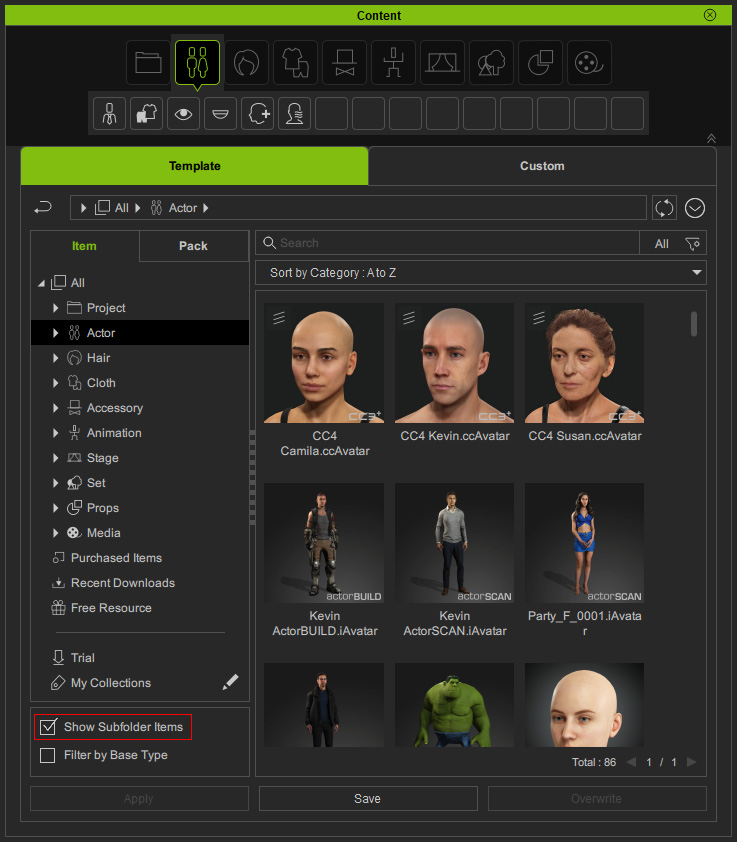
* You can enable the Show Subfolder Items on the bottom to view all items from separate content folders. - Pick one or several items.
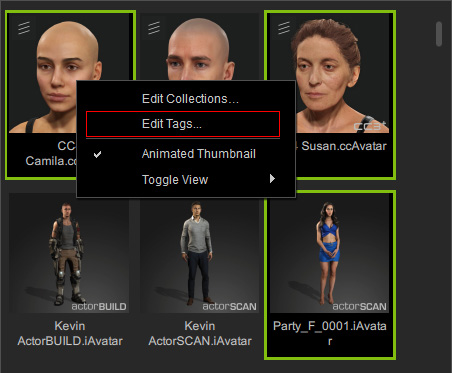
Right-click on them and choose the Edit Tags... command from the context menu.
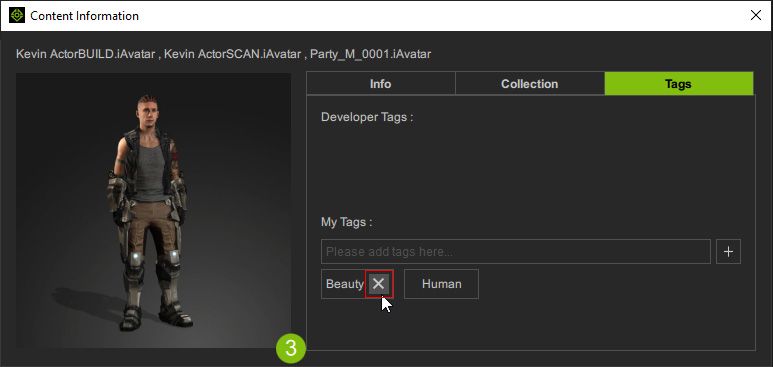
- The Content Information panel shows with the Tags tab open.
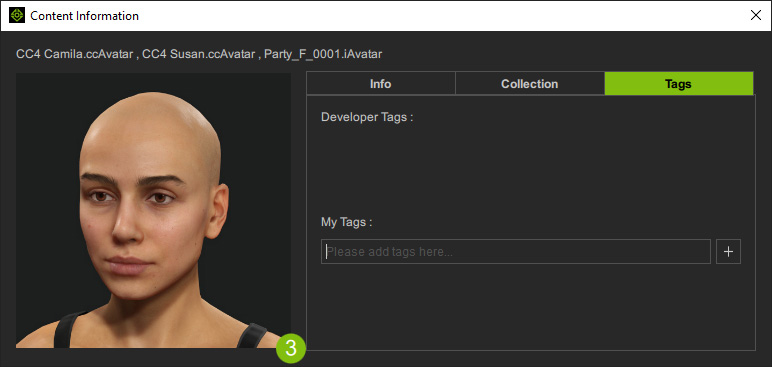
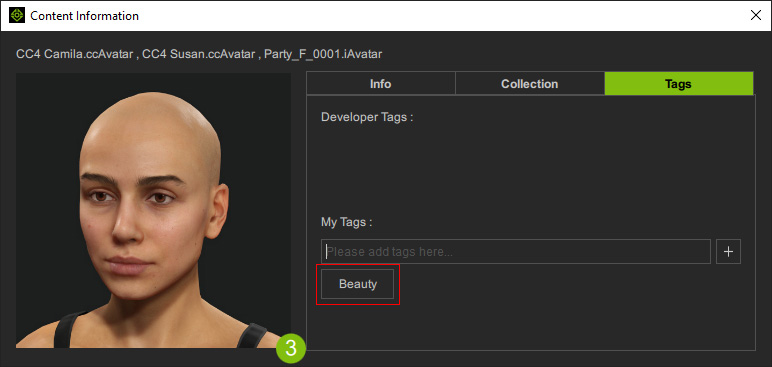
- Type in the desired tag string ("Beauty") in the text field.
Press the Enter key or click the + button.
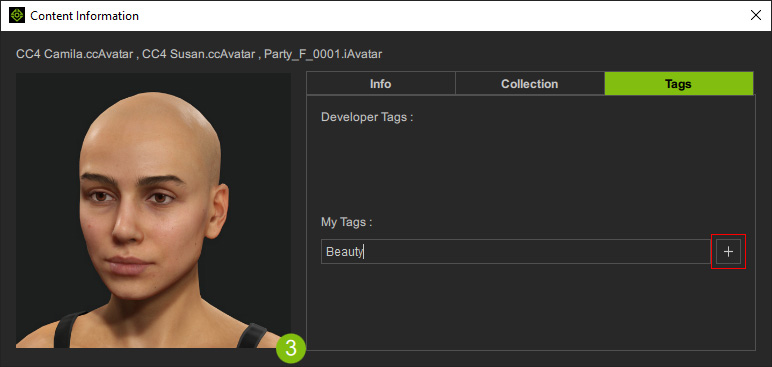
- The tag with the custom string is added to multiple items at once.
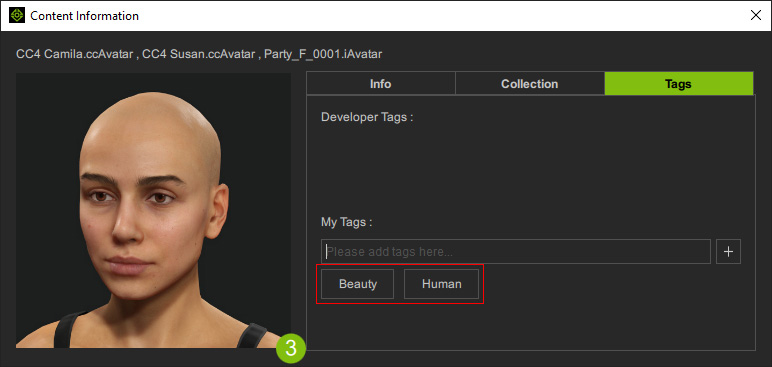
- Using the same steps above, add more tags to the items if you wish.
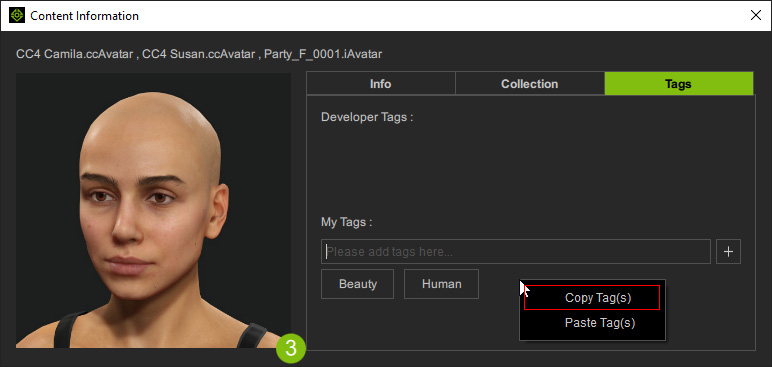
- To copy tags to other items, right-click on an empty area beside the tags and select the Copy command from the context menu.
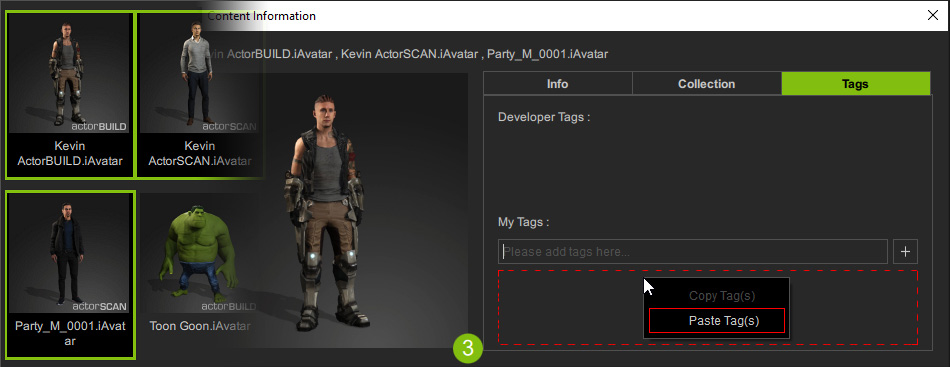
- Pick another items on the shelf.
Right-click on the empty area below the text field of the panel and select the Paste command to append tags to the currently selected items.
- By hovering the cursor over a tag, you can click the X button besides it to discard the tag.
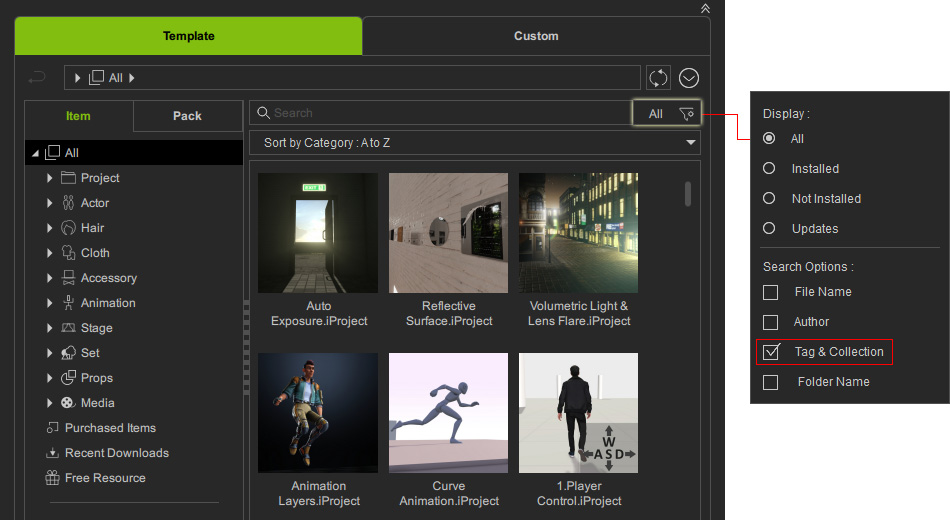
- Click on the All category to search your entire content inventory.
Click the Filter button to make sure the search option Tag & Collection is enabled.
- Type in the entire string of the tags you just created ("beauty human" separated by a space) in the search field.
Press the Enter key.
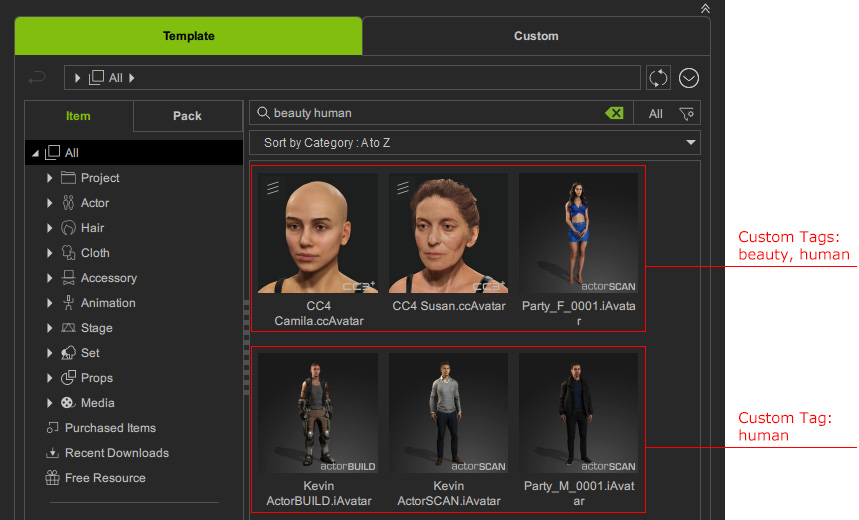
The Content Manager will return items of matching tag names and rank according to the search rules.
