Scene Manager
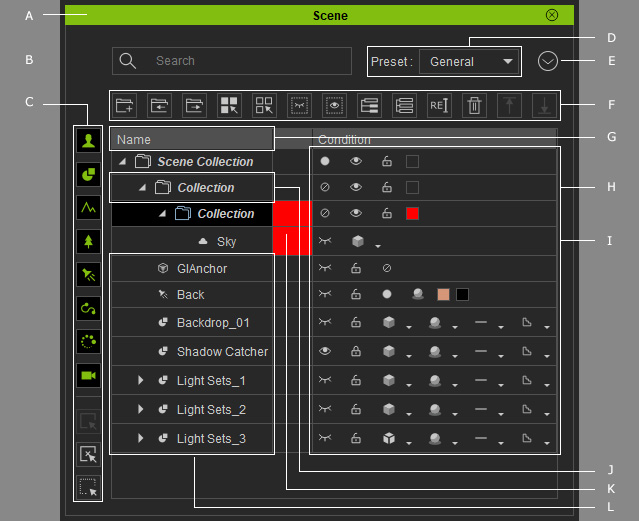
The Scene Manager displays all the objects and actors included in the current project. You can select multiple items, show/hide the objects altogether, lock them from being selected in the working area, or even adjust the render state.
-
 Dock / Undock
Double-click on the caption to dock the panel to the docking place, or undock the panel and make it float above the main program.
-
 Search
Type full or partial names of objects in the search field to search for desired objects.
-
 Filters
Use the Filter to show / hide specific categories. This is an easy way to keep the Scene Manager clean.

- Show Character: Shows characters along with their accessories in the Scene Manager.
- Show Prop: Shows props in the Scene Manager.
- Show Nature: Shows elements of the nature in the Scene Manager, including the Terrain, Water and Sky.
- Show Plant: Shows plants in the Scene Manager, including the Trees, Grass, and Winds.
- Show Light: Shows lights in the Scene Manager, including Directional Lights, Spotlights, Point Lights and GI Anchor.
- Show Constraint: Shows constraints in the Scene Manager, including the Physics Constraints and Motion Paths.
- Show Effect: Shows different effects in the Scene Manager, including the Image Layers, Particles and Lens Flares.
- Show Camera: Shows cameras in the Scene Manager.
- Show All: Shows all items in the Scene Manager.
- Hide All: Hides all items in the Scene Manager.
- Invert: Shows all hidden items while hide all shown ones in the Scene Manager.
-
 Preset
Toggle three presets for filtering the objects.

You are allowed to adjust the filters in the preset via Menu > Preset Settings described in the next section. -
 Menu Button
Click this button to show the menu for manipulating the Scene Manager, including:

-
Launch the Preset Settings dialog box to
adjust the show/hide object status icons, or change the display order of these icons in each preset.
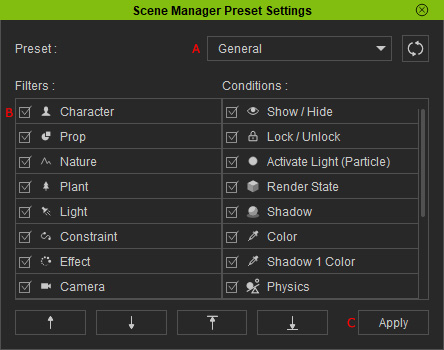
- Preset: Provides options for different filters.
- Checkboxes: Activate or deactivate the checkbox to adjust the filter.
- Apply: Saves the preset settings.
- Sort By Name (A to Z / Z to A): Sorts the items by name in ascending or descending order.
-
Launch the Preset Settings dialog box to
adjust the show/hide object status icons, or change the display order of these icons in each preset.
-
 Toolbar

- Create Sub Empty Collection: Creates a new empty collection (group) under Scene Collection (root) or custom collections.
- Add to New Collection: Creates a new collection and move the selected items into the collection.
- Bring to Front: Moves collection or sub-items one level up.
- Select Hierarchy: Select a collection and click this button to select all sub-objects under it.
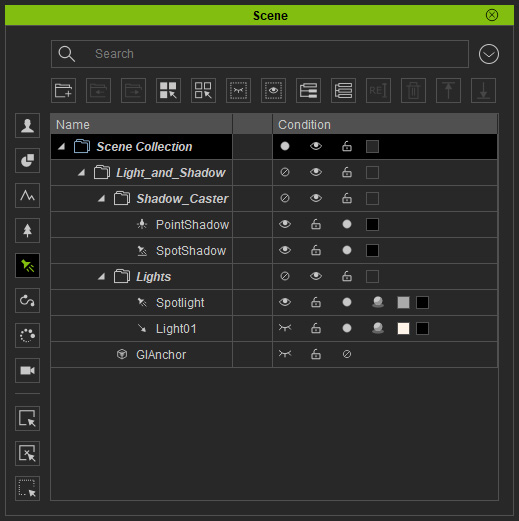
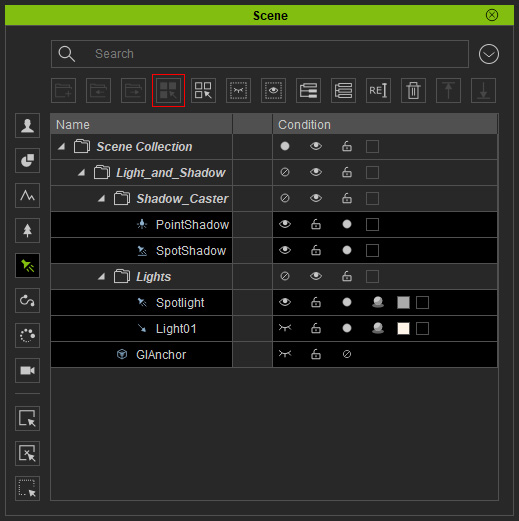
Before
After
- Select Invert: Invert current selection, hide unselected objects or show all objects in the scene.
- Hide Unselected: Hides the unselected items from the viewport.
- Unhide All: Shows all hidden items.
- List Expand: Expands all collections or items with parent-child structure.
- List Collapse: Collapses all collections or items with parent-child structure.
- Rename: Renames the selected objects.
- Delete: Deletes the selected items.
- Move Up: Moves the selected item up by one row.
- Move Down: Moves the selected item down by one row.
-
 Sort
Sort
Click the Name caption, to re-order the object by their alpha-numeric order.
-
 Object Status Icons
Multi-select object rows in different categories, and you can simultaneously change the following object status items:
Status
Icons
Descriptions
Activate / Deactivate
 : Activate
 : De-activate
- Collections:
- Lights: You can turn the light on/off by clicking on the sphere-shaped icon.
Show/Hide
 : Show
 : Hide
Show or hide the selected object. This status does not affect the export result.
Lock/Unlock
 : Lock
 : Unlock
Lock or unlock the selected object. If an object is locked, then it cannot be picked in the Preview window. Please refer to the Locking and Freezing Camera section for more information.
Render State
 : Normal
 : Smooth
 : Wireframe
 : Bounding
 : Wireframe on Shaded
 : X-Ray
You may specify the render status for each object to relieve the load on system resources. This status does not affect the export result.
The status includes:- Basic Modes -
Normal, Smooth, Wireframe and Bounding Mesh


Normal
Smooth
Wireframe
Bounding Mesh
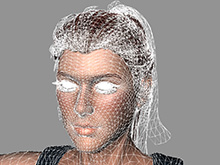
- Wireframe on Shaded: This mode displays the surface of the object with
wireframe covered. When the wireframe mode seems too difficult to identify the
selected meshes due to the high density of the wireframes, then switch to the
Wireframe on Shaded mode for getting more clues of the selected objects.
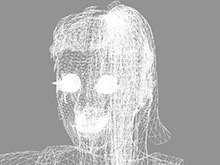
Wireframe
Wireframe on Shaded
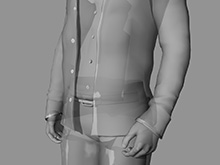
- X-Ray: Since some objects, such as CC characters, maybe composed of
multiple layers (clothes for characters), with this mode you are able to easily
observe the relationships between each layers.
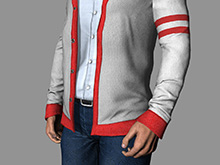
Normal
X-Ray
Shadow
 : All Shadows
 : Cast Only
 : Receive Only
 : No Shadows
You can decide to turn the shadow effect on/off for each object, cast the object shadows only, or receive shadows from other objects only.
Physics
 : None
 : Rigid Body
 : Soft Cloth
You may turn the Rigid Body or Soft Cloth simulation on/off.
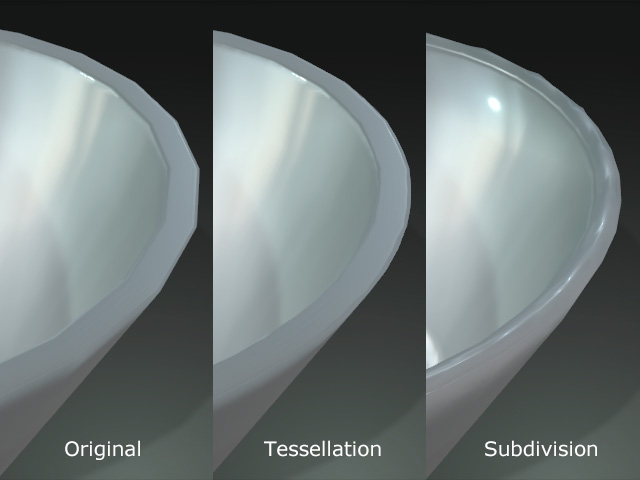
Realtime Smooth
 : Original
 : Tessellation
 : Subdivision
 You may turn the Realtime Smooth or Subdivision on/off.
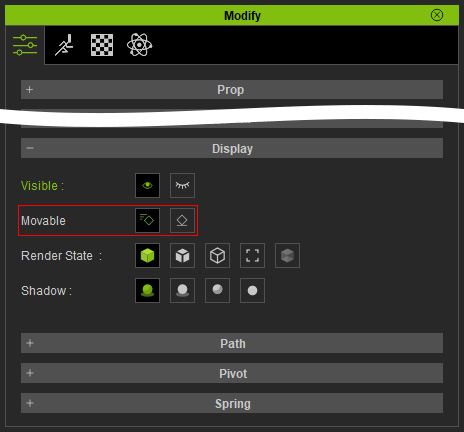
Movable
 : Animatable
 : Static
- The characters or props that are set to Animatable can have animation clips or keys, while the ones set to Static can not.
- Objects set to static release the system resources in order to increase the performance, especially for a massive scene with abundant character's and props.
- When an object is set to static, the bounding box becomes light blue.
- Moving static objects elsewhere does not auto-add transform keys to them.
- You can also toggle these two statuses under the Modify > Display section.
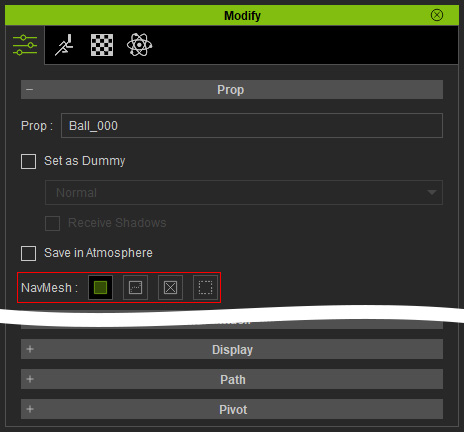
Props for NavMesh
 : Static
 : Dynamic
 : Impassable
 : Passable
These settings are used for trimming the Navmesh with props.
You can also toggle these four statuses under the Modify > Prop section.
Color
 : Color
- Light Color: You can change the color of the light.
- Shadow Color: The shadow color can be changed as well.
- Collection Color: You can change the collections' color, too.
Light Shadow
 : Activate Shadow
 : No Shadows
You may turn on/off the shadow of the light.
-
 Collection
Creates custom collections as groups for specific items. You can apply this method for Merging Projects.
-
 Collection Color Column
Shows the color of collections. Items will be assigned same colors as the collection they belong to.
-
 Object Name
Double-click on the object name to enter name-editing mode.
- Some items such as water, trees, grass, particle emitters, and terrains cannot be selected or are difficult to be selected from within the 3D viewer. Use the Scene Manager panel instead to easily select them.
-
The Scene Manger will also show the parent / child node structure of a
3D object, so you can use this behavior to select the child node directly.
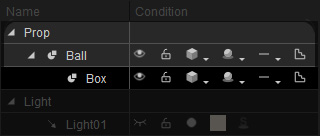
- The object status on each icon item will be saved to iClone project files.


