Modify Panel
The Modify Panel contains adjustable parameters that belong to the object currently selected.
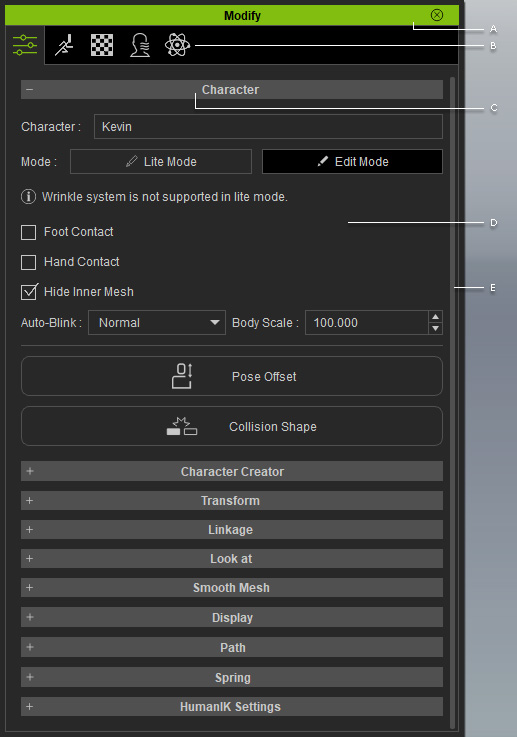
Double-click on the title bar to dock the panel to the docking place, or undock the panel and make it float above the main program.
This panel includes four category tabs. You may click the tabs to find different features that belong to the picked object.
- Attribute tab: To adjust the attributes and set keys on the object, such as Transform, Linkage, Look At, Path and Spring keys on the timeline.
- Animation tab: To generate body motions and facial expressions for the actor, or animate the prop with various tools.
- Material tab: To modify the material and texture settings, including Substance and Tessellation features for the object.
- Physics tab: To activate physics settings (Rigid Body or Soft Cloth) for the object.
You may expand or collapse each section by clicking the +/- symbol. There are hotkeys you can use to jump to that section. Please refer to the Global Shortcuts >> Modify Panel for more information.
The adjustable parameters associated with the objects in the current project. You may set parameter value for all the objects in the 3D viewer.
There is a scroll bar at the right of the panel. Click and hold the mouse down anywhere on it and drag up / down to navigate the whole panel when it is longer than one page. Alternatively, you may roll the mouse wheel to scroll it up / down.
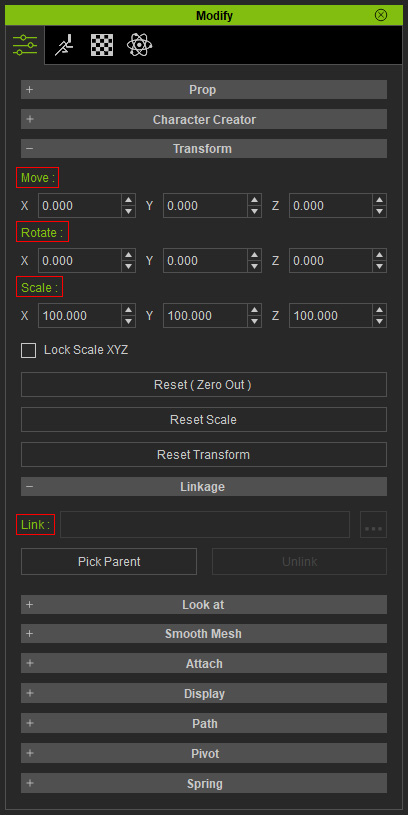
Keyable Parameters or Settings
When a parameter or setting is keyable, the name will be highlighted in green.
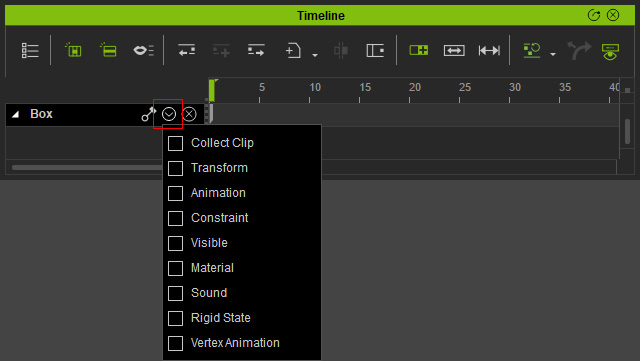
You can also open the timeline and press the drop down arrow next to the name of the object to show the keyable parameters or settings of the object.


