Creating Morphing Slider for Default Character
-
Prepare a target character in OBJ or iAvatar format.
-
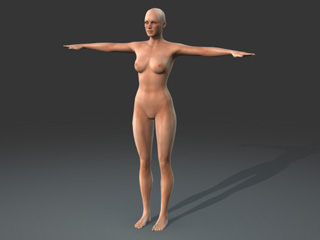
Launch Character Creator. A female character is loaded by
default.
-
Retrieve the default appearance of the character.
 Note:
Note:To retrieve the default appearance of the character:
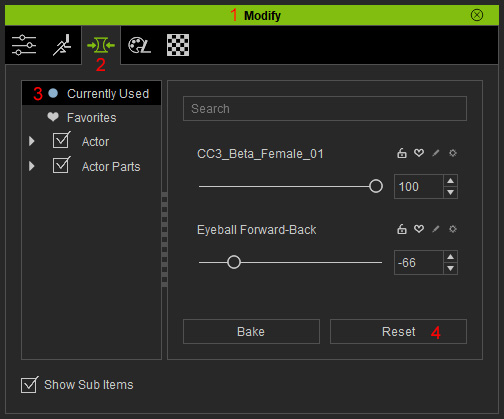
- Open the Modify panel.
- Switch to the Morphs tab.
- Select the Currently Used item in the tree view.
- Click the Reset button at the bottom of the panel.
-
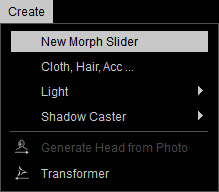
Go to Create menu >> New Morph Slider item to open the Morph Slider Editor.
-
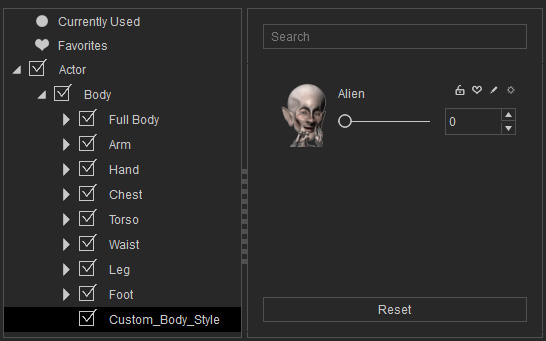
Set the path and a name for the slider.
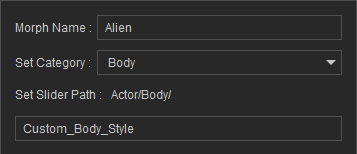
In this case, Body >> Custom_Body_Style >> Alien.Note:Please refer to the point 1 in the User Interface Introduction for Morph Slider Editor section for more information.
-
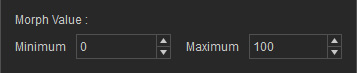
Set the Min. Morph Value to 0 and the
Max. Morph Value to 100 so that when the custom slider is set to maximum
the character retains its original look.
-
Optionally load an image for the slider if you want it to have a thumbnail by
clicking the
 button and load the prepared image.
-
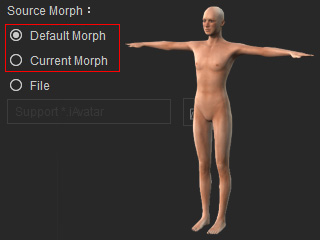
In the Source Morph radio button group, choose either the Default Morph or the Current Morph
one because, currently, they are totally the same.
-
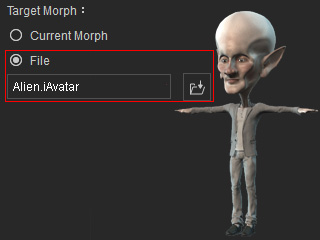
In the Target Morph radio button group, choose the File one and load the character
prepared in
step 1 by clicking the button.
-
Click the OK button and you can see your custom morphing slider is now added into designated node
and path.
-
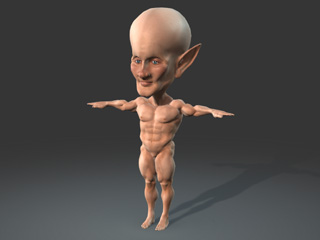
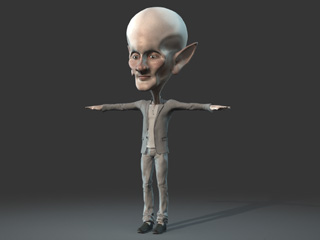
Drag the slider and you will see the default character is gradually transformed to the target character.
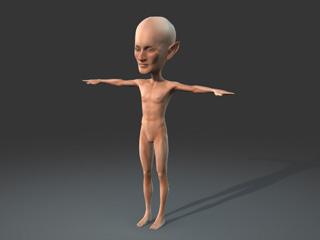
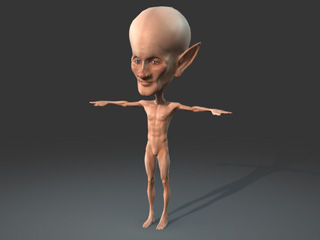
Value = 50
Value = 100
Note:Please note the clothes of the target morphing character will not be loaded and involved with the morphing behavior because they are different objects.
-
You can still use the default sliders to further adjust the new character.