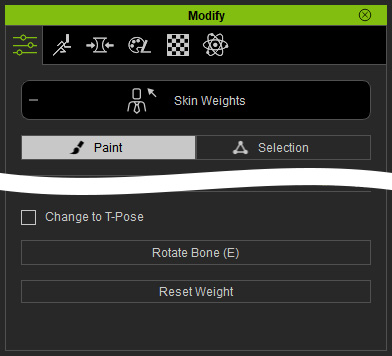
Calibrating Skin Weights
When adjusting skin weights using the
Skin Weight Brush or manual
input, you can employ the Calibrate feature to test the
character's pose for accurate weight assignment. While the
Skin Weight Brush is used as an
example here, this feature works in both Painting and
Vertex Selection modes.
- Load a custom OBJ model in a new project. By default, it is set as an accessory.
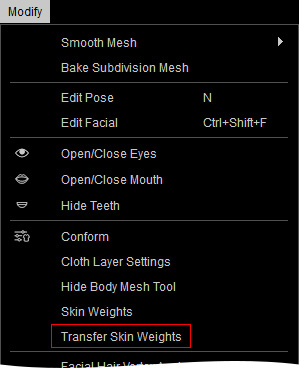
- Convert it into a piece of clothing with the Transfer Skin Weight
tool.
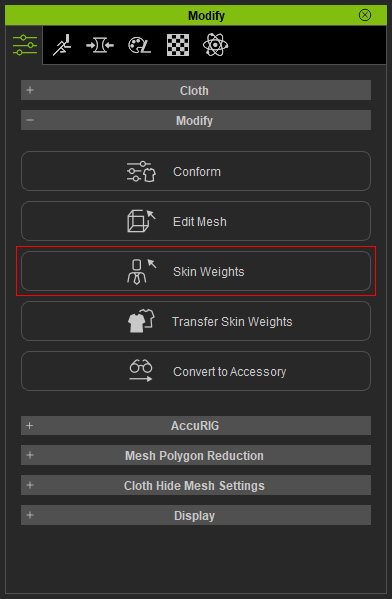
- Enter the skin-weight editing mode by clicking on the
Modify > Attribute > Modify > Skin Weights button.
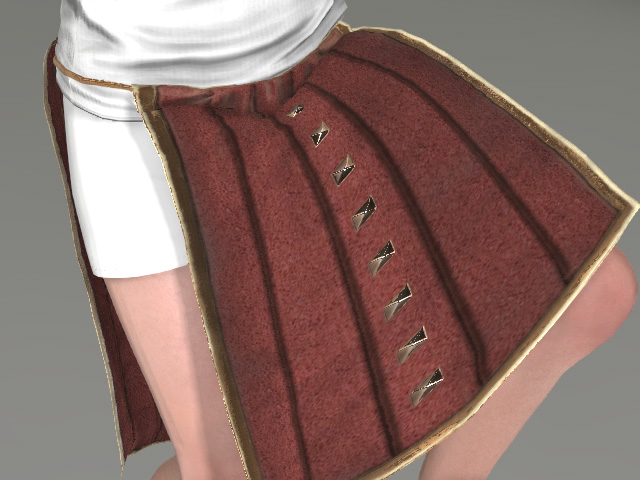
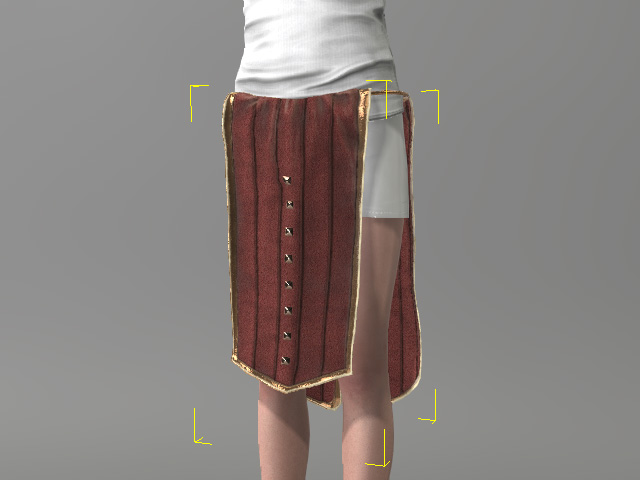
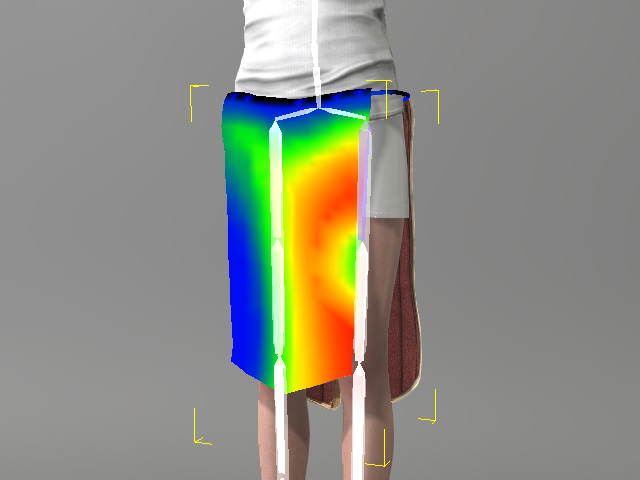
- Right-click to select a target bone, in this case the left thigh. You will see the skin weight colors that are influenced by this bone.
* In order to verify the skin-weights, the character must strike some poses. - Instead of leaving Skin Weights mode and using the Motion Editor
to set character's pose, you can use Rotate Bone and Calibration.
- Rotate Bone: Click the
Rotate Bone (shortcut: E) button.
The rotation gizmo will also display the pivot of the selected bone.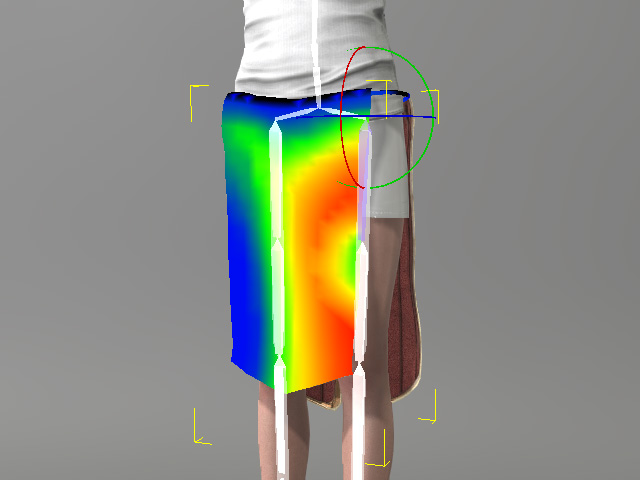
Rotate the bone to examine the skin-weights.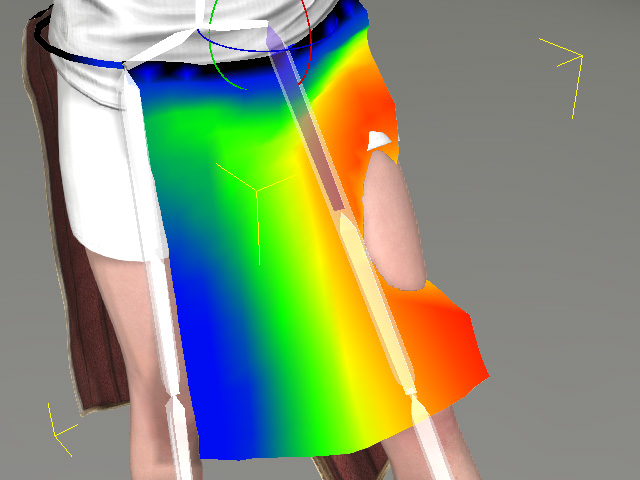
- Calibration: Access
Pose or Body Rig in the
Motion menu from the playbar; and choose the
motions within them.
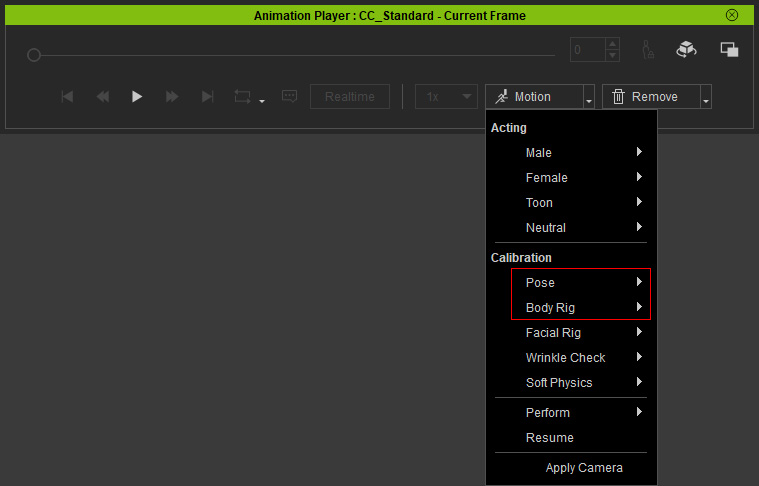
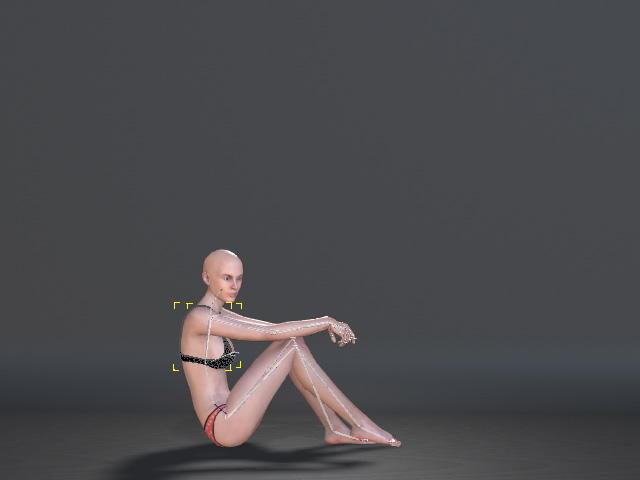
Begin playback to observe the character assuming various poses, allowing you to assess the integrity of the skin weights. Pause the playback when encountering poses where mesh penetration occurs and carefully assess the defects.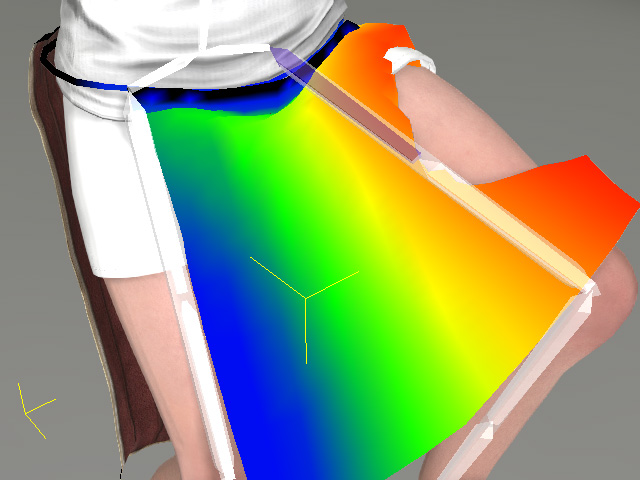
- Change to T-Pose:
Temporarily applies the t-pose the character to facilitiate
observation and editing.
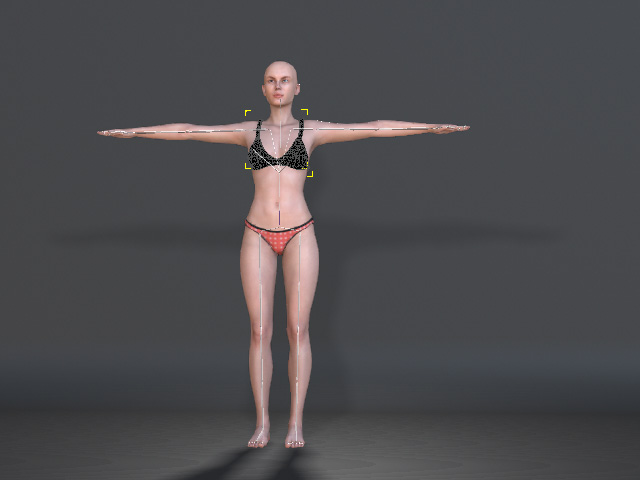
Change to T-Pose: Deactivated
Change to T-Pose: Activated
- Rotate Bone: Click the
Rotate Bone (shortcut: E) button.
- You can then use the Skin Weight Brush
to paint on the surface, or use the
Vertex Selection mode to enter an
ideal values for the penetrating vertices.

You can follow the same steps to examine, adjust, and fix the entire cloth. - Exit the Skin
Weight mode and the mesh
penetrations will be fixed.