


Creating Custom Clothes
In addition to the deploying embedded clothing templates, you can also create custom clothes with your favorite 3D tools in OBJ or FBX format.
- Create a new project.

- Load a model file in OBJ or FBX format using Create >
Accessory.
- The model will be loaded as an accessory by default.
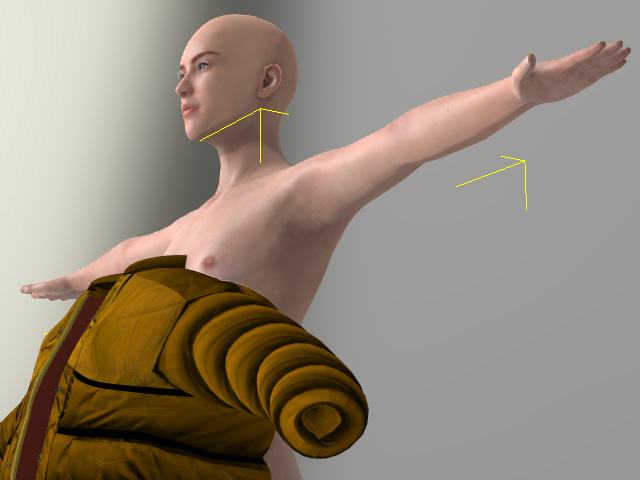
- Rescale the accessory to a proper size. Angle and position it to
fit the body.
- You can also use Edit the mesh to remove any mesh penetration that may occur.
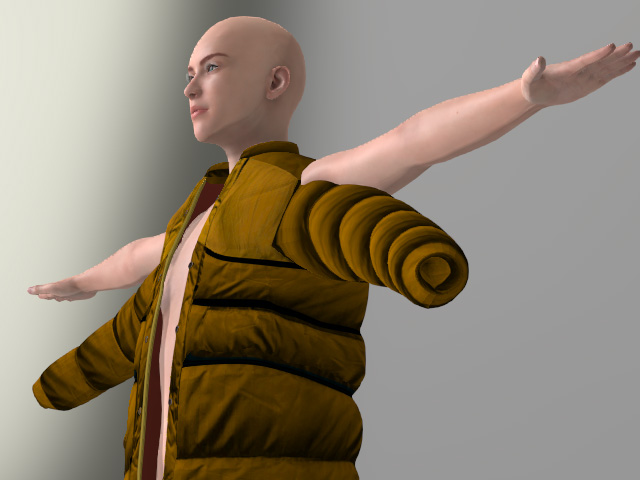
- To put the body into the accessory rather than editing the mesh
faces repeatedly, use the Pose Editing panel to repose the
character.
- Smooth the normals, modify the materials of the
accessory and set it to the PBR shader type.
 Note:
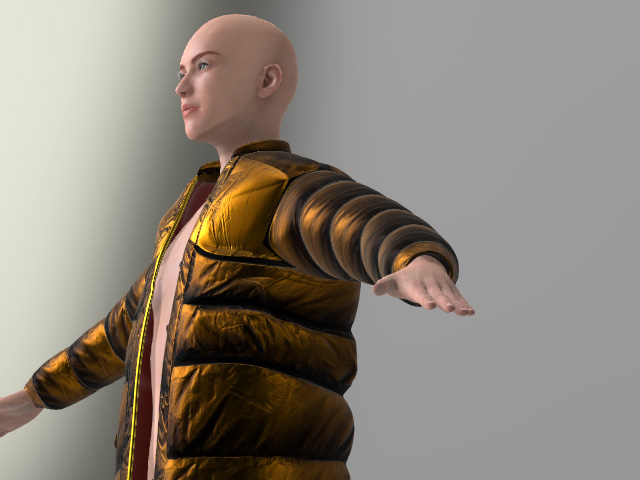
Note:If you adjust the character's pose now, the imported accessory will not move due to the lack of skinning.
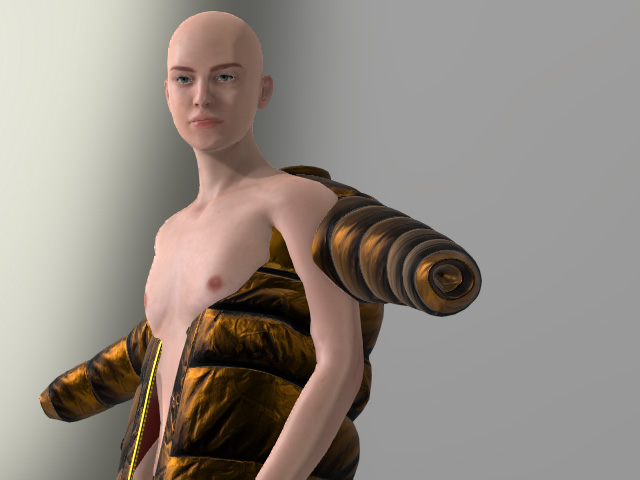
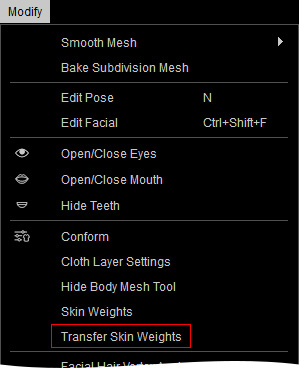
- In order to assign the skin weight to the accessory and turn it into a piece of cloth, select it and
perform Modify > Transfer Skin Weights.
Alternatively, go to the Modify > Attribute > Modify section and click the Transfer Skin Weights button.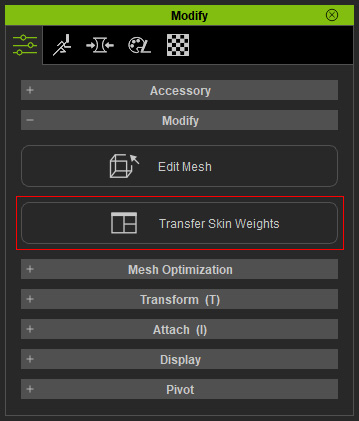
- In the Transfer Skin Weights panel, select the
target for the accessory transformation. This step assigns skin
weights to vertices, defines cloth type, and sets
layer order for
converted cloth.
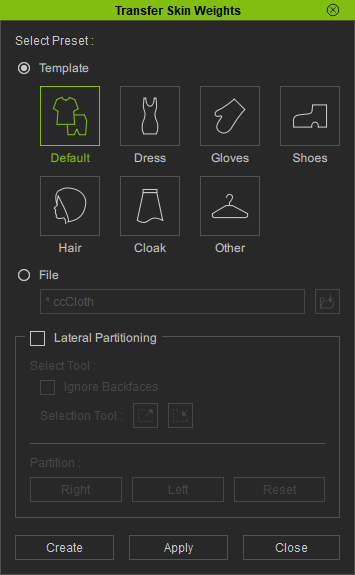
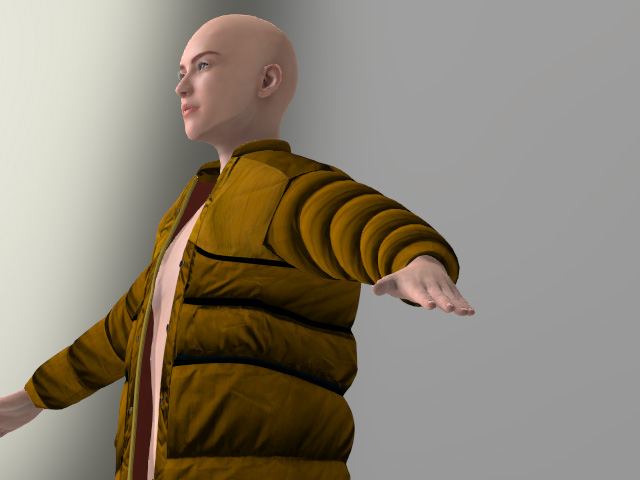
- Click the Apply button to automatically skin the cloth.
- Conform the cloth for to
remove any mesh penetration.
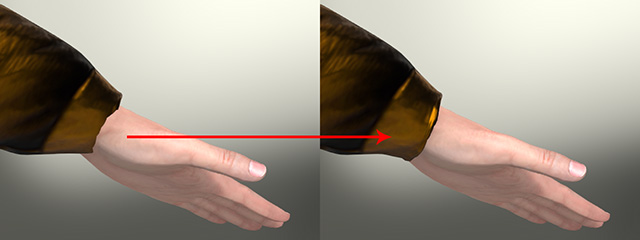
- When the character is posed, the cloth will deform as well.
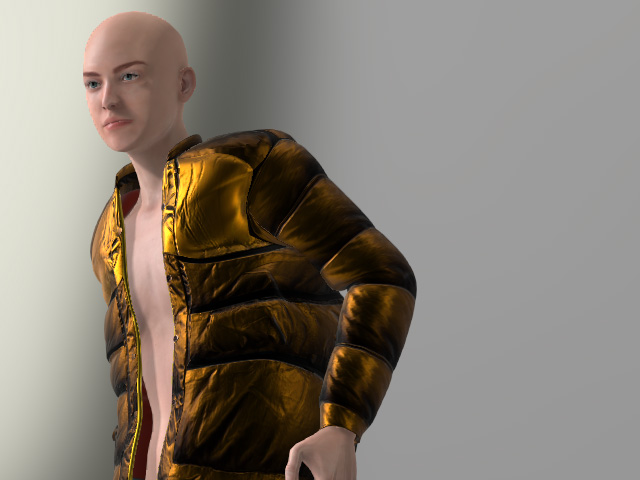
- Save it to the library to expand your collection.
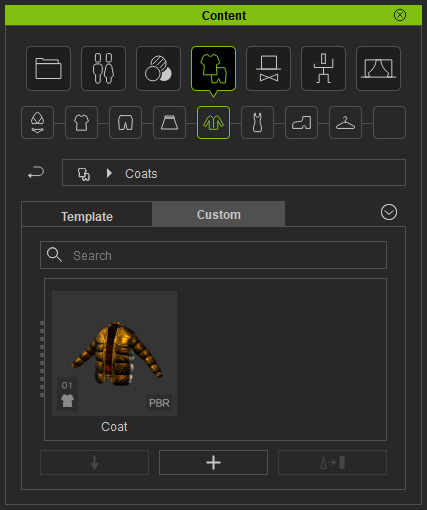
- You can then apply this piece of clothing to other characters.
You can customize the skin weights to fix any existing distortions.
