Quickly Setting Skin Weights for Selected Vertices
Character Creator provides an easy way to auto-transfer skin weights to the clothes; however, the skin weights assigned by this feature are not always ideal. Under this condition, you are able to set the skin weights by vertices. In addition to fix the inappropriate skin weights, you can also use the setting-skin-weight feature to adjust the skin weights on your own.
Create a new project and create a new cloth for the character. If any skin weight flaws show as the illustration below, then you need to fix the skin weight by brush or
follow the steps in this page.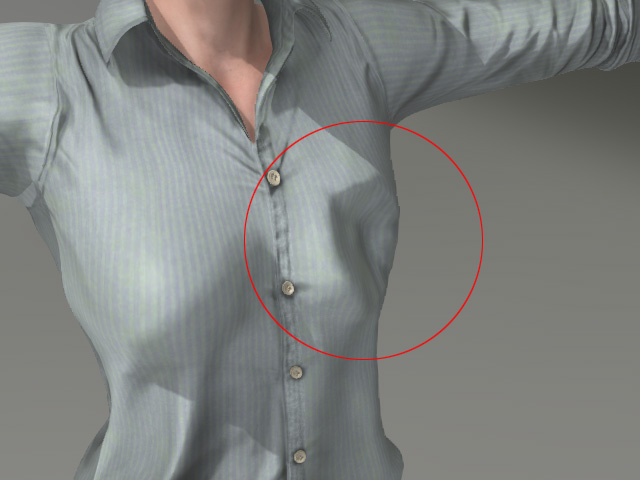
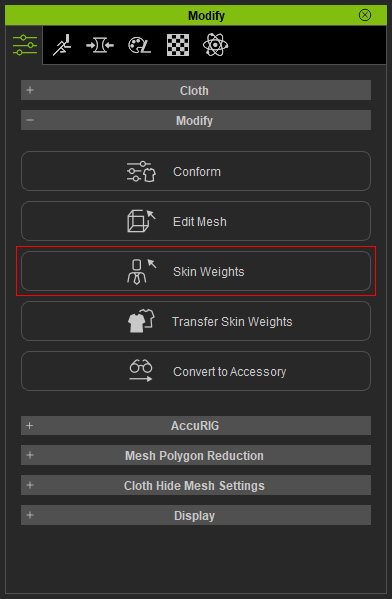
- Select the cloth. In the Modify panel, switch to the Attribute tab and click the Skin Weights button in the Modify section.
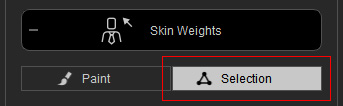
- Switch to the Selection tab.
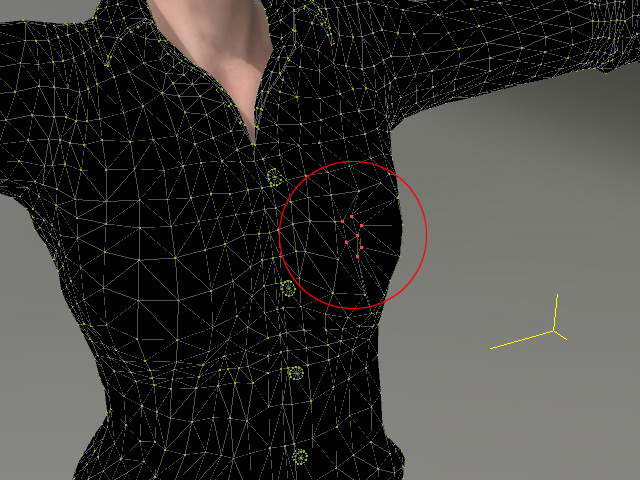
- Pick the vertices that are incorrectly assigned with skin weights.
- At the lower part of the panel, you will see a bone list in which the bones controlling these vertices are displayed.
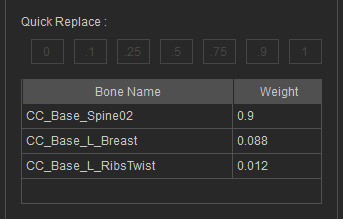
In this case, obviously the CC_Base_Spine02 bone controls the vertices too much (Weight = 0.9). - Select the bone from the list to quickly assign a new value of skin weight.
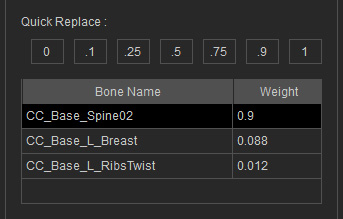
- Click the Quick Replace button above the list to set the new value.

Notice that the skin weights for the other bones will be adjusted automatically. - The vertices will pop to the correct positions in accordance with the new arrangements of the skin weights from different bones.

- Leave the Skin Weights mode to view the results.

