


Importing DAZ HD Characters (New for v3.3)
On DAZ online store, you can find HD characters, which
have more detailing than the average character, with the titles clearing
indicate that they are in high definition.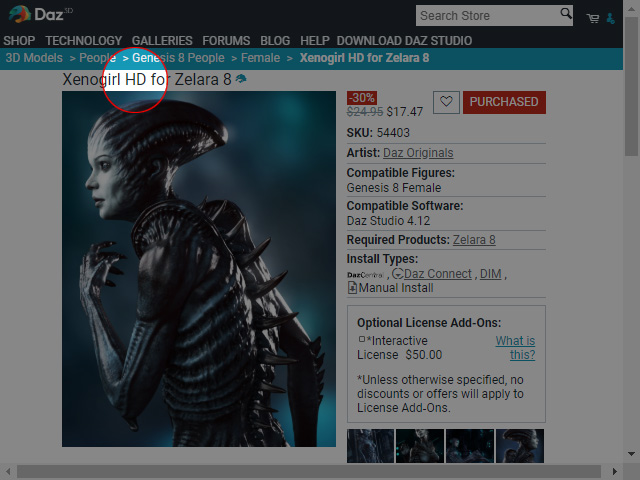
However, the details can not be completely implemented with Transformer.
|
|
|
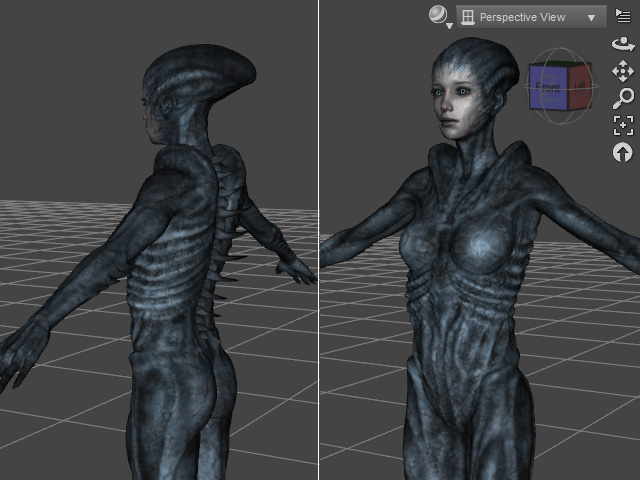
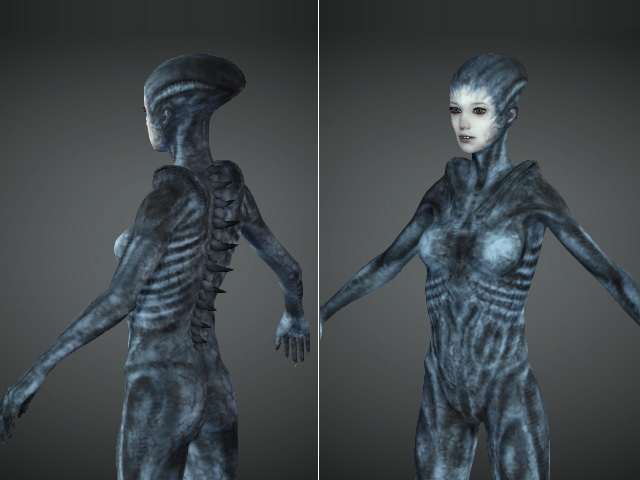
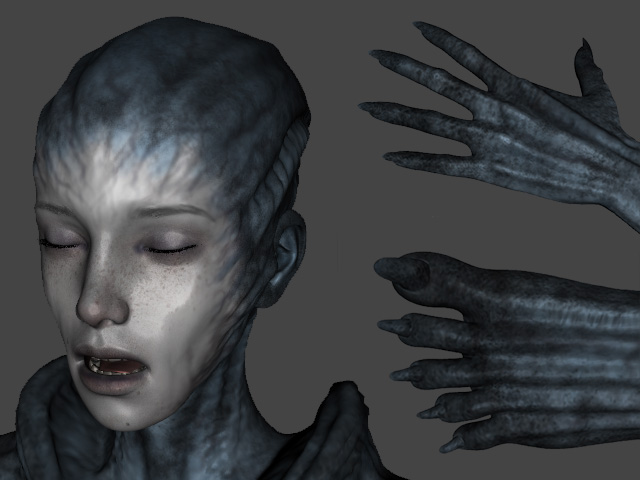
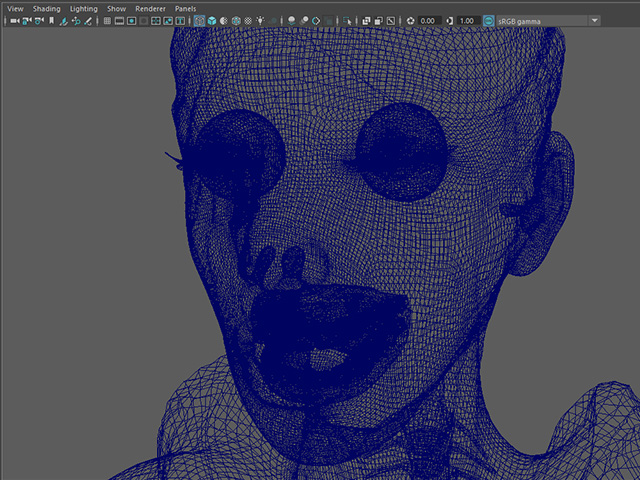
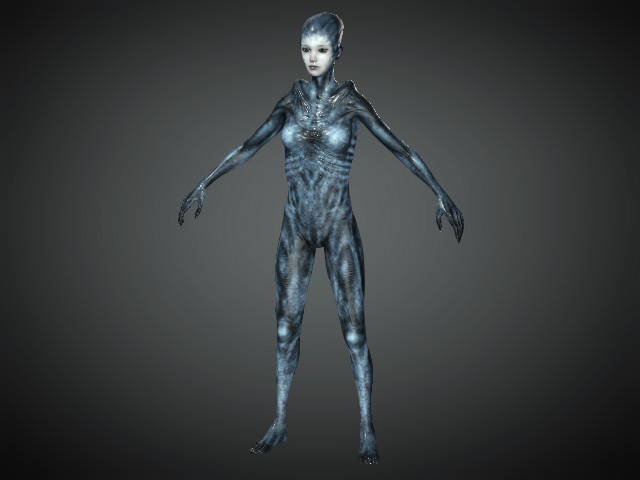
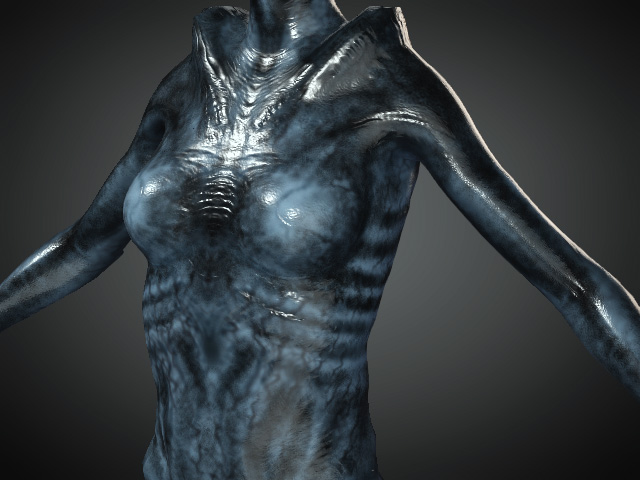
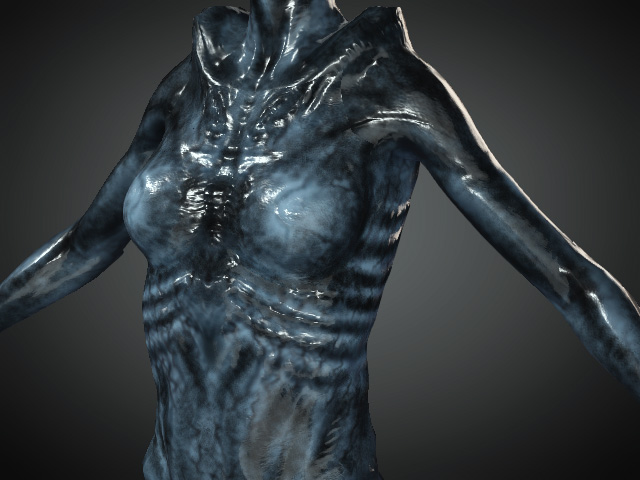
DAZ HD character |
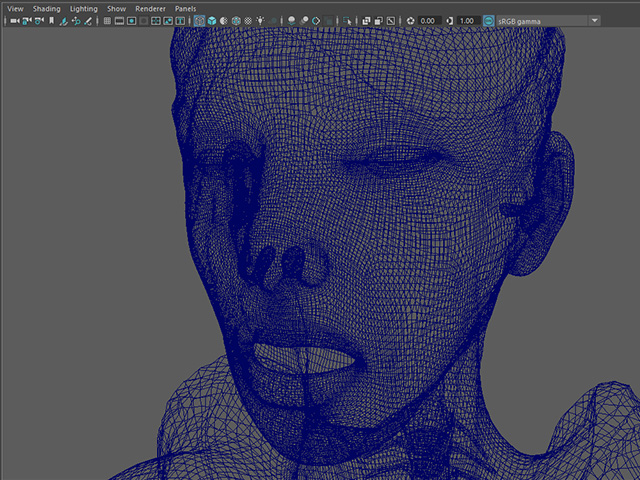
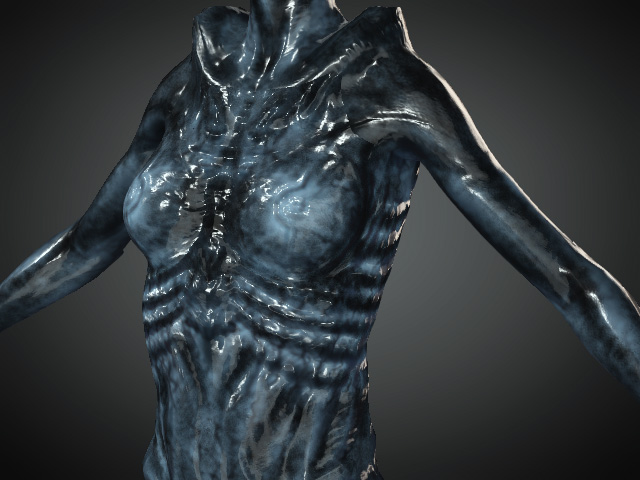
The rebuilt CC3 Base+ character by Transformer |
In order to re-create the DAZ HD character as possible, you need to perform the following steps with 4 main phases : Preparing High Mesh Source, Preparing Retopologized Mesh, Burning Details to Normal Textures and Combining Normal Textures with Character Generated by Transformer.
Phase 1: Preparing High Mesh Source
- In DAZ, find the UV Prep Poses by the Smart Content panel.
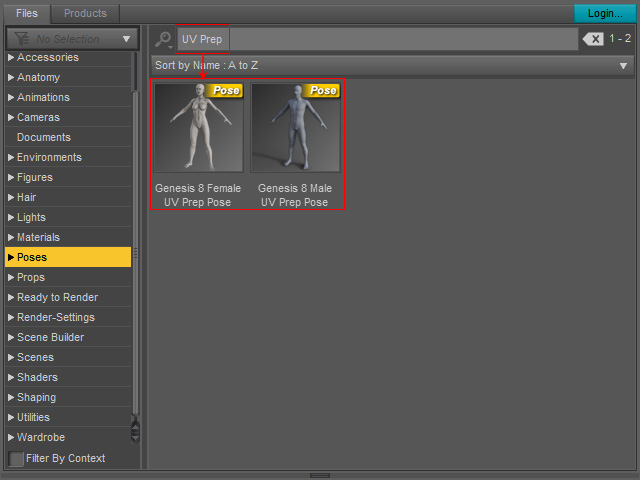
- Apply the UV Prep Pose for the character to open the mouth, fingers and toes to ensure the best rendering results for the normal maps.
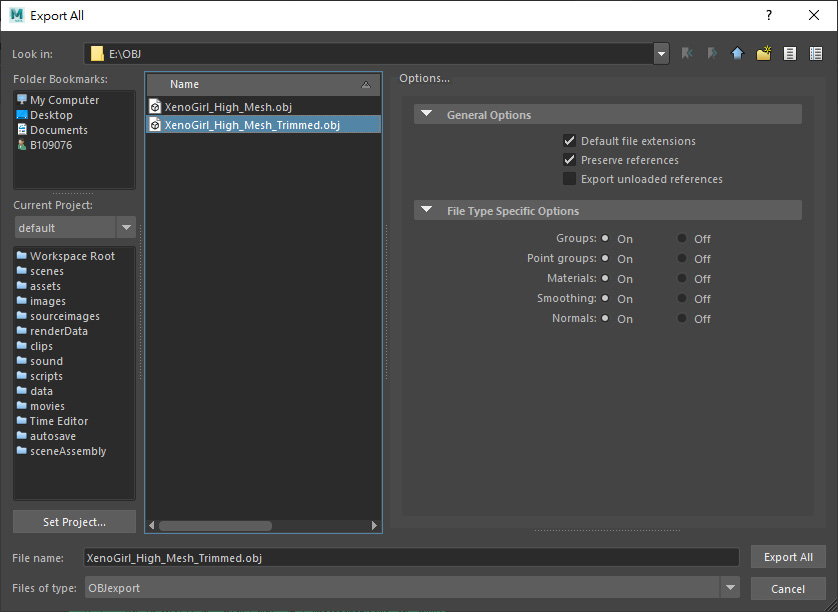
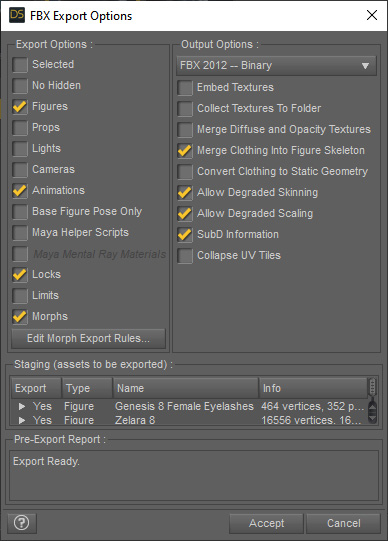
- Export the character in OBJ file with the settings in the following illustration.
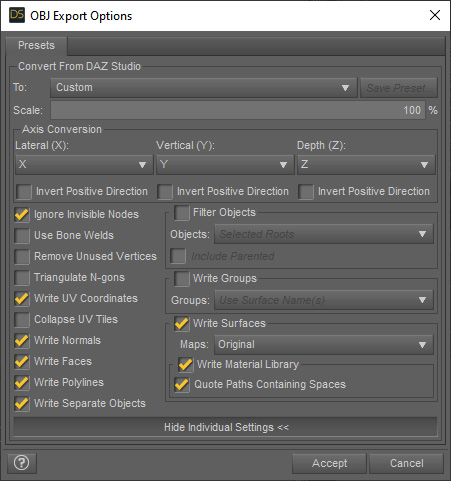
For better identification, the file name is inserted with string, High.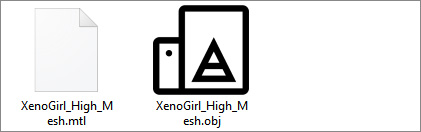
- Load this OBJ file into a 3D editing tool (in this case, Maya).
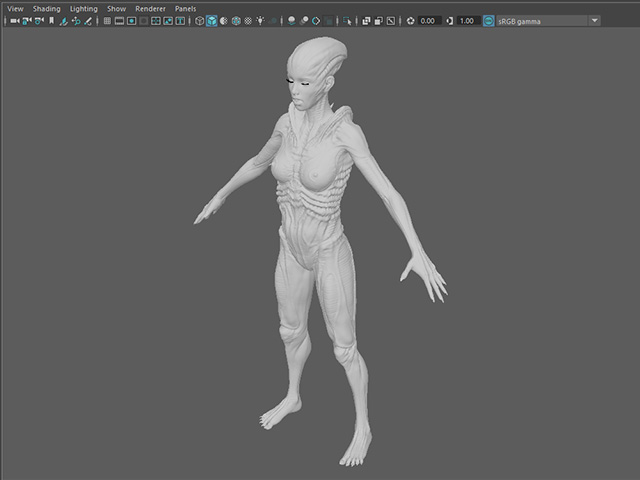
- Delete the eyes (and related elements), eyelashes, mouth cavity, tongue, and teeth.
Before
After
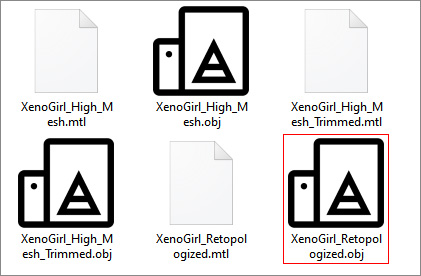
- Export the mesh in OBJ file again.
This OBJ file will be use as source for burning body and head details in the later step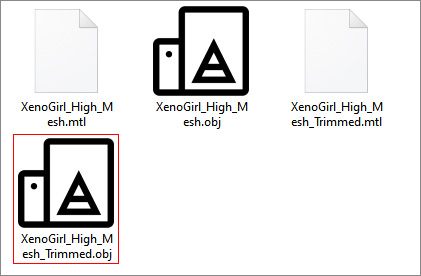
Phase 2: Preparing Retopologized Mesh
- Switch back to DAZ, export the character in FBX format.
This FBX file will be used to re-topolozied for generating OBJ file.
- Launch Character Creator, execute the command, Create > Retopologize Base for High-Poly Normal Bake > CC3 or CC3+.
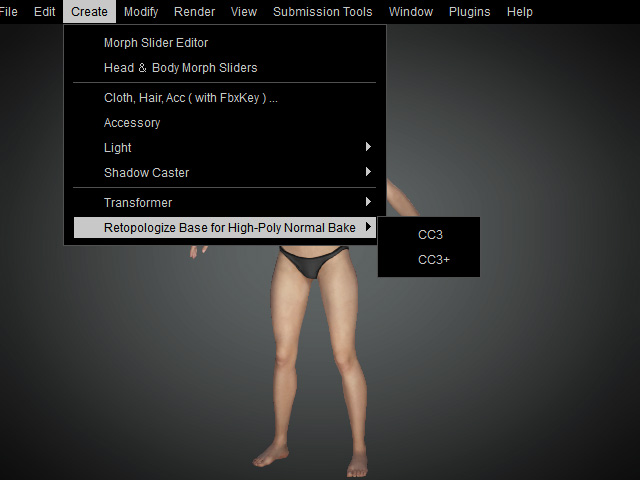
If you want the final character to be derived from the CC3 Base after conversion, then choose CC3, otherwise, CC3+. - The Export Retopologized Base for Texture Baking panel pops up.
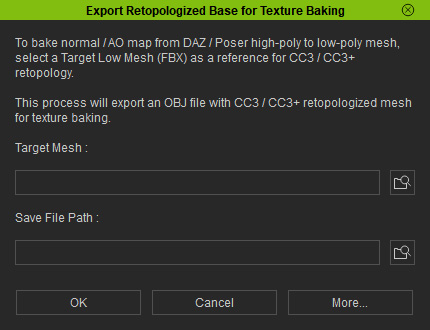
- Click the Load File button at the right side of the Target Mesh field, pick the FBX file.
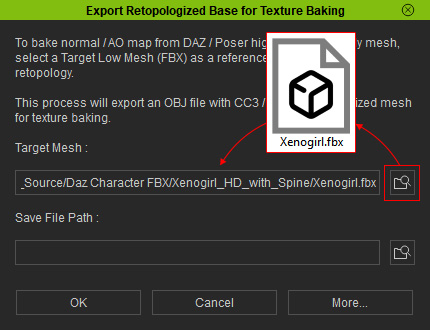
- Click the Save File button at the right side of the Save File Path field for saving the re-topologized OBJ file.
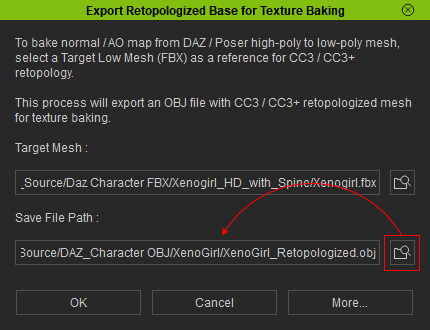
Click the OK button to start re-topologizing the FBX file into OBJ file. - You will get another OBJ file. This file is going to be used as the target for creating Normal texture.
Phase 3: Burning Details to Normal Textures
- Download (xnormal.net), install and launch xNormal application (free).
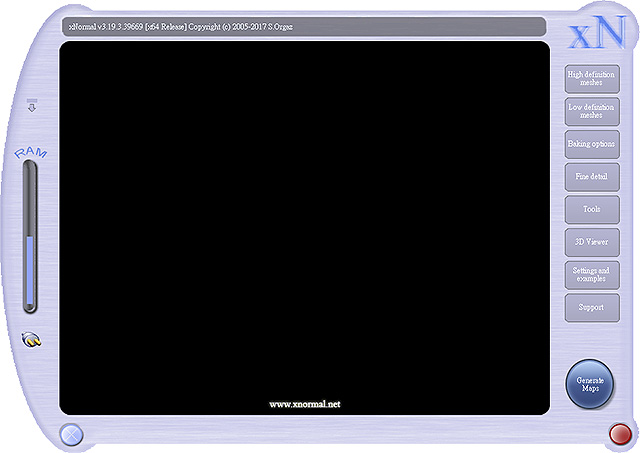
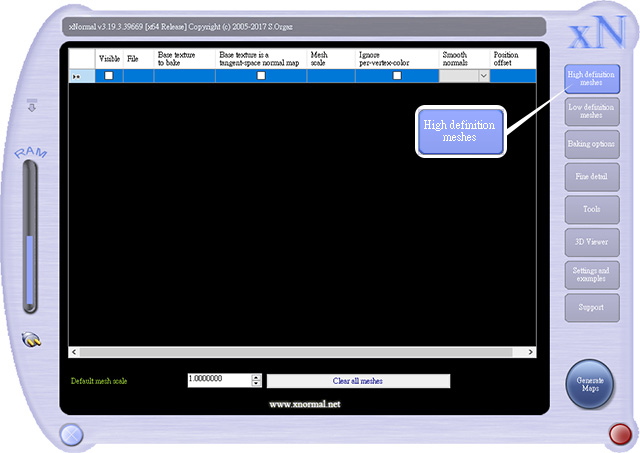
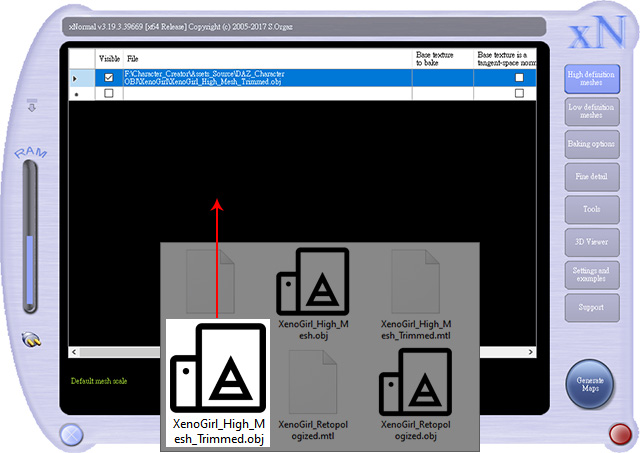
- Click the High definition meshes button at the right side of the panel.
- Drag and drop the high definition OBJ file created at the end of the Step 1
into the application.
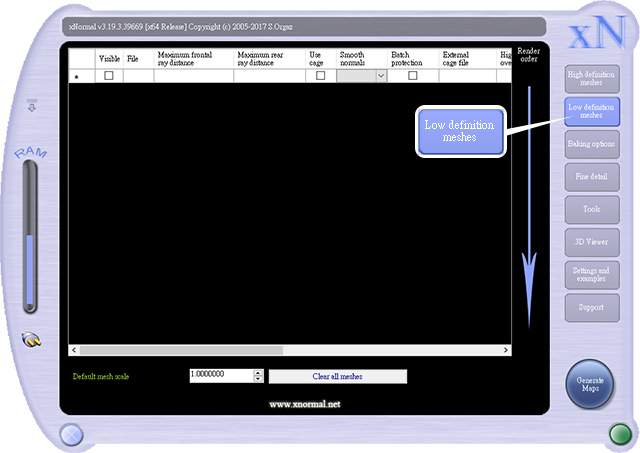
- Click the Low definition meshes button at the right side of the panel.
- Drag and drop the re-topologized OBJ file created at the end of the Step 2 to the application.
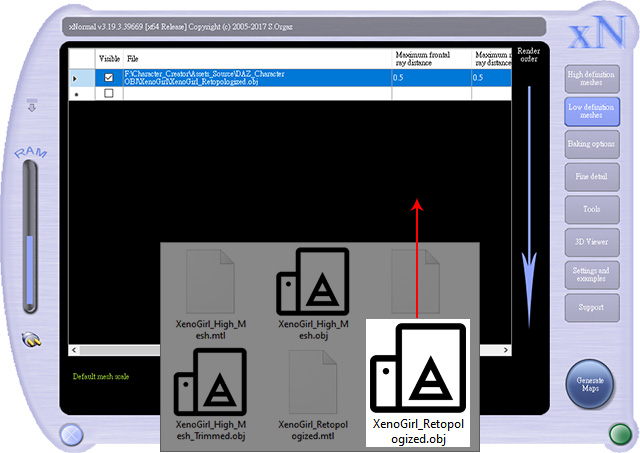
- In the U Offset cell, enter 0.
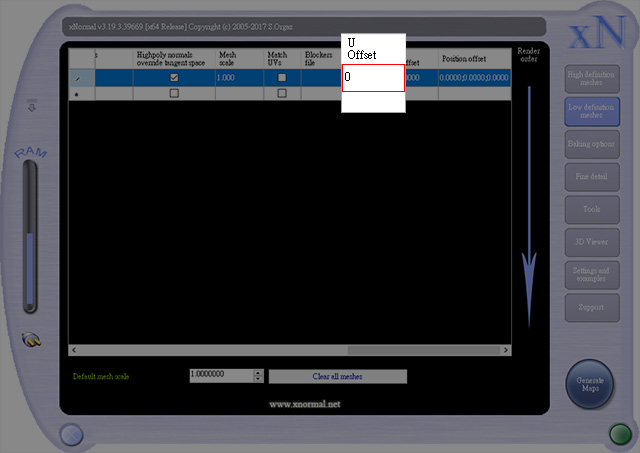
Because of the characteristics of the UDIM technique, the U Offset must be set from 0 to -4 for XNormal to recognize the starting position for generating normal maps one by one.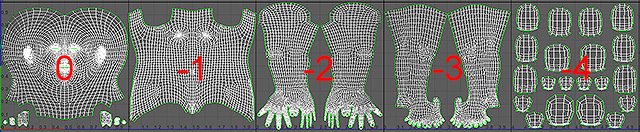
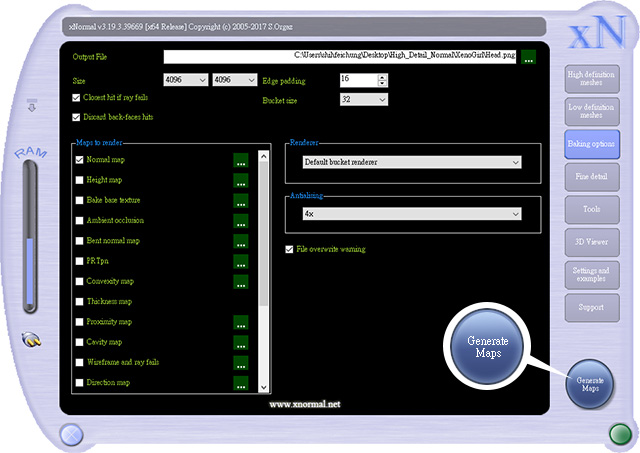
- Click the Baking options button at the right side of the panel.
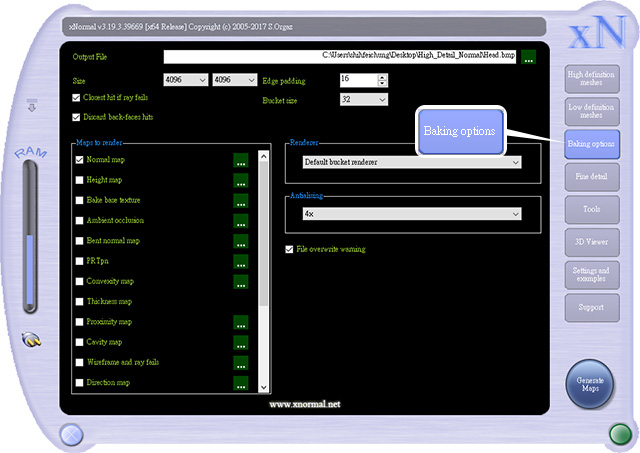
- Adjust the settings according to the following illustration:
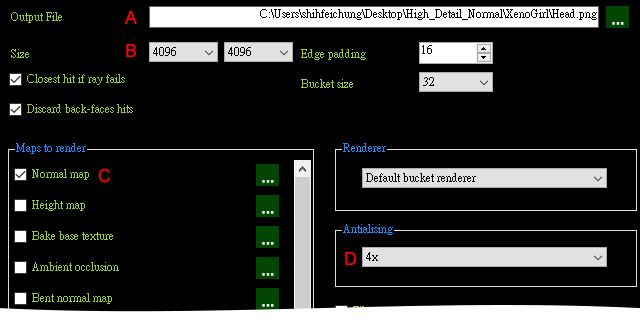
- Set a recognizable name for the normal map in PNG format, according to the target items in UDIM.
- Set the size of the exported normal maps.
- Set the map for rendering. Normal map, for this pipeline.
- Set the Antialising to 4x for matching the super sampling in Character Creator.
- Click the Generate Maps at the bottom right of the panel to generate one normal map.
A preview window pops up showing you the rendering process.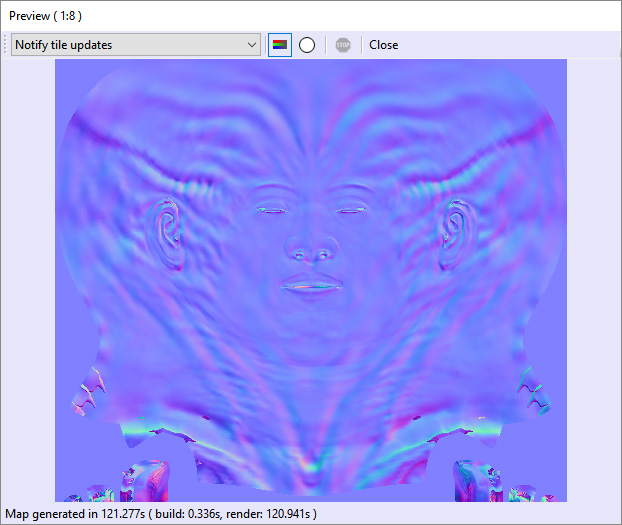
- Open your destination folder and you can see the normal map.
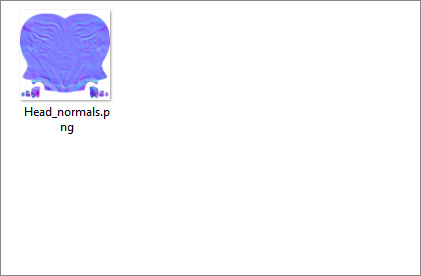
- Repeat from step 6 to step 9 to generate the rest of the normal maps.
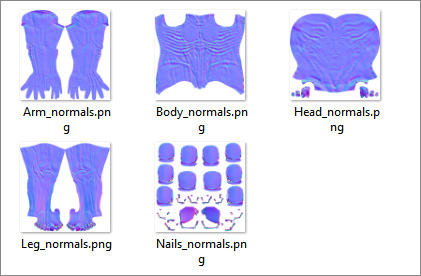
Note that set -1 for Body, -2 for Arm, -3 for Leg and -4 for Nails.
Phase 4: Combining Normal Textures with Character Generated by Transformer
- Switch back to DAZ, apply the A-Pose.duf file to set a Character Creator compatible motion.
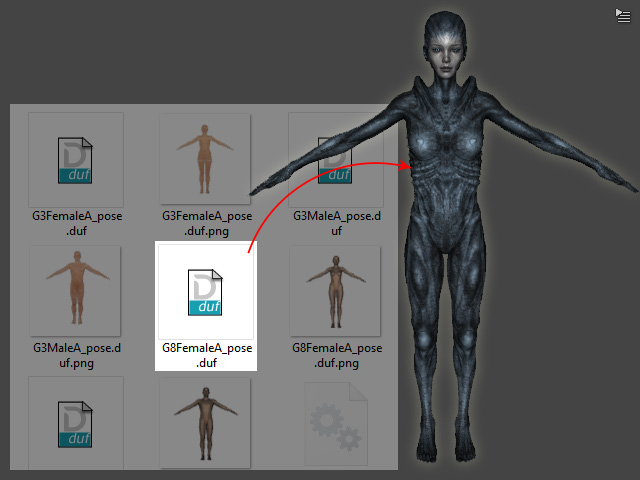
By default, the DUF files provided by Character Creator can be found in the folder:
C:\Users\Public\Documents\Reallusion\Template\Character Creator 3 Template\DazResource\A_Pose - Export the character in FBX format.
You will have a new FBX file ready for conversion in Character Creator.
- Launch Character Creator, execute the command, Create > Transformer > CC3 or CC3+ (in this case, CC3+).
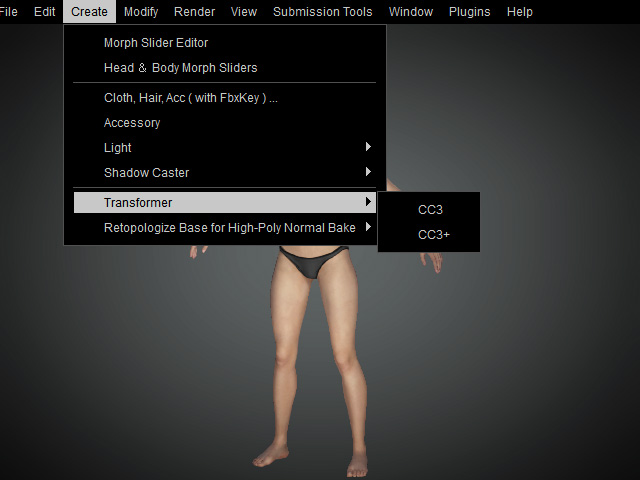
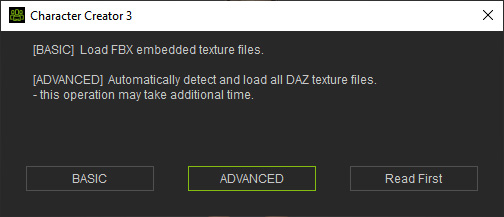
If you want the final character to become a CC3 Base character after being converted into Character Creator, then choose CC3, otherwise, CC3+. - Choose the FBX last exported from DAZ and click the Advanced procedure to use Transformer
feature to convert the character in Character Creator.
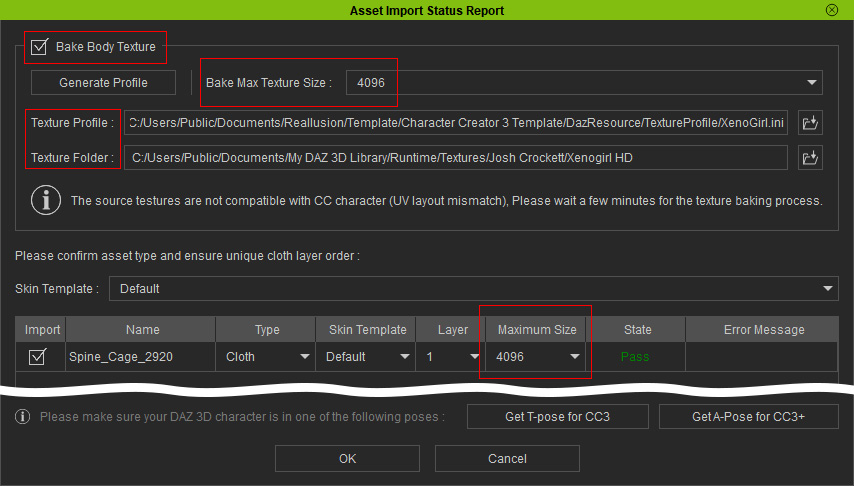
- Set the controls as shown in the following illustration. For the settings of Texture Profile and Texture Folder, refer to the Using INI for Loading All Body Textures section for more information.
- The DAZ HD character has been converted to a Character Creator base character.

- Overlaying the normal maps with the one exported at the end of the previous section with two methods, Overlaying in Image Editor or Using SkinGen Tools.
 Overlaying in Image Editor
You can use your favorite image editor, such as Photoshop, to overlay the character's normal maps with the ones exported in the previous section.
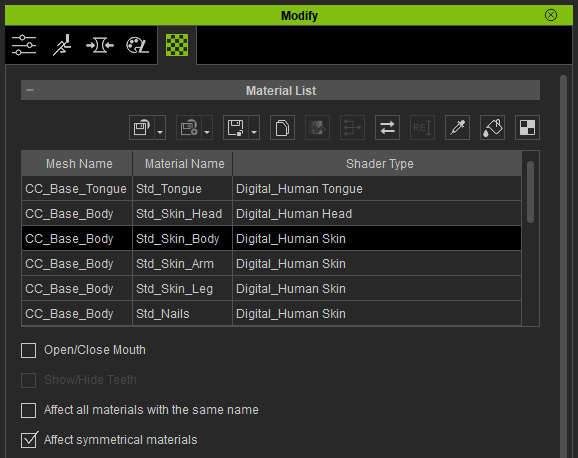
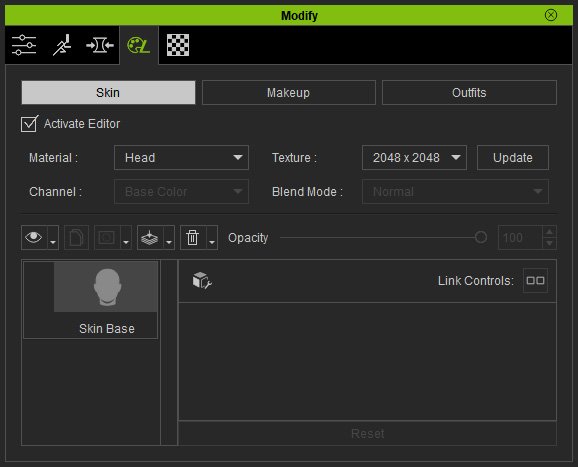
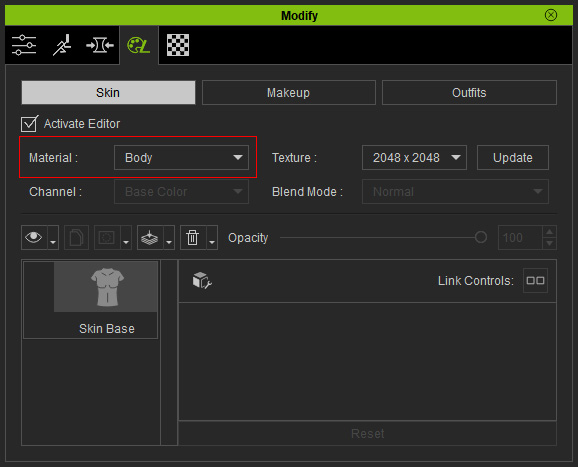
- Select one of the materials of the character (body, for example).
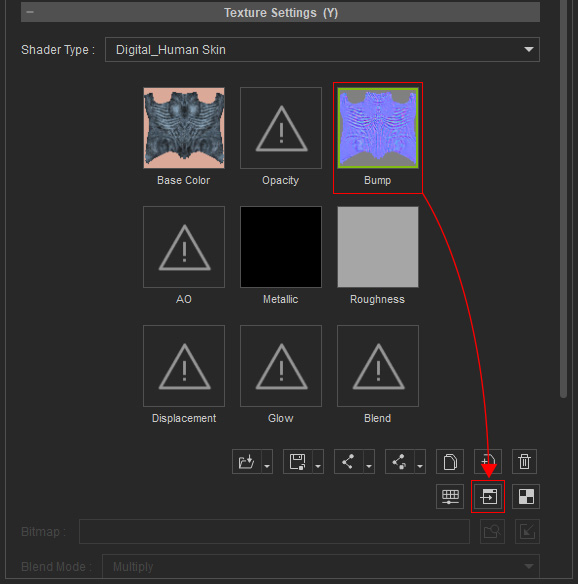
- Pick the normal map in the Bump channel, launch it with image editor.
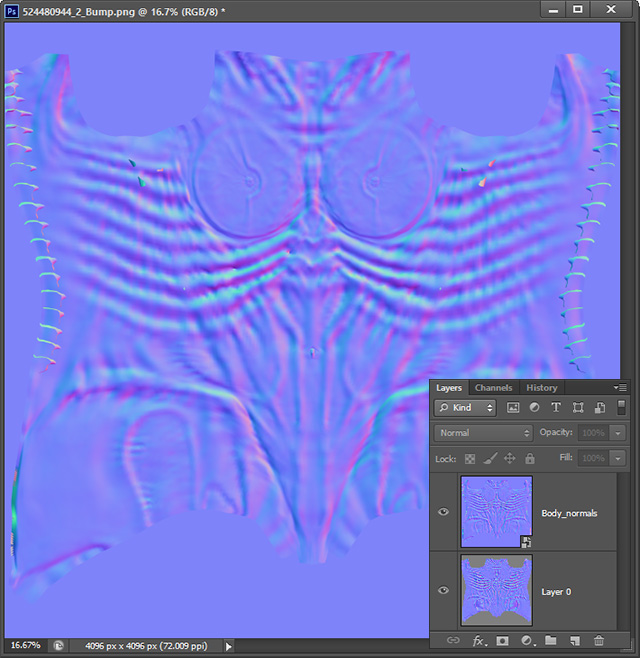
You can see the image is opened with only one layer in the Layers panel. Note:
Note:For better observation, the Roughness texture of the material is decrease to see the reflection of the initial normal effect.
- Drag and drop the suitable normal texture exported at the end of the previous section
into the project.
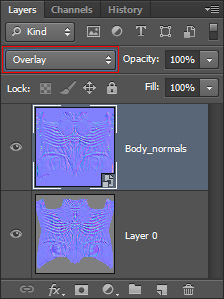
- Select this new layer and set the blending mode to Overlay.
- The texture
will have added details because it is the blended result of the two normal textures.
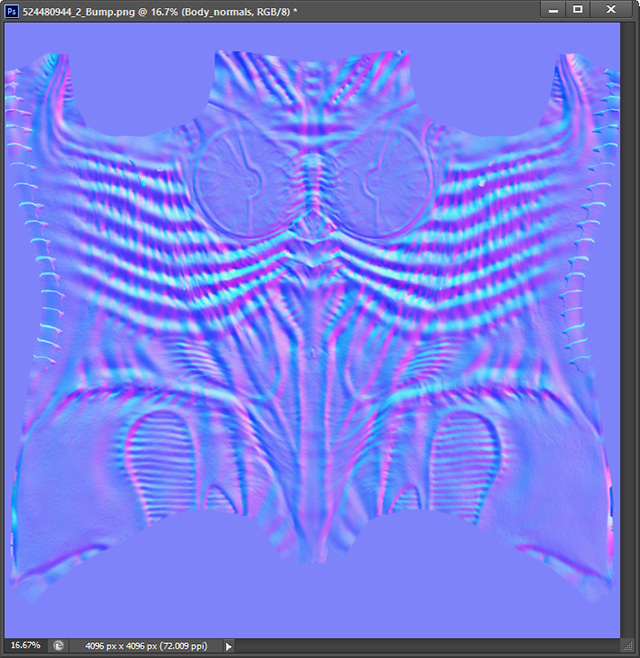
- Merge layers and save to update the Normal texture in the character's Bump channel.
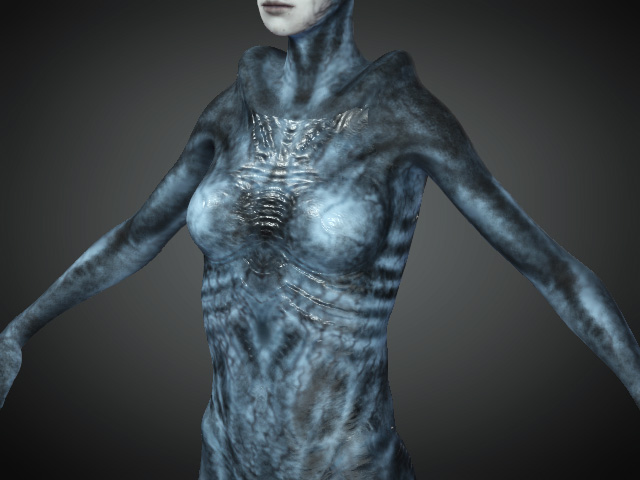
Before
After
- Repeat the same steps for other materials.
Using SkinGen TemplatesThe other method is to use the SkinGen template with modified normal textures.
- Focus on a body part (in this case,
the Body).
- Open the Modify panel and switch to the Appearance Editor tab. Check up the Activate Editor checkbox.
- Switch to the Body material.
- Open the Content Manager, switch to the Skin > Normal Effects > Body library.
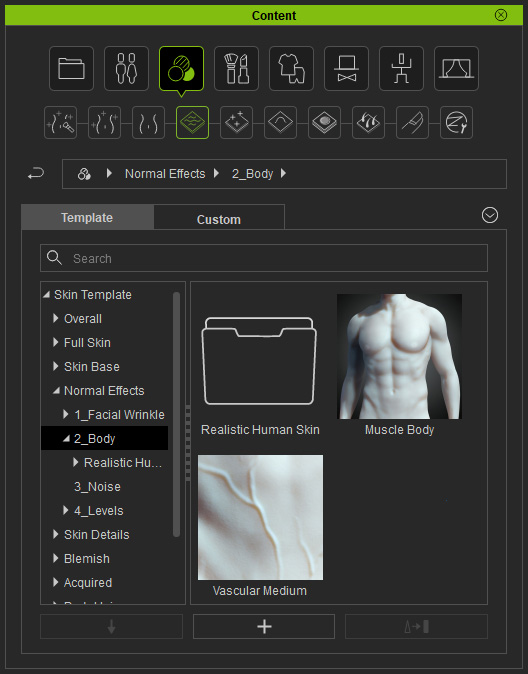
- Apply the template that covers the entire body part (in this case, the Muscle Body).
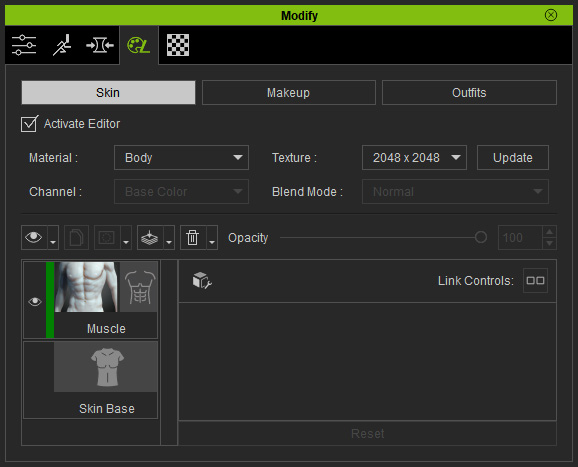
- Currently, the body normal effect is unsuitable for the character because the template is made for the base characters.

- Pick the layer and open the Texture
section.
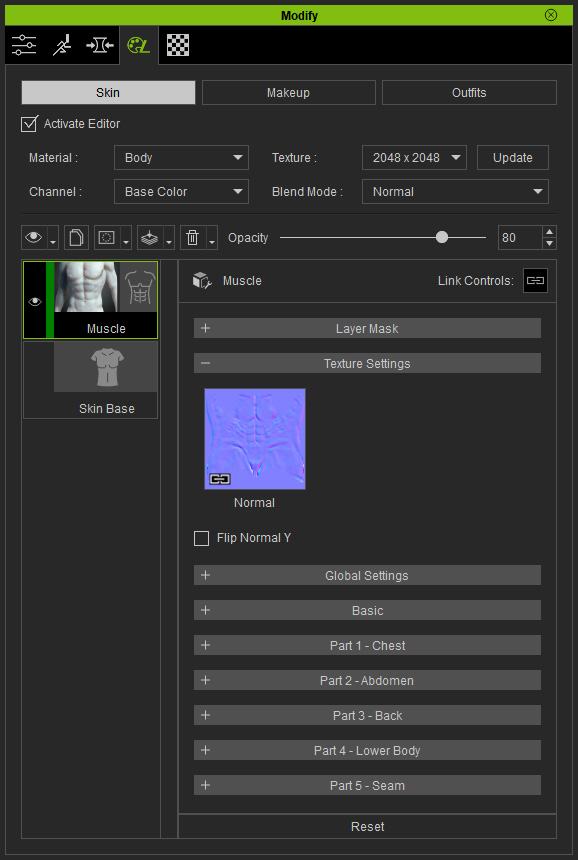
- Drag and drop the corresponding Normal texture created at the end of Phase 3 into the Normal channel in the section.
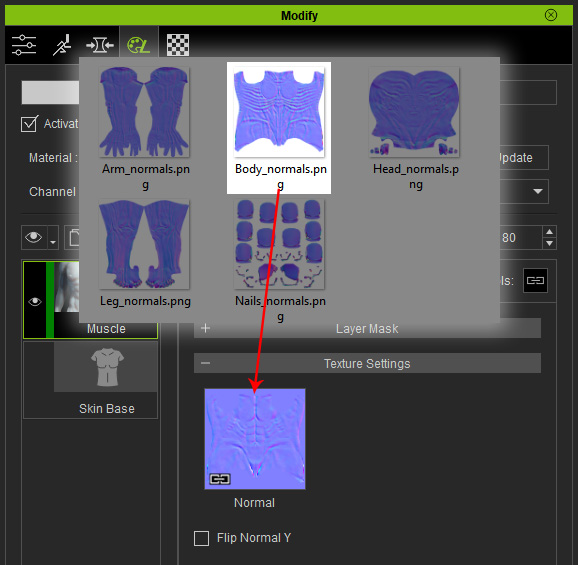
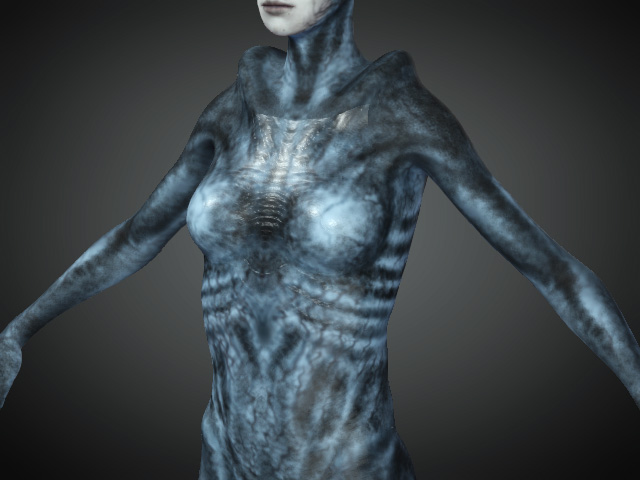
- As you can see the normal effect on the body is enhanced.
- You can drag the Strength slider in the Global Settings section to increase or decrease the normal effect on the body part.


Strength = 0.25
Strength = 1.00
- Repeat the same steps for the rest of the body parts.
- Select one of the materials of the character (body, for example).
