Organizing Custom Content
After saving or importing contents in a custom folder, you can organize these contents with subfolders in Content Manager, or directly manage the custom files in the Windows File Explorer. The content organized in the Content Manager will sync with the Windows File Explorer, and the other way around.
The following sections will demonstrate how to create subfolders, move content to subfolder, move all content, and back up partial content.
You can create unlimited subfolders under a sub-category to organize your contents.
- Make sure you have saved contents or imported contents under the Custom tab.
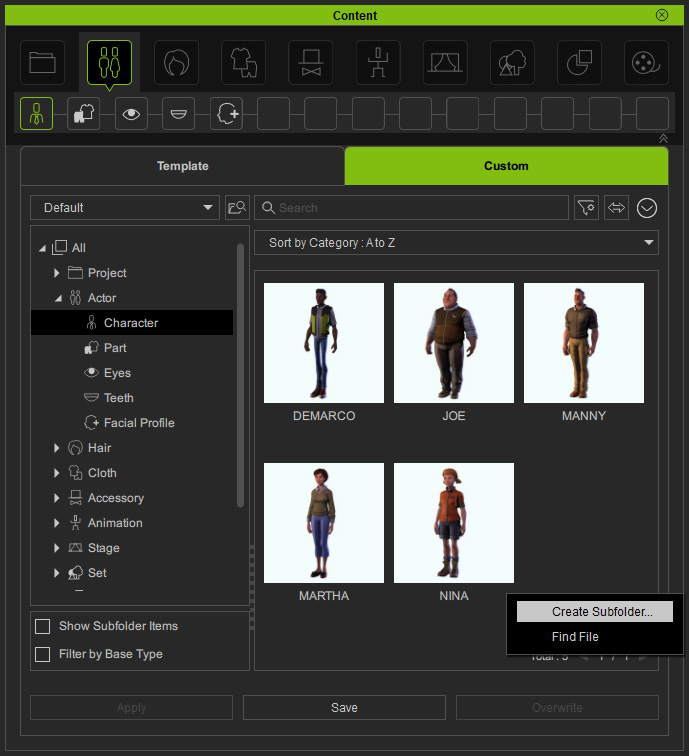
- Go to a sub-category (in this case, the Character sub-category under the Actor).
Right-click on the empty areas and choose the Create Subfolder command from the context menu.
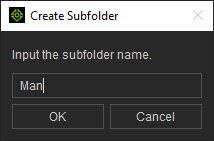
- Type in the subfolder name.
Click the OK button.
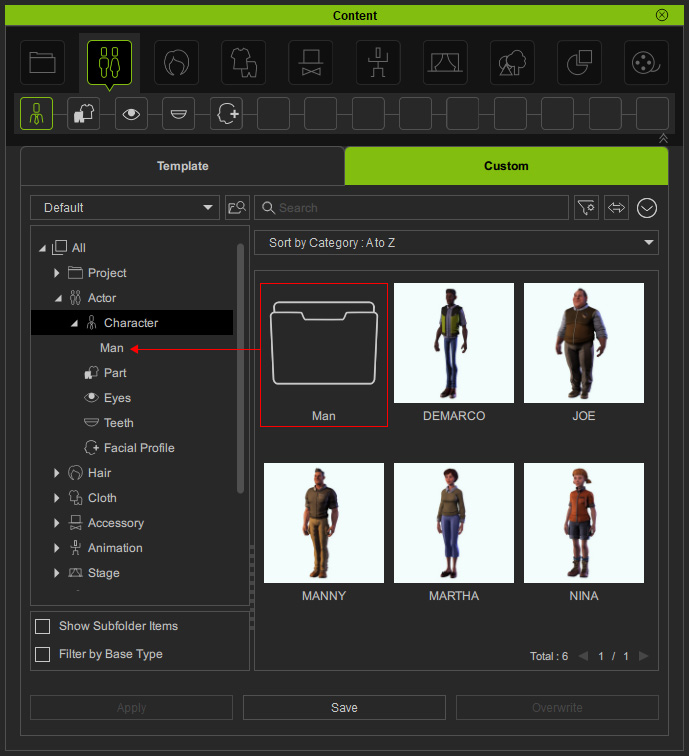
- The new subfolder will appear and create its node under the current sub-category in the tree view.
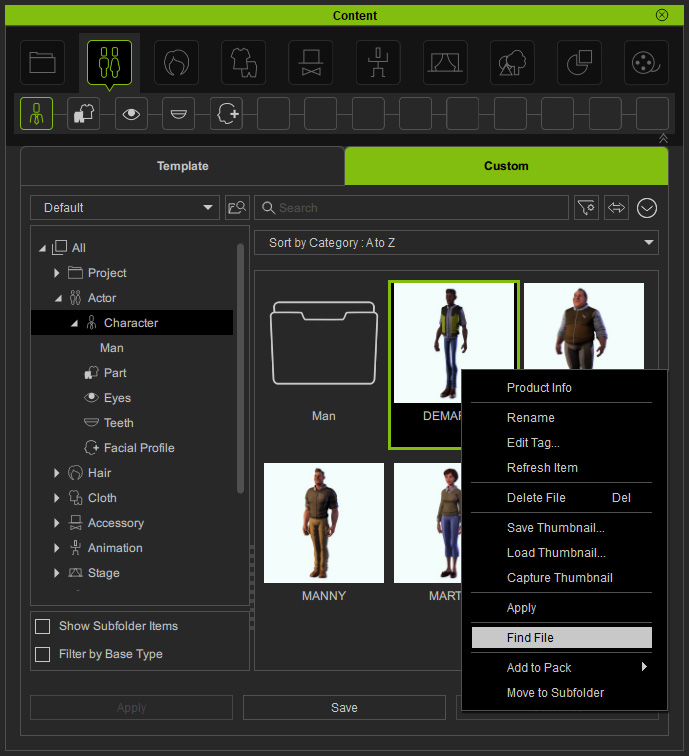
- Right-click on an item in this sub-category and choose the Find File command from the context menu.
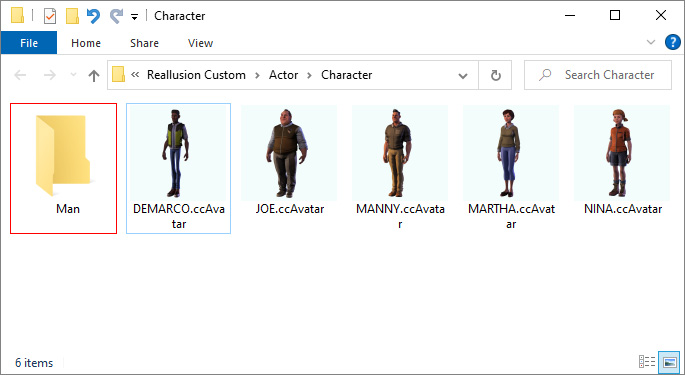
- You will see the subfolder is shown in the file explorer.
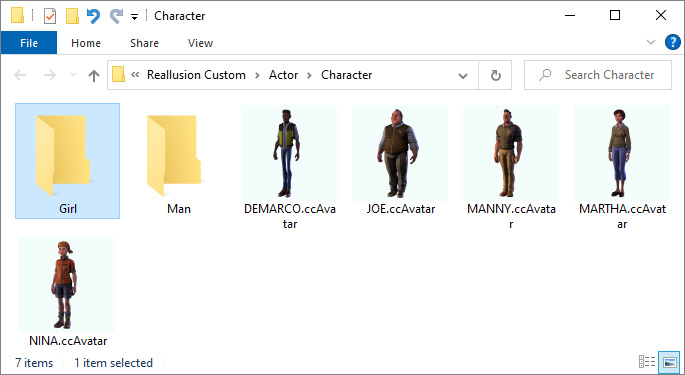
- Create another subfolder in the file explorer.
- You will see the new subfolder appear in Content Manager instantly, when the Auto-sync Custom Folder checkbox is enabled by default in the Settings panel.
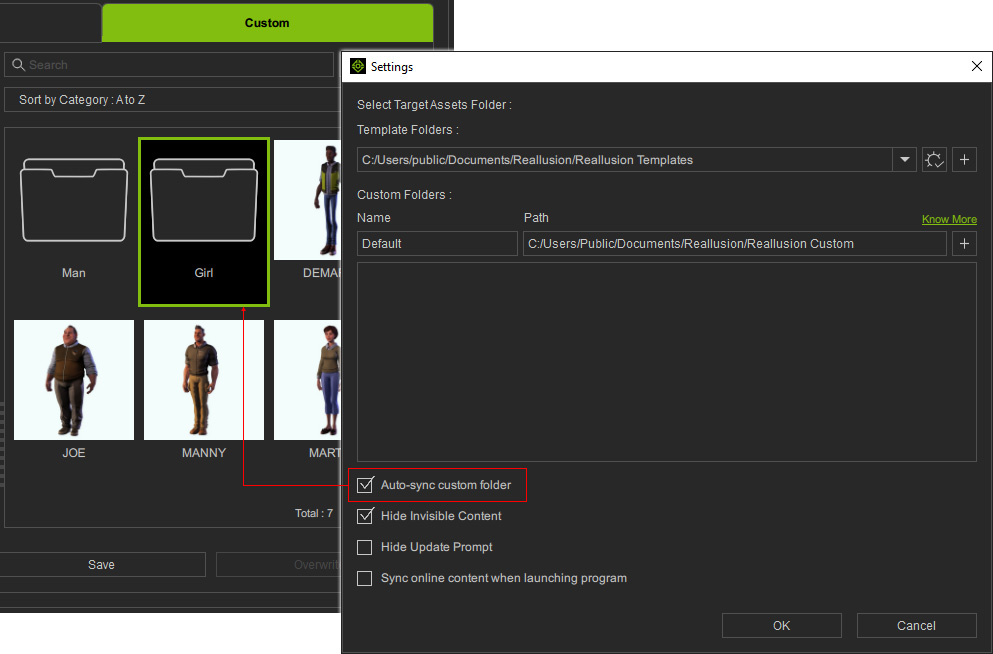
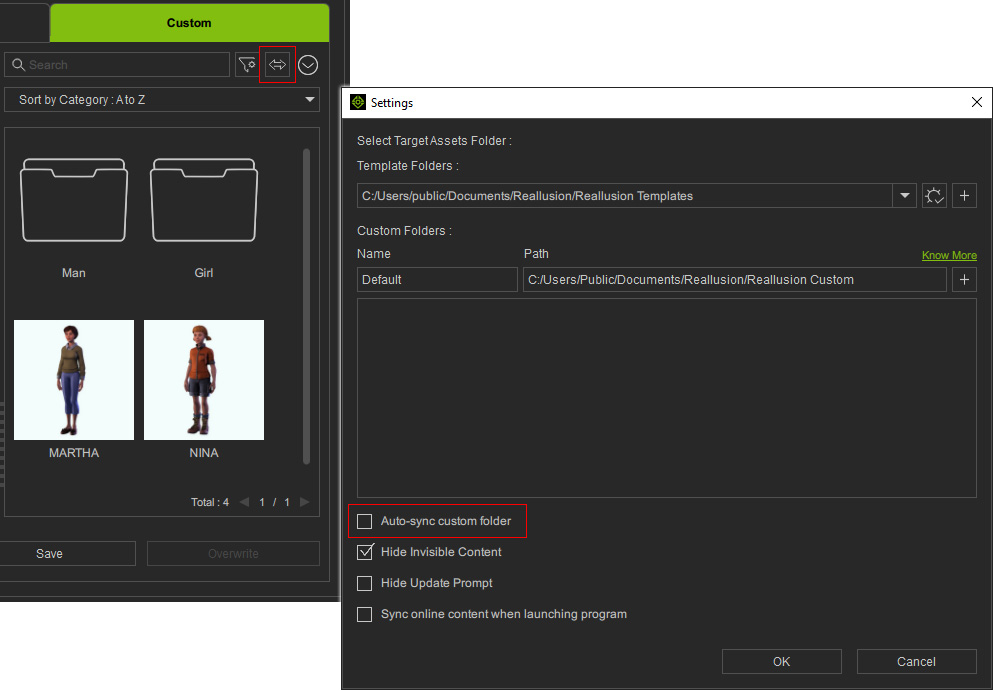
- Alternatively, you can disable the Auto-sync Custom Folder checkbox, and click the Refresh Custom button to manually sync with the file explorer.
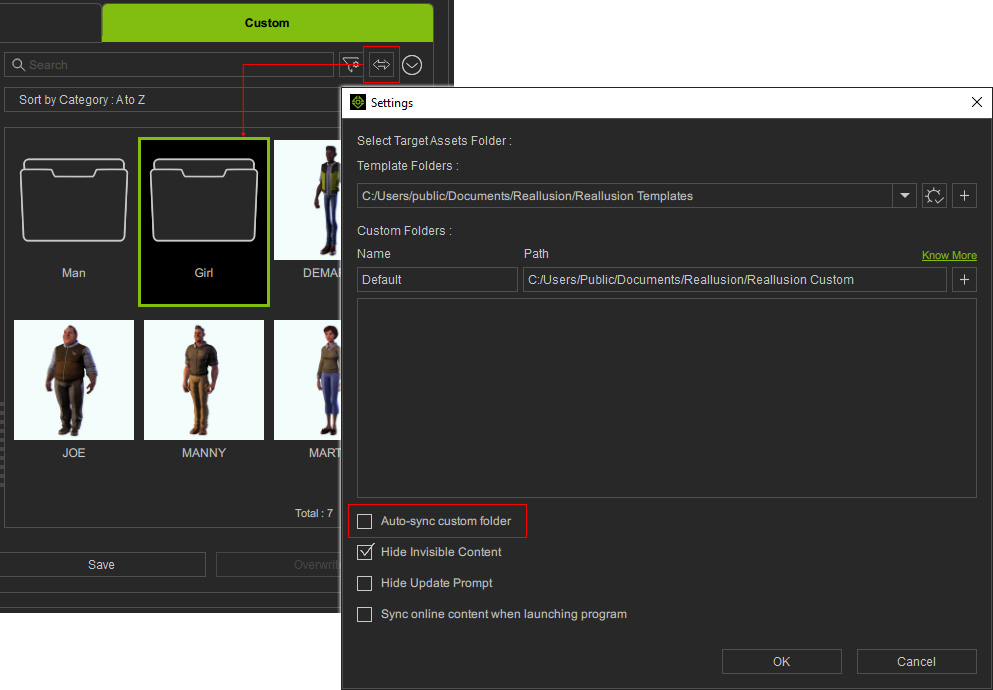
You can relocate contents to any subfolder under the same sub-category via Content Manager or File Explorer.
- Create subfolders in a sub-category with the steps described in the previous section.
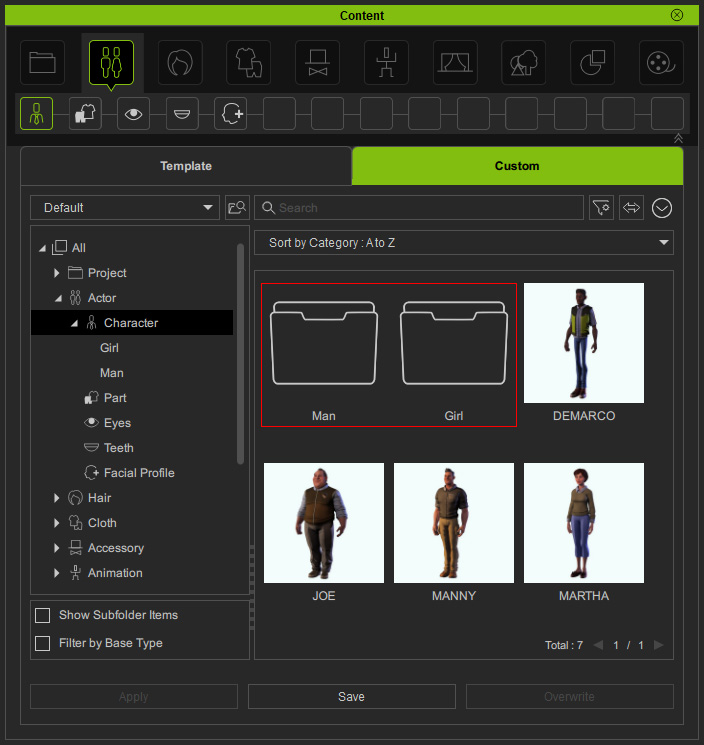
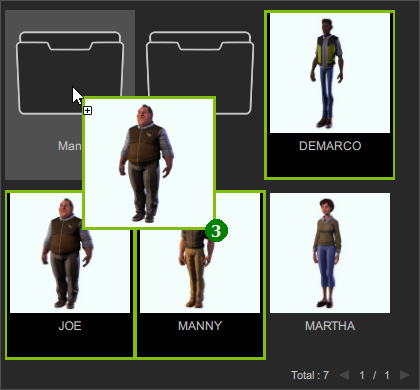
- Move the assets to the subfolder using either of the following methods:
- Drag-and-drop the selected content(s) to the target subfolder.
- Right-click on the custom content(s) and choose the Move to Subfolder command from the context menu.
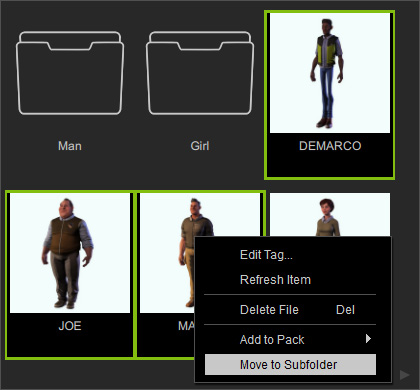
Then pick the subfolder from the list as the target folder in the Move to Subfolder dialog. Click the OK button.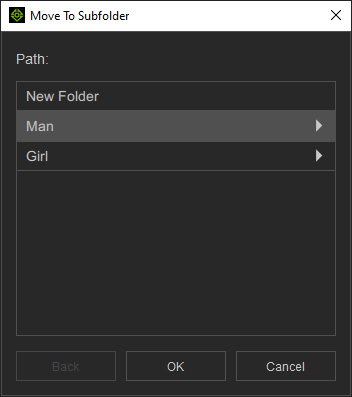
* You can also pick the New Folder to add another subfolder in the list.
- Drag-and-drop the selected content(s) to the target subfolder.
- A message will appear after migration.
Click the Go button.
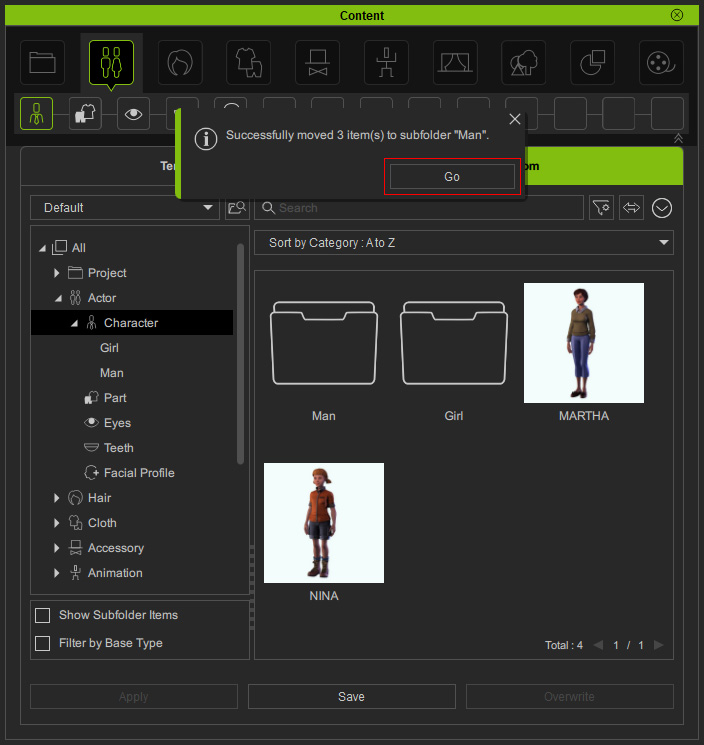
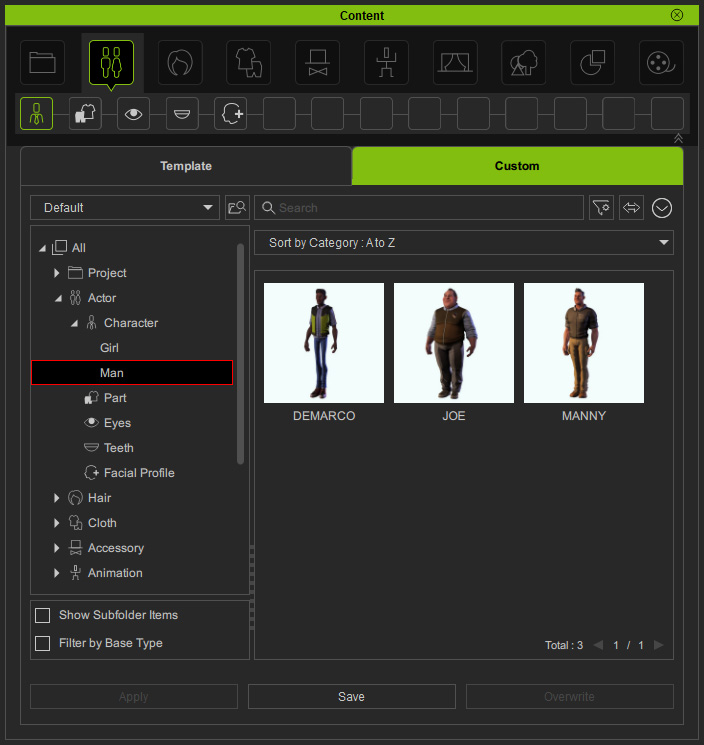
The message will disappear after five seconds. If you did not instantly click the Go button to show the result after the move, then you can double-click on the subfolder to view the changes. - You will find the contents are relocated into this subfolder.
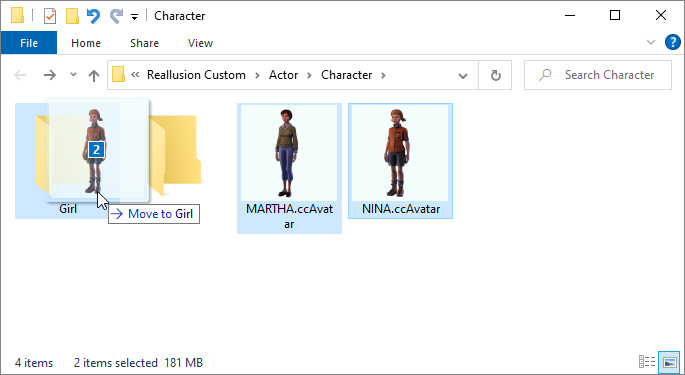
- Right-click on an item to find contents files in the file explorer.
Drag-and-drop or cut-and-paste the rest of the content files to the another subfolder.
 Note:
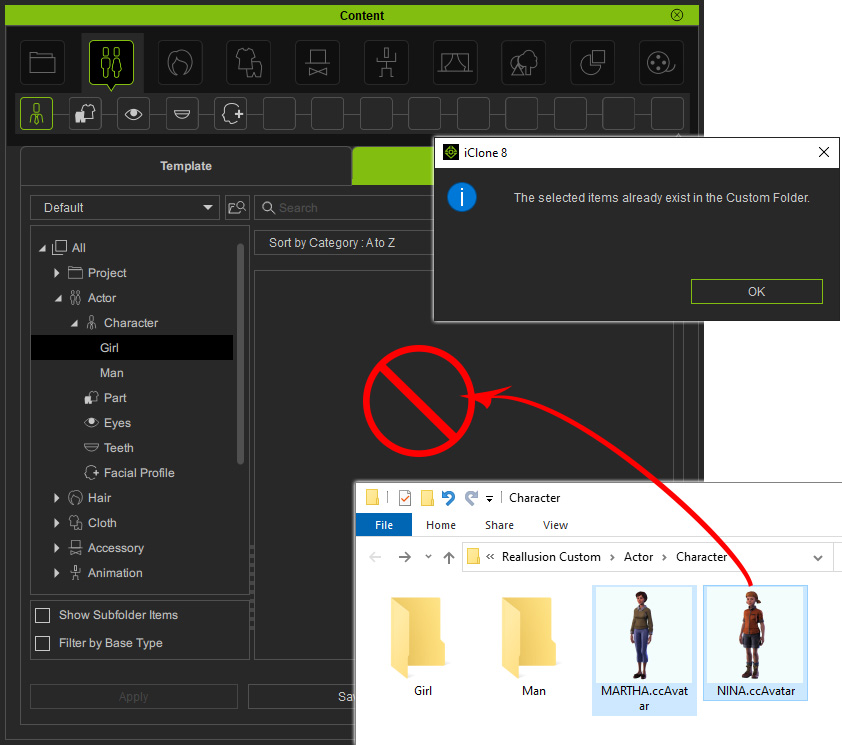
Note:If the content files are already stored in the custom folder, drag-and-dropping the same files to Content Manager will be blocked.
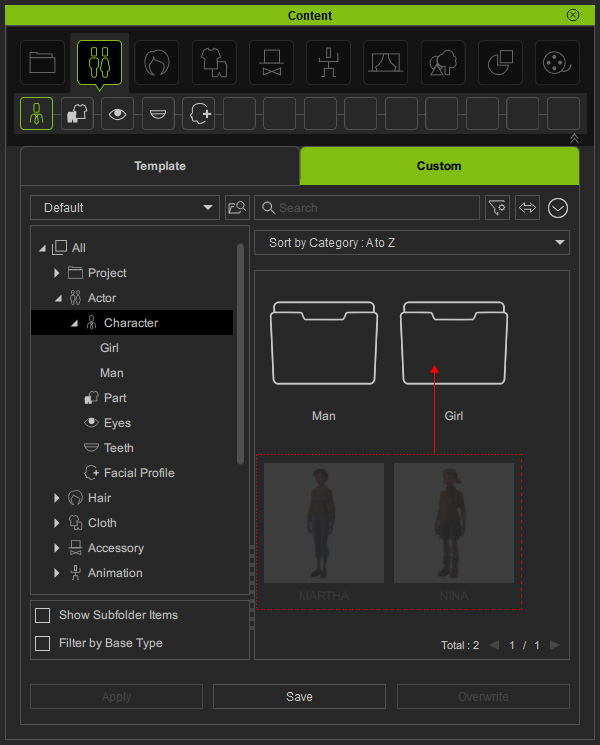
- The contents will be moved to the subfolder instantly in the Content Manager, if the Auto-sync Custom Folder checkbox is enabled by default in the Settings panel.
- If the Auto-sync Custom Folder checkbox is disabled in the Settings panel, you have to click the Refresh Custom button to manually sync with the file explorer.
- Open the subfolder and you will find the assets.
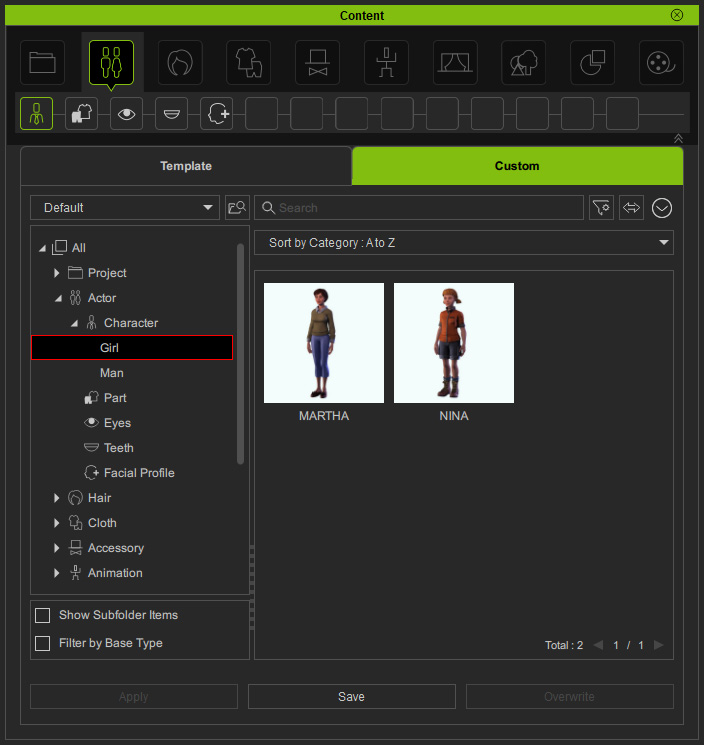
- You can apply the objects as usual.
All of your contents can be moved to any directory on any drive at once.
- Under the Custom tab, switch to the custom drive whose contents you want to move, if you have set multiple drives.
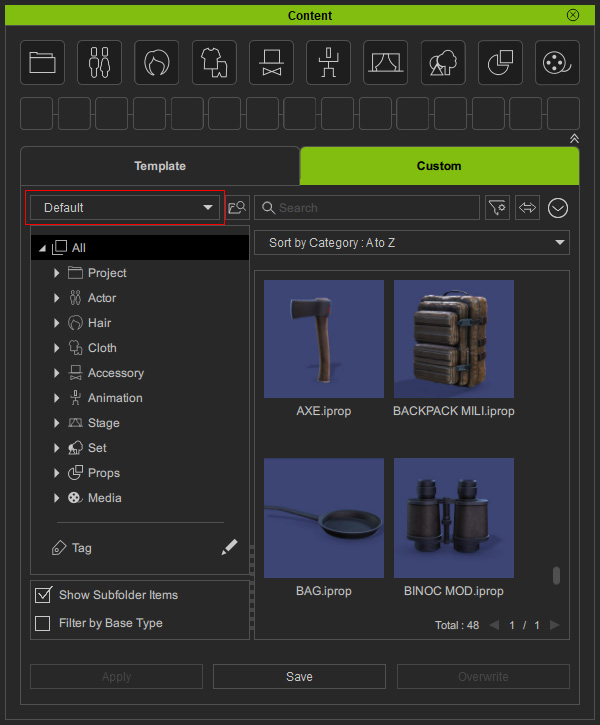
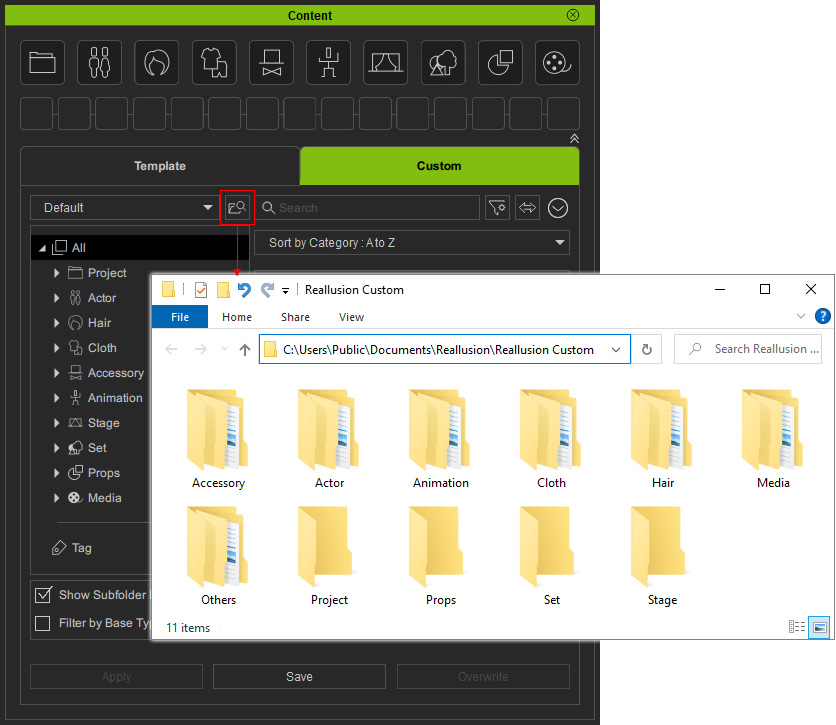
* You can activate the Show Subfolder Items checkbox to show all items in the subfolders. - Click the Show in File Explorer button to browse the current custom folder with your file explorer.
You will see the folder groups for storing custom contents.
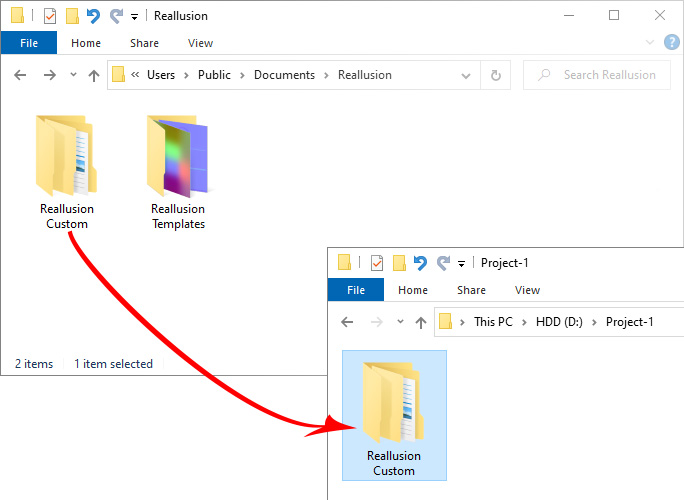
- Locate the Reallusion Custom folder in a higher level directory.
Move, cut or copy this folder to another directory on any drive (in this case, D:/Project-1).
- Back to Content Manager.
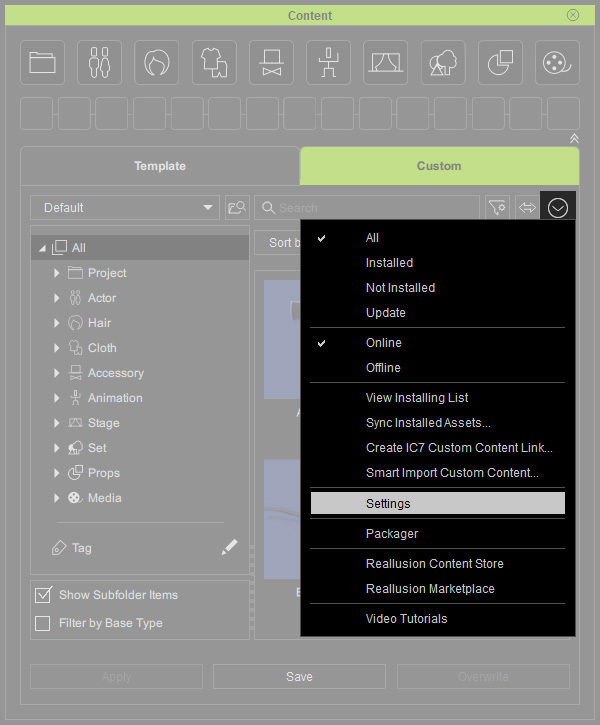
Click the Menu button and execute the Settings command.
- The Settings panel will show with the default custom folder for saving your contents.
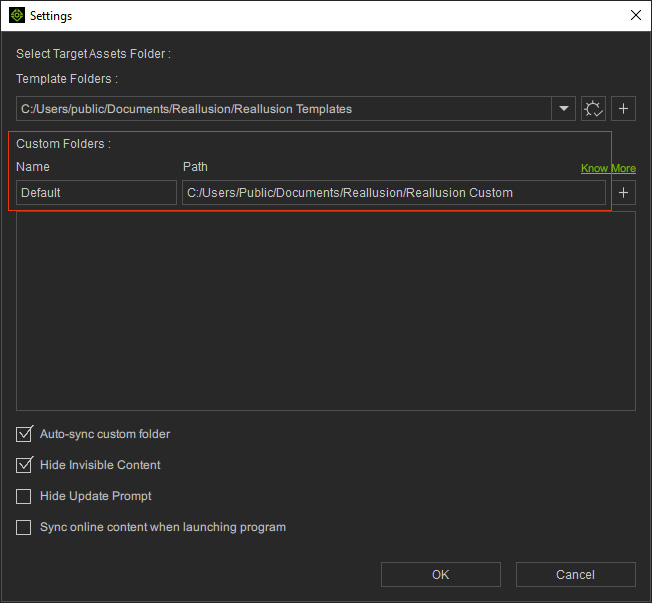
- Click the + button to add a custom folder.
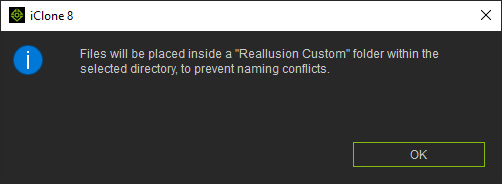
A message will appear saying that a Reallusion Custom folder will be created in your target directory.
Click the OK button.
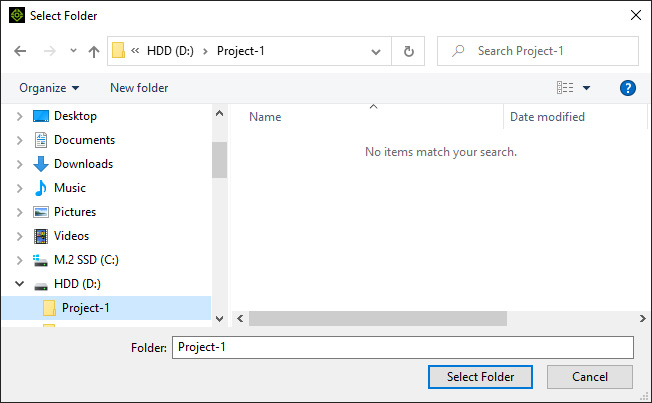
- Browse and pick the destination folder with custom contents in Step 3.
Click the Select Folder button.
- The folder name and folder path will show in the list.
Click the OK button.
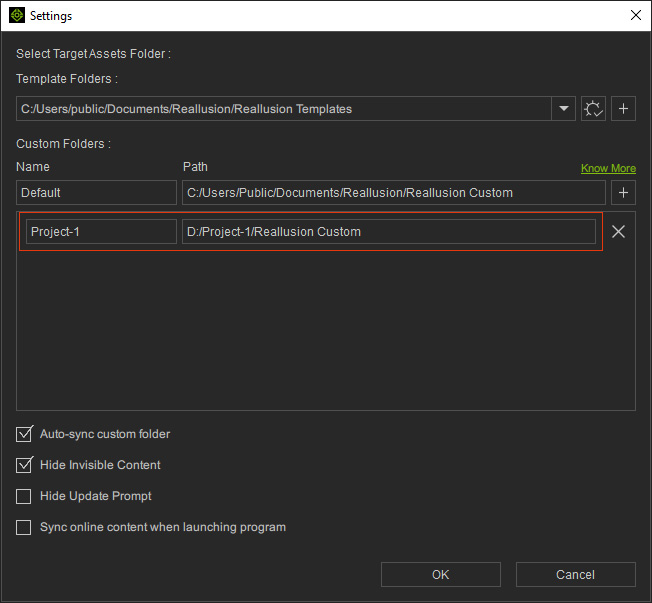
- Switch to the new custom folder, and you will see all the contents are transferred to this custom folder.
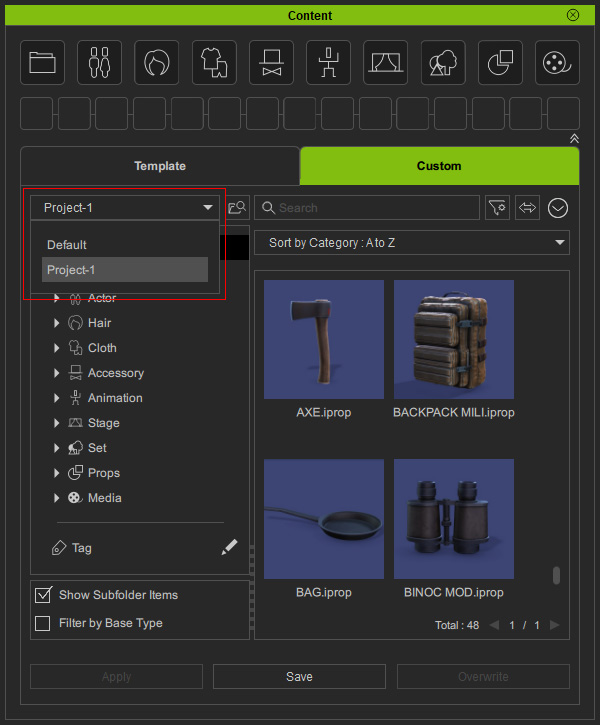
 Moving Content to Existing Custom Folder

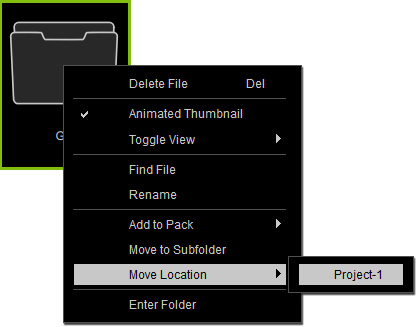
If you have defined any custom folder in the Settings panel (step 8), you can perform the Move Location command from the context menu and choose the target custom folder for moving the assets at any time.
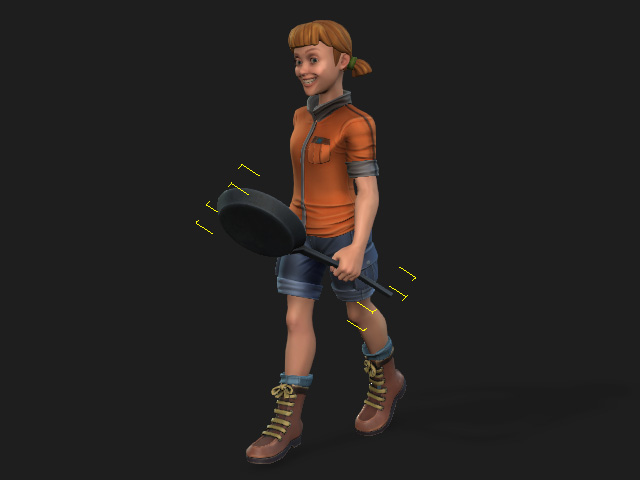
- Now you can keep working on your project.
It is easy to back up custom contents to any directory on any drive using drag-and-drop.
- Open the destination folder with the file explorer.
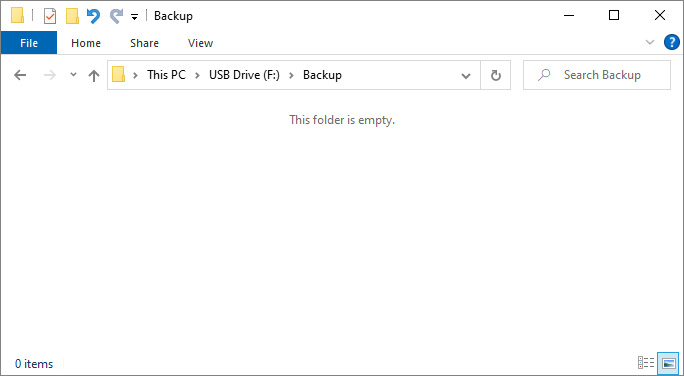
- Select the desired custom contents under the Custom tab.
Drag-and-drop them to the destination folder in the file explorer.
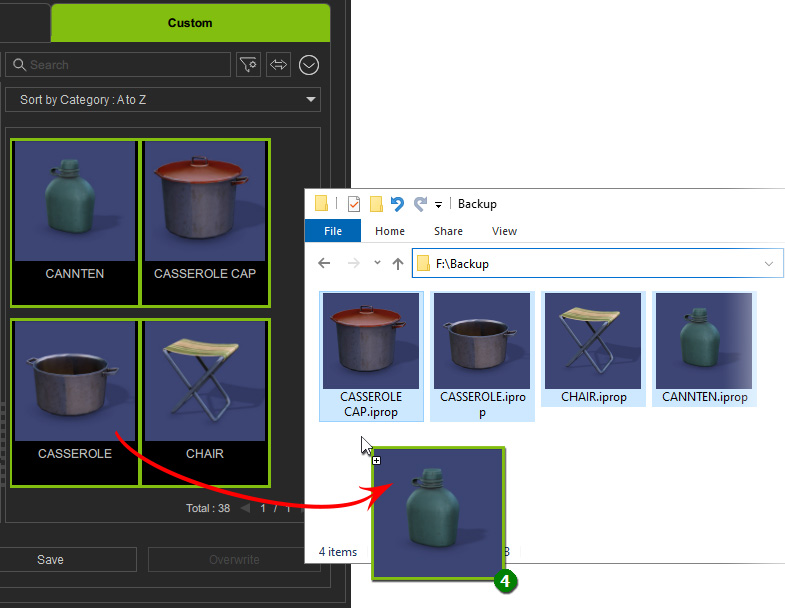
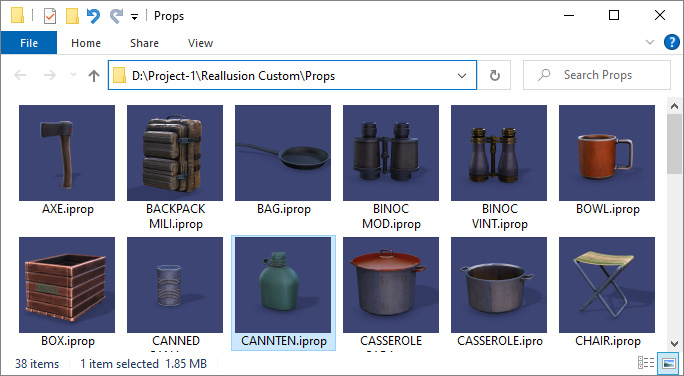
- Note that this operation actually duplicates the selected custom contents to the destination folder.
Right-click on the item to view the actual file and to verify that it is stored in the original custom folder.
- If any custom content is removed or overwritten accidentally, replace it with the backup in the file explorer.
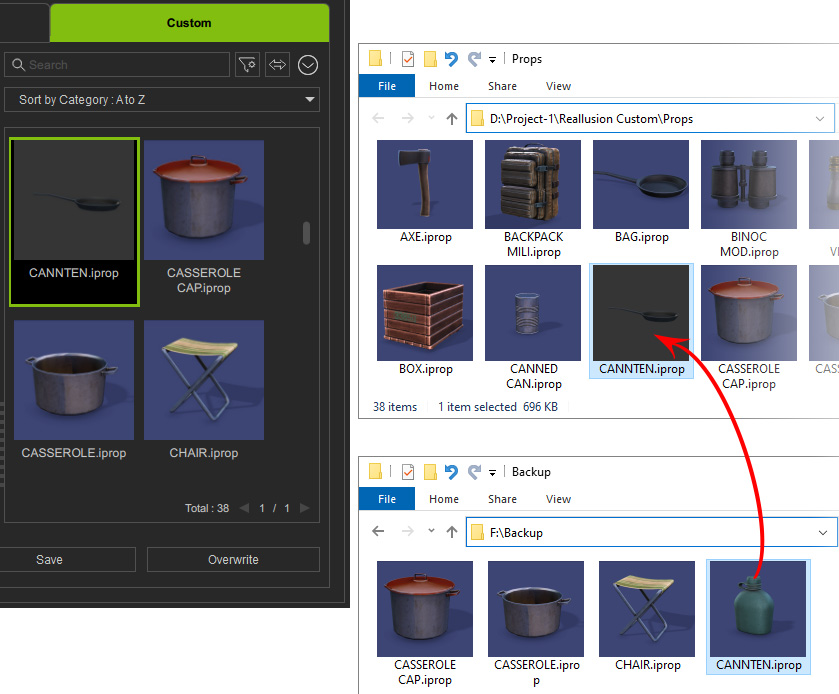
- The custom asset will be restored and you can apply it as usual.
