|
1
|
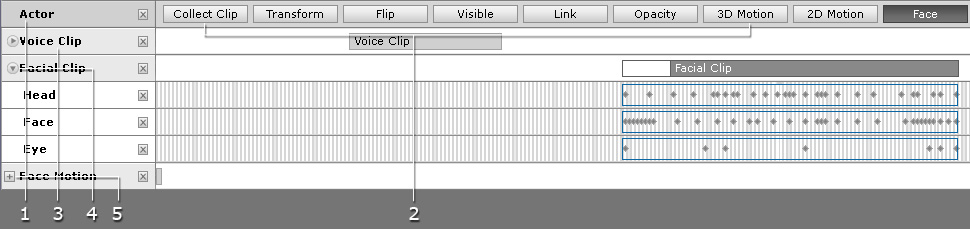
Item Name and Main Track Buttons
|
This track shows an item's name and its master track buttons.
Click on the name to select the item.
|
|
2
|
Track Buttons
|
Click these buttons to show/hide the master tracks of the picked item.
Button Status:
-
 - Show all of its
main tracks. - Show all of its
main tracks.
-
 - Hide all of its
main tracks. - Hide all of its
main tracks.
Track Button that contains multiple
master tracks:
-
Face - Voice Clip, Facial Clip and Face Motion master tracks.
|
|
3
|
Main Track Name and Data
|
This track shows the name and its data.
Click on the name to select the item.
Double click on the name to select all the data in the track.
Click the Cross icon beside the track name to hide the track.
|
|
4
|
Display Sub-Tracks
|
Click this arrow button to show all sub-tracks.
|
|
5
|
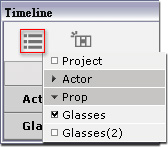
Sub-Tracks Drop-down List
|
Click this drop-down list in order to show/hide
sub-tracks.
|
|
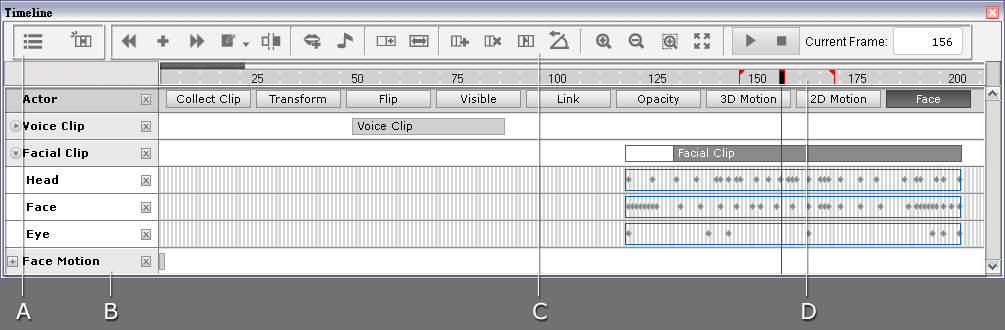
1
|
Next, Previous
(Tab, Shift + Tab)
|
This feature is for the Pipeline and Pro versions only.
Click these two buttons to snap the play head back to the previous, next keys or start-frame clip.
The key or clip will be automatically selected.
|
|
2
|
Add Key
|
This feature is for the Pipeline and Pro versions only.
The Add Key button only works for the Camera,
Transform, Flip, Opacity tracks,
the Head, Face, Eye
and all T and D sub-tracks under the Face and Motion
main tracks.
Double-click on the timeline cell area to add a key, or press this
button.
Keys can also be automatically added when users alter any key
information in the
Modify Panel.
|
|
3
|
Edit Function
|
Click this button to show the clip editing drop-down list.
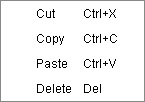
-
Cut: Select the Cut command, or use hotkey
Ctrl + X to cut the target key, or clip, in the clipboard.
(Pipeline and Pro only)
-
Copy and Paste: Select the Copy and Paste commands, or use hotkey
Ctrl + C on selected keys or clips to copy, and
Ctrl + V to paste to the target frame (single or multiple keys)
(Pipeline and Pro only)
-
Delete: Select the Delete command or press Delete button
to delete highlighted keys or clips.
|
|
4
|
Break
|
This feature is for the Pipeline and Pro versions only.
Break works for Clip type data in all tracks/groups.
Click the Break button, or use hotkey
Ctrl + B to split the selected clip at a current frame into two new clips.
|
|
5
|
Audio Editing Tools
|
Click the Lips Editor button to show a panel to add or modify lip-synched keys on the Lips track.
Click the Sound Modify
button to show a panel to modify the clips under the Sound Fx and Music items.
|
|
6
|
Loop and Speed
|
This feature is for the Pipeline and Pro versions only.
The Loop and Speed buttons work to Clip data in all tracks/groups
except for clips in the Sound Fx and Music items.
Press the Loop button DOWN and drag the clip's right edge rightward to repeat the clip.
Press the Speed button DOWN and drag the clip's right edge rightward/leftward to
decelerate/accelerate the speed.
|
|
7
|
Project Editing Tools
|
This feature is for the Pipeline and Pro versions only.
Click the Insert Frame
button to insert a designated number of frames into the current time frame in order to increase the length of the project.
You may also use this feature to insert frames for individual object without
affecting the length of the project.
Click the Delete Frame
button to delete a series of selected frames in order to decrease the length of the project.
You may also use this feature to delete frames for individual objects without affecting the length of the project.
Click the Add Flag
button to add flag marks to the Project track.
This allows you to easily hop between events.
|
|
8
|
3D Motion Angle Align
|
Click this button to align the selected motion clip data to the previous clip.
|
|
9
|
Zoom in/out
Actual Size
Fit to Window
|
Click the Zoom In button, or use hotkey Ctrl + + to increase the time (cell) unit size.
Click the Zoom Out button, or use hotkey Ctrl + - to decrease the time (cell) unit size.
Click the Actual Size button, or use hotkey Ctrl + / to show the time unit represented as
30 frames
per second.
Click the Fit to Window button to view all the timeline items within the timeline window space.
|
|
10
|
Play and Stop
|
Click the Play/Pause button, or press the space bar to play the project, click again to pause.
Click the Stop button, or press the space bar to stop playing.
|
|
11
|
Current Frame
|
This field shows the current frame number
on the timeline. You may also type-in the frame number to jump to the target frame.
This allows you to go to your precise target location;
this is especially convenient for animation with clear timing control.
|
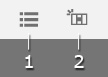
 button on the play bar to open the Timeline Editor.